Set Up Genta to Do Real Work on Your Own Computer
Published:
Getting started with Genta: connect your Windows PC or VM, install and register the agent, then automate a SharePoint task from chat with screenshots.
Install the Genta Agent on a Windows machine, connect it to your workspace with a registration key, then hand Genta a task from chat and watch it do the work. In this walkthrough, Genta adds a new member to a SharePoint site's Visitors group.
Genta can run work on its own cloud computers, but often you'll want it to work on your machine: a VM or PC that already has your apps, browser sign-ins and network access. Genta calls this Bring Your Own Computer (BYOC). A small Windows service, the Genta Agent, runs on that machine and connects it to your workspace.
A Genta workspace — Signed in at work.genta.ai.
A Windows computer — Windows 10/11 PC or VM where you can install software (admin rights).
About 10 minutes — Download, install, register, done.
In this article
Open the Computers page
Sign in to Genta. The home screen is where you'll delegate work later. The Get started panel on the right tracks setup steps such as Connect my PC.
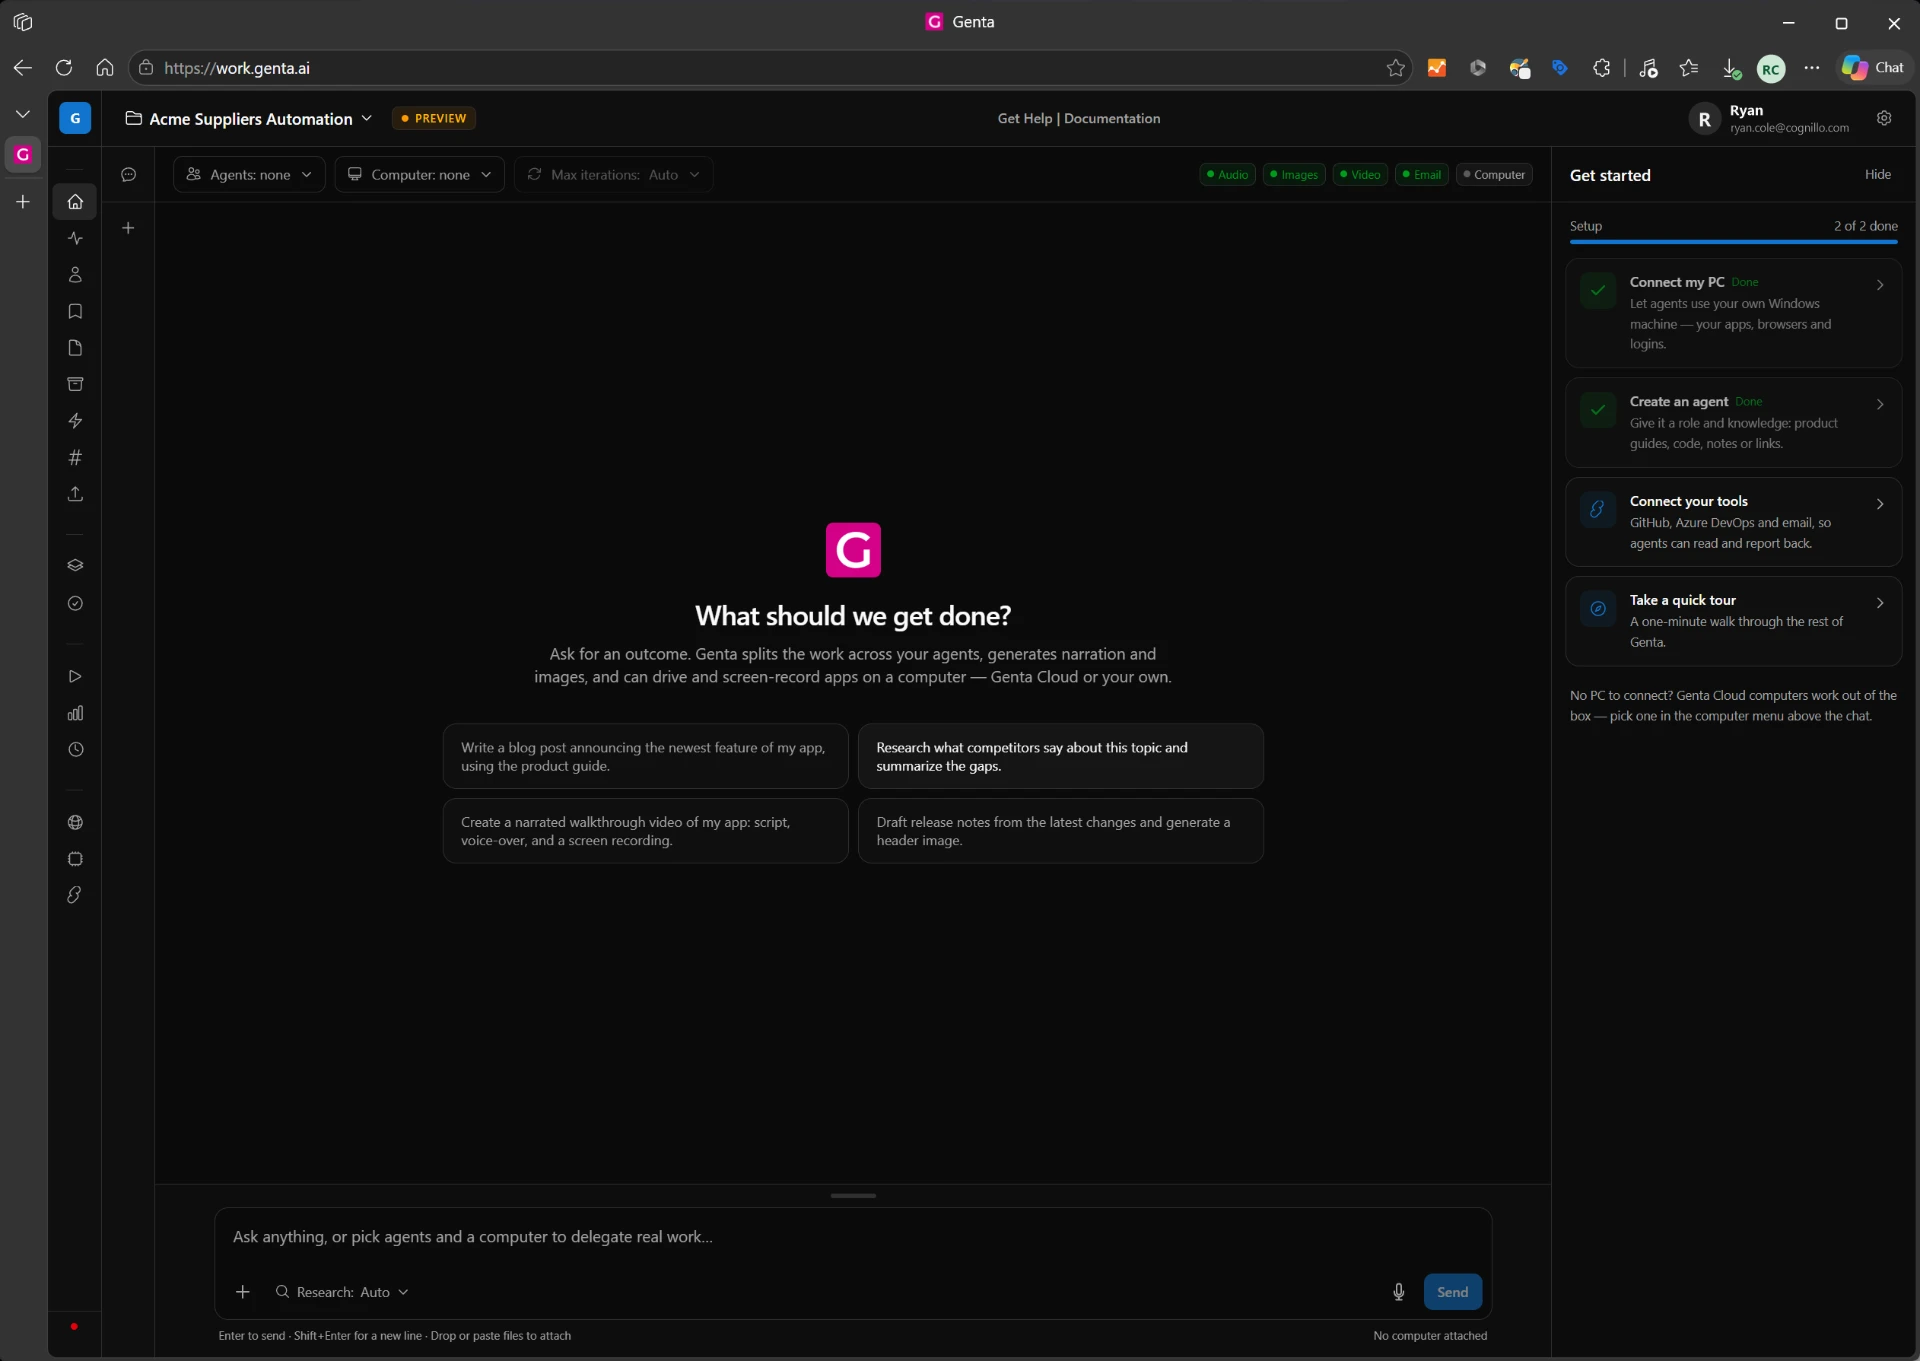
The Genta home screen.
In the left sidebar, choose Computers (under Environments).
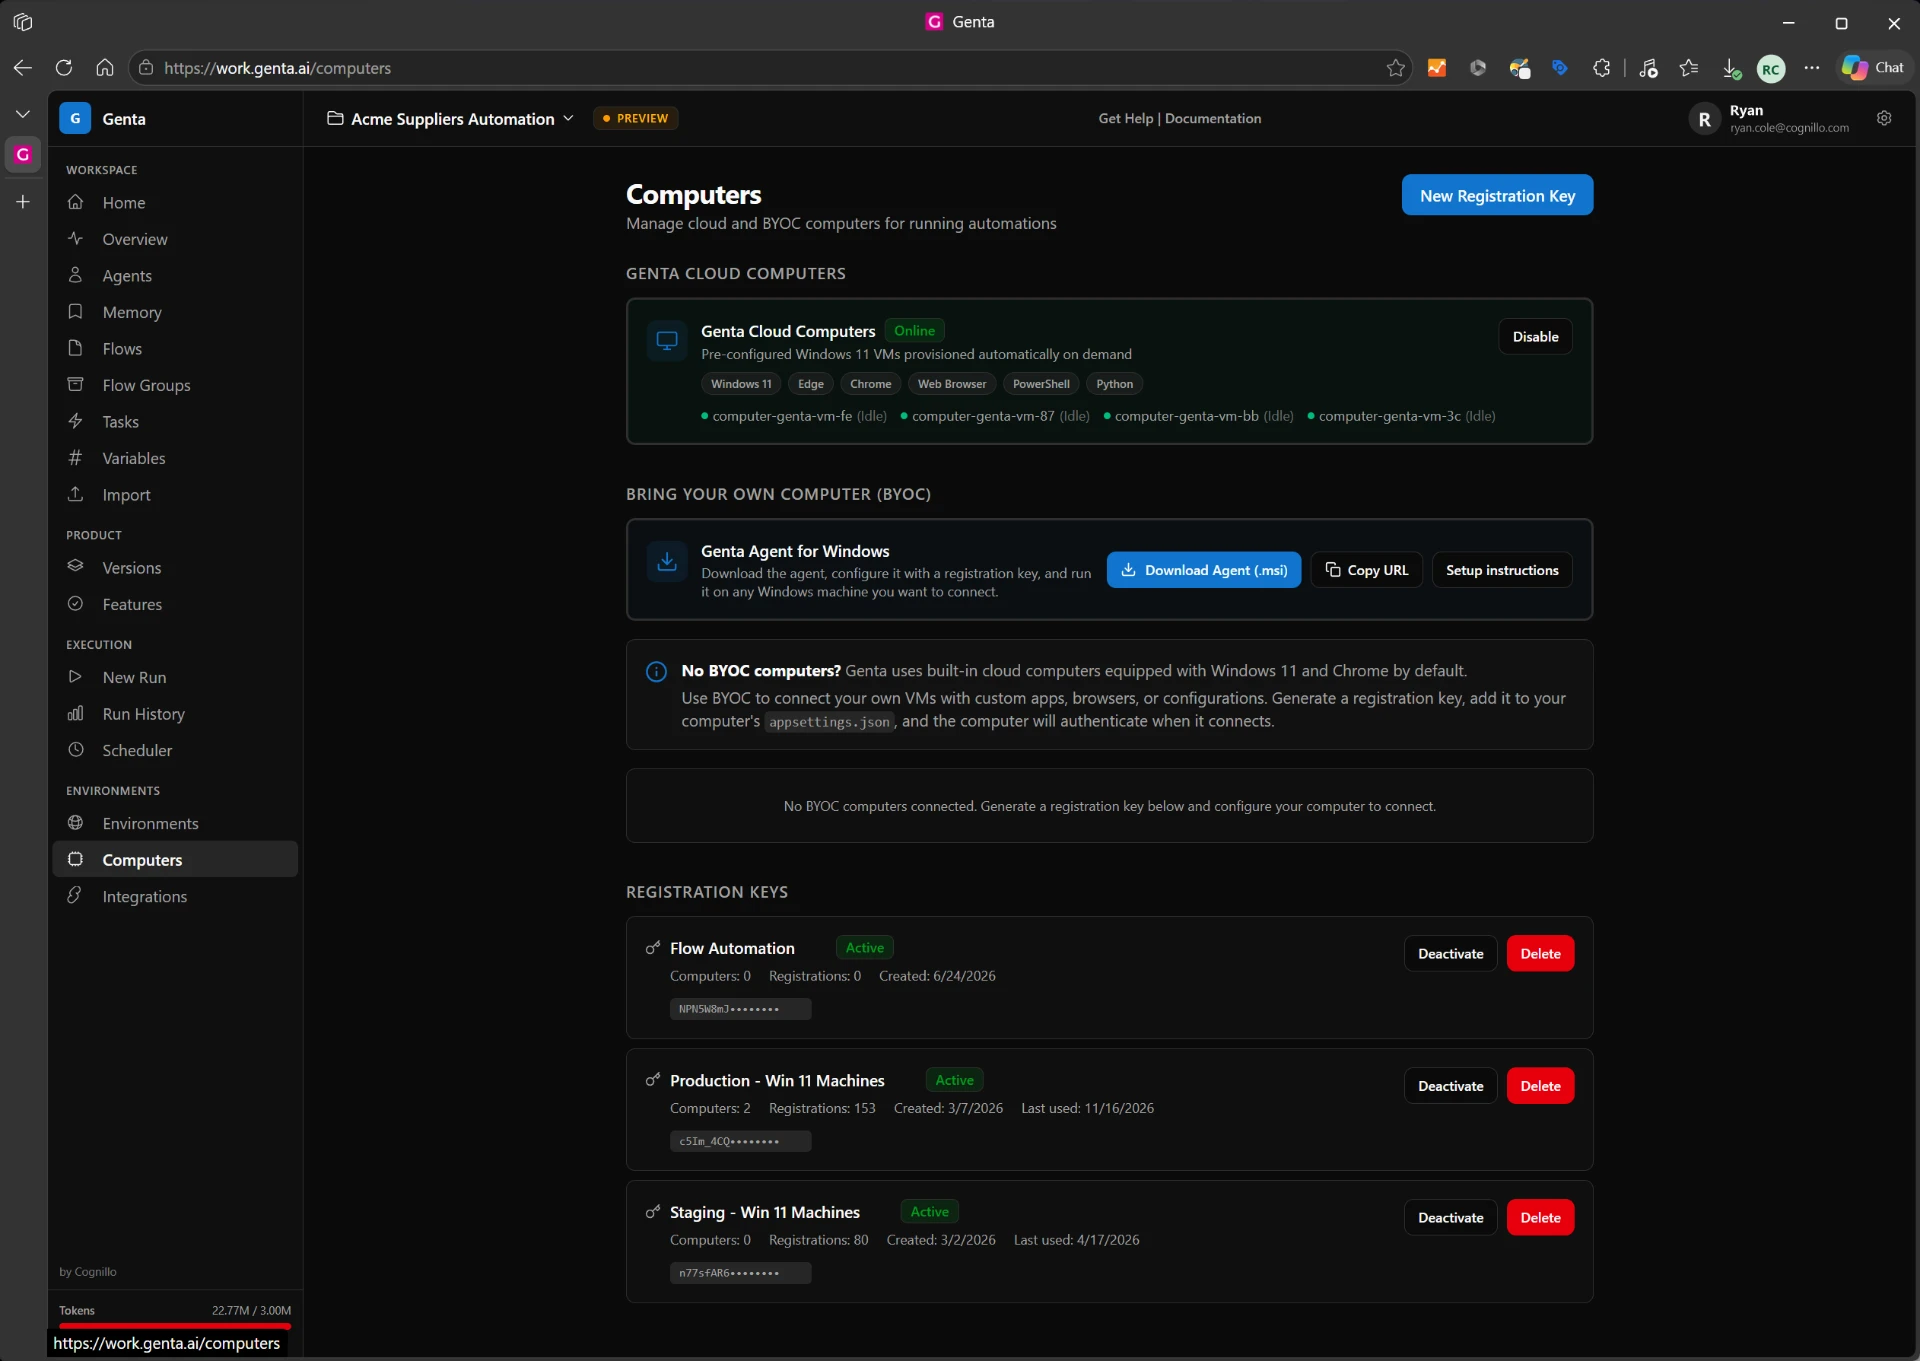
Sidebar → Environments → Computers.
The Computers page has three sections. Genta Cloud Computers are ready-made Windows 11 VMs. Bring Your Own Computer (BYOC) is where you get the agent. Registration Keys control which machines can join your workspace.
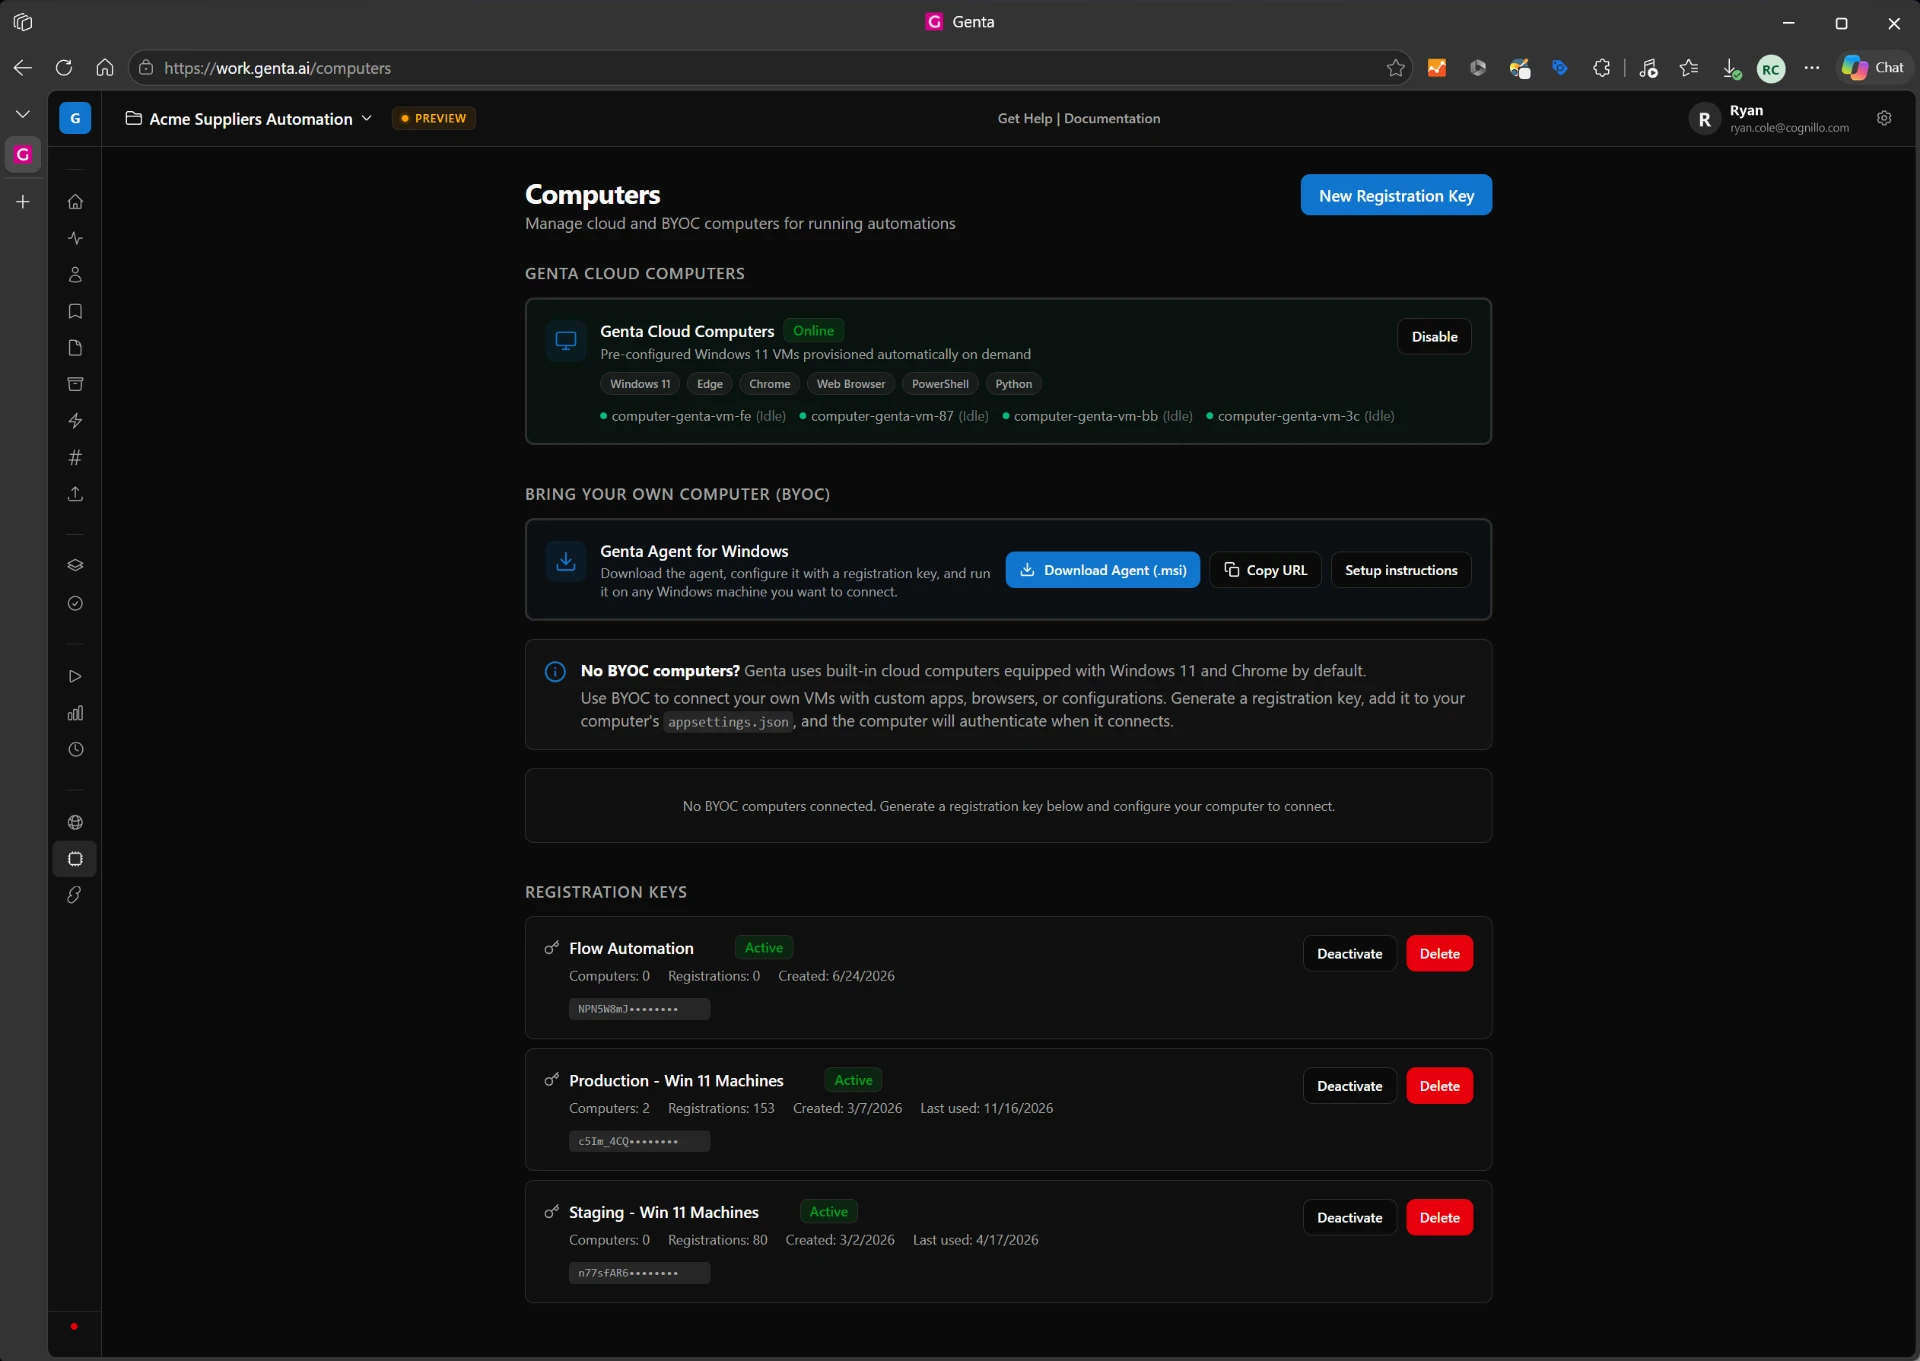
No BYOC computers are connected yet.
Copy the agent installer URL
The Genta Agent for Windows card has a Download Agent (.msi) button. If you're working on the same machine you want to connect, click that button. To install on a different machine, such as a VM you reach over Remote Desktop, click Copy URL instead. Genta copies the installer link and shows Agent installer URL copied.
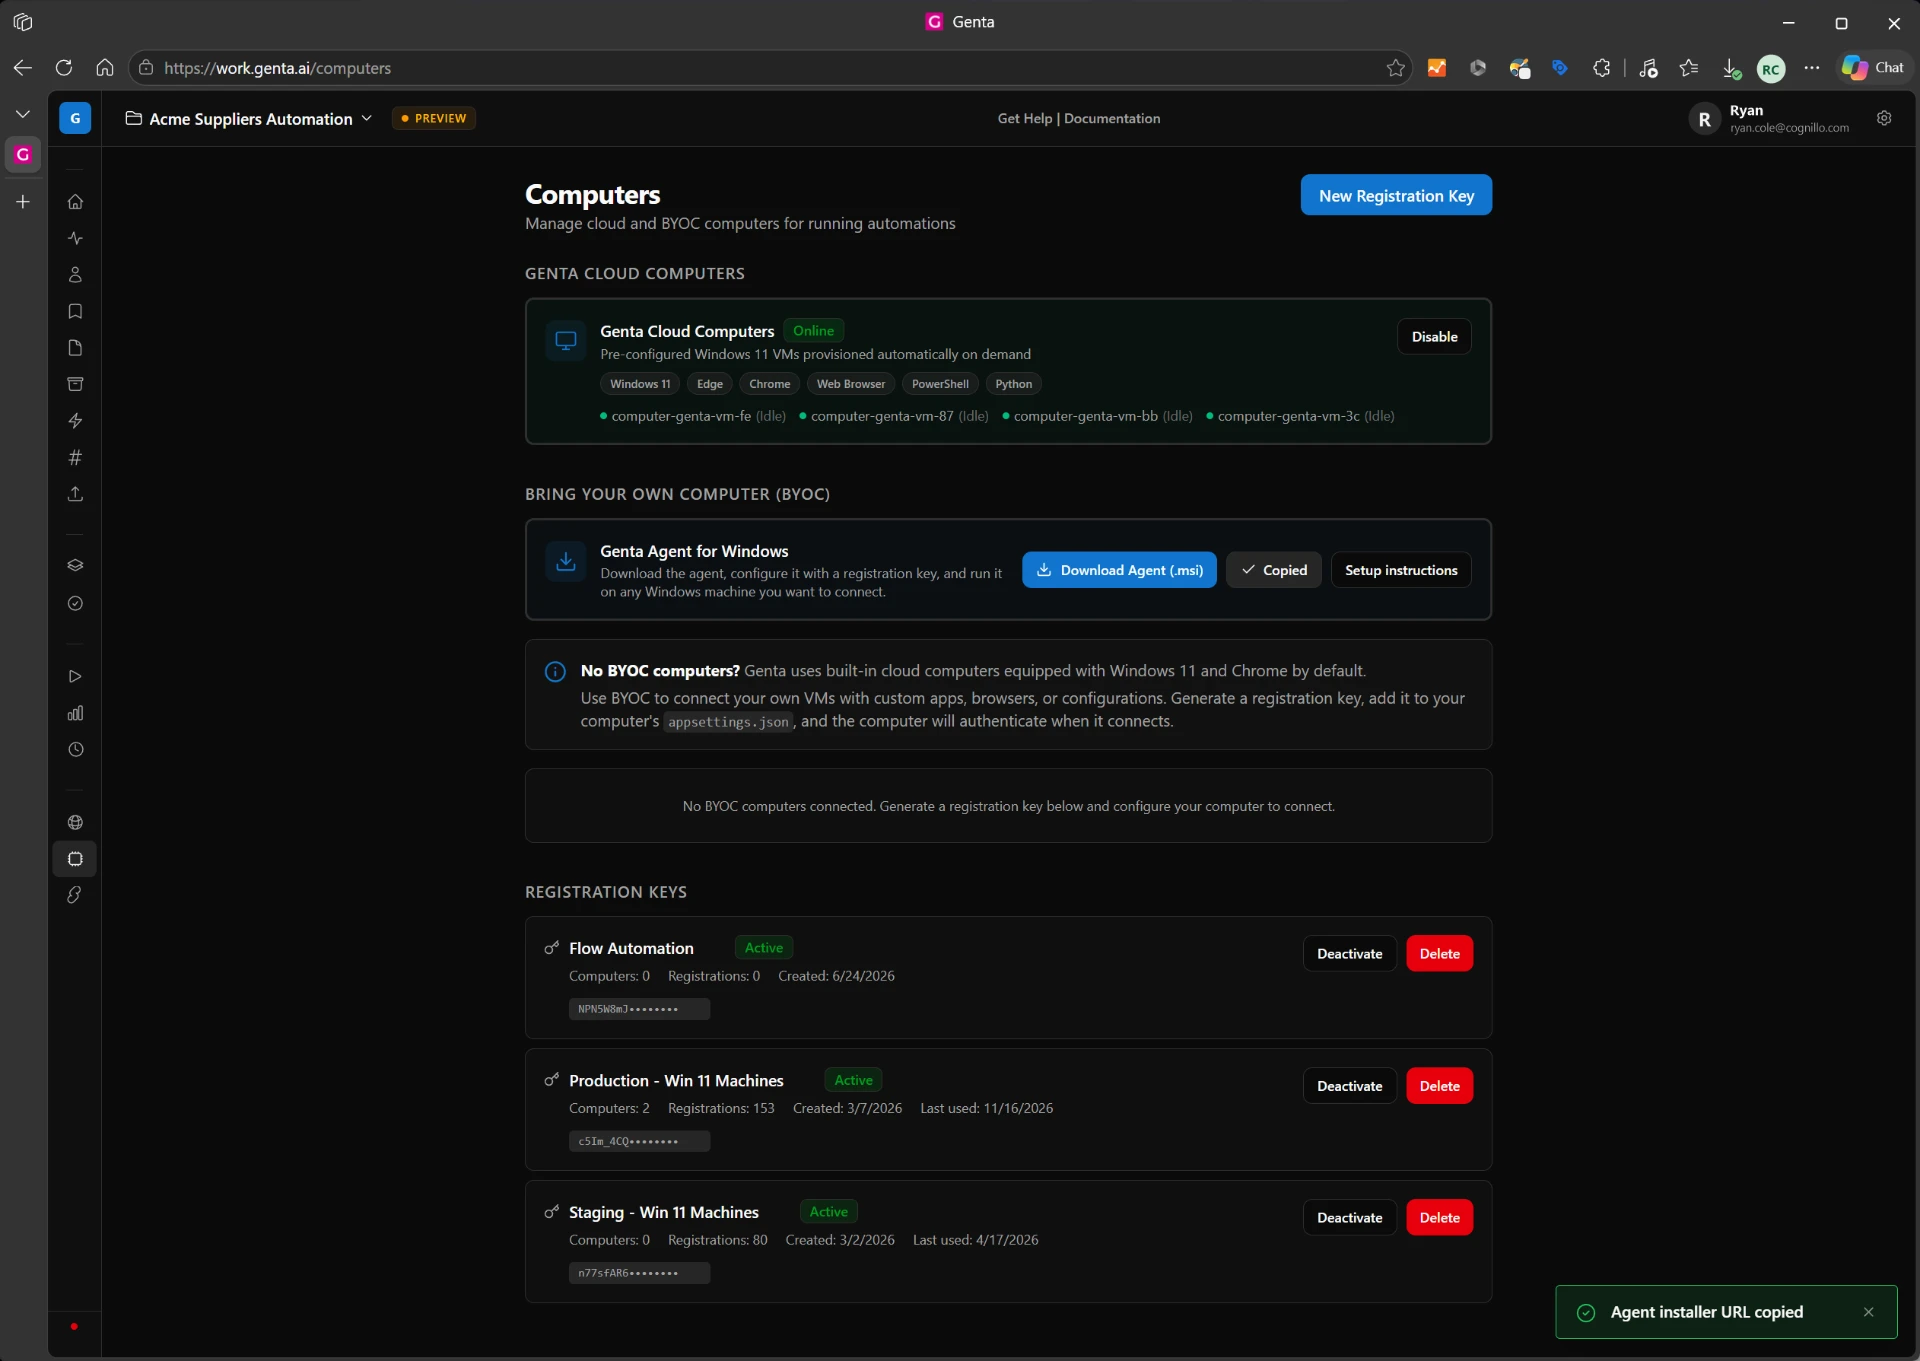
Copy URL puts the installer link on your clipboard.
Installer linkhttps://cdn.genta.ai/agent/GentaVmAgent.msi
Want the whole process at a glance? Setup instructions opens a five-step guide covering the same steps as this article.
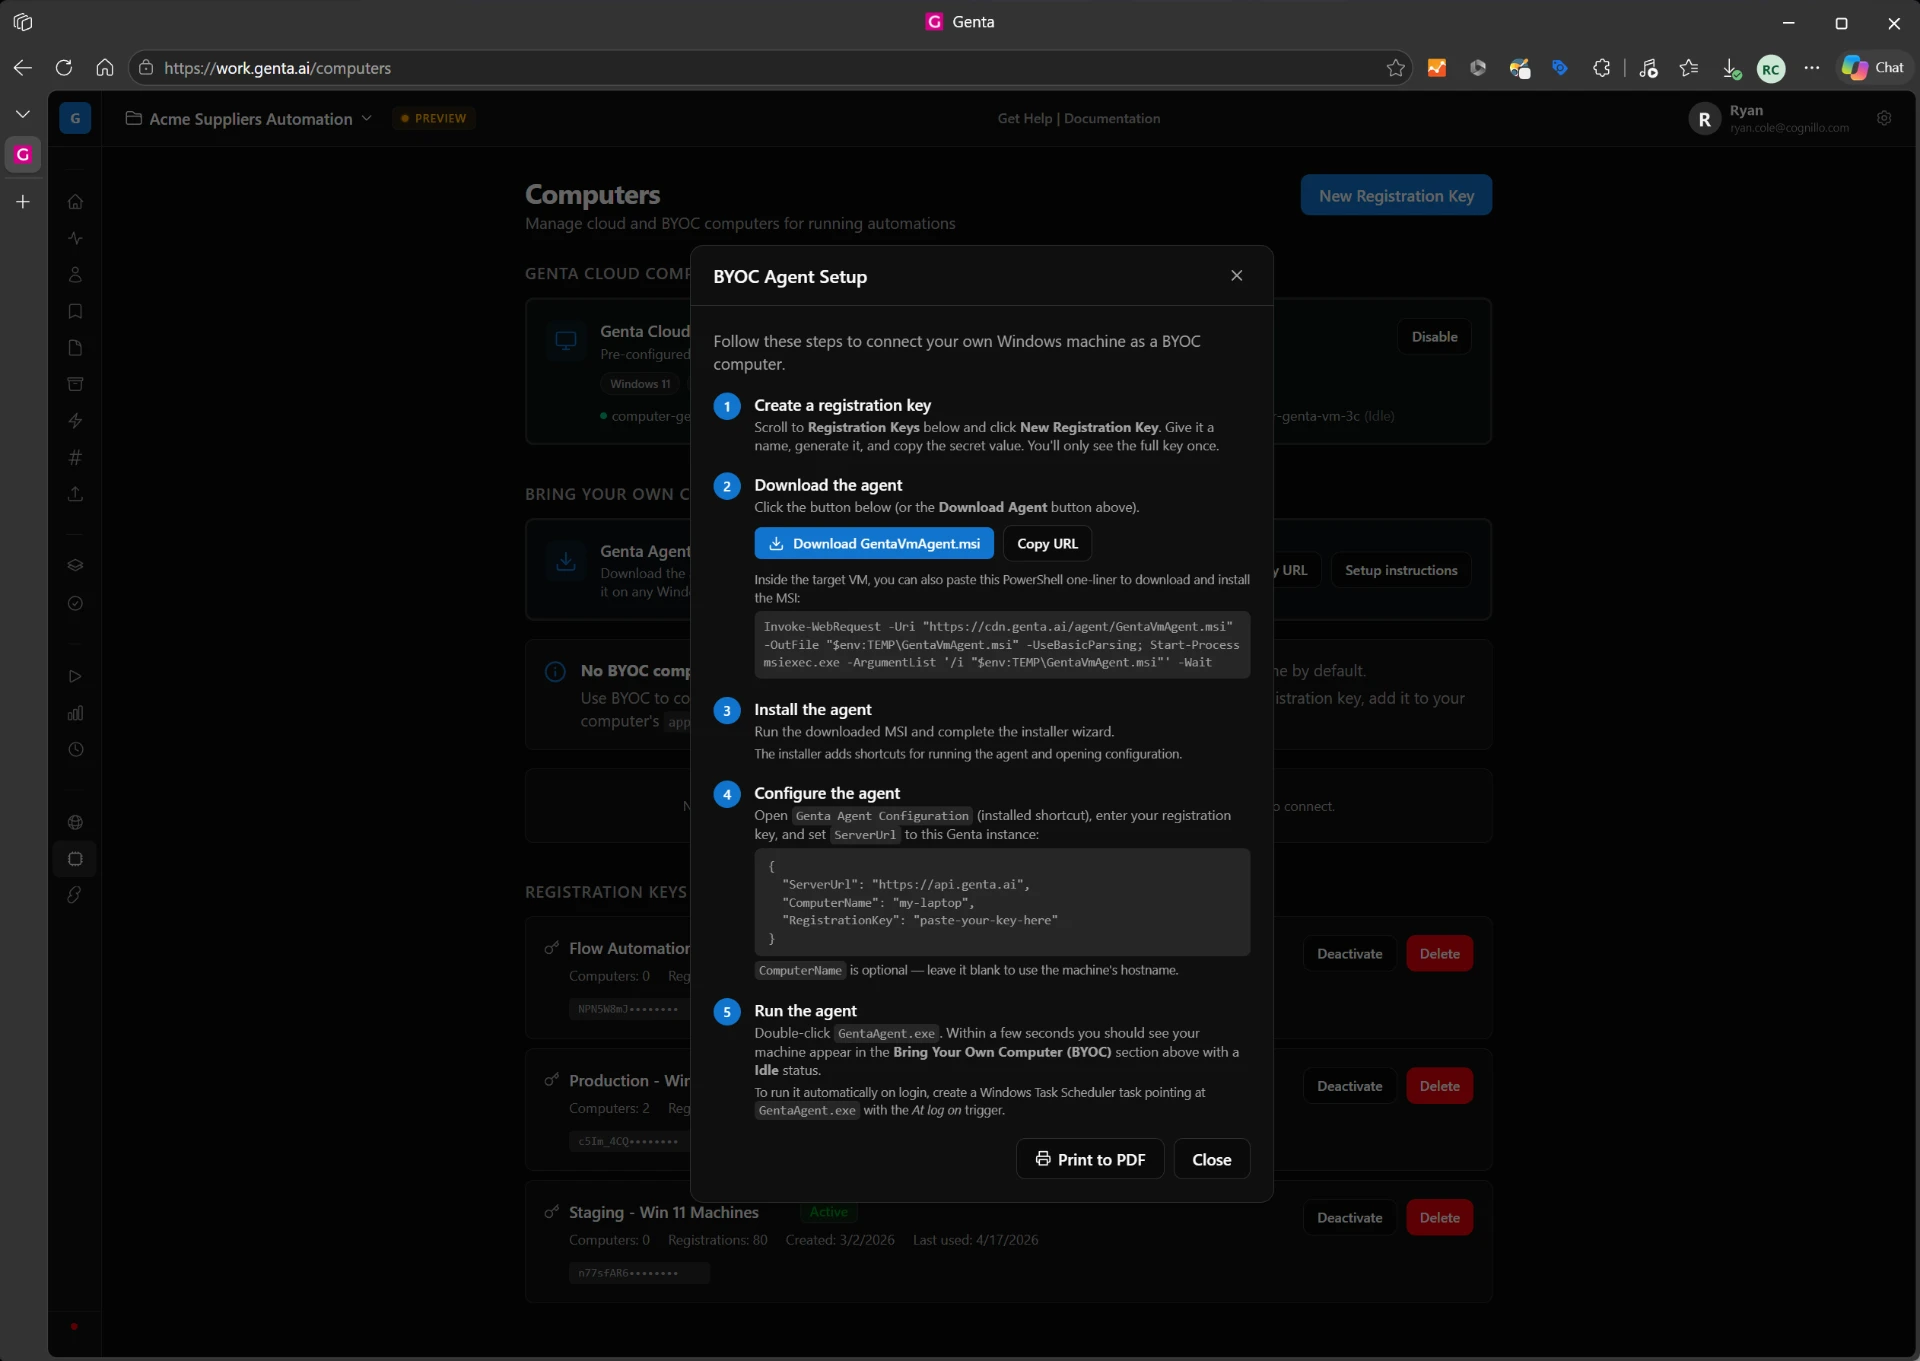
The built-in BYOC Agent Setup guide.
Download and install on the computer
On the computer you're connecting (here, a Windows 11 VM open in Remote Desktop), open a browser, paste the URL into the address bar and press Enter.

Pasting the installer URL on the target computer.
When the download finishes, select Open file under GentaVmAgent.msi.
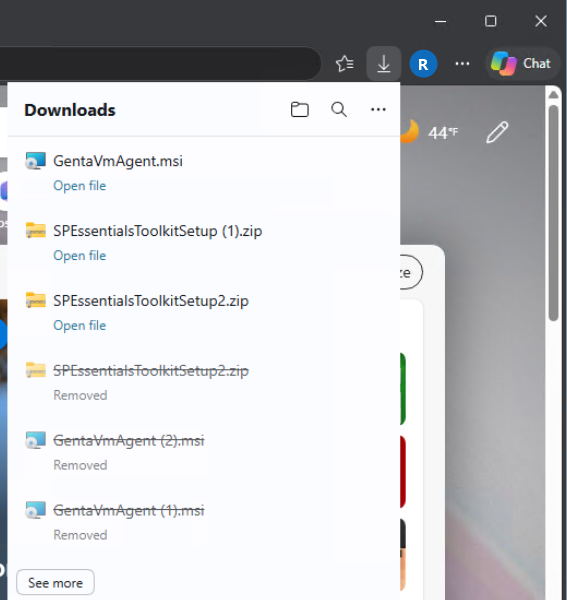
The downloaded installer.
The installer shows the publisher (Tendero Inc dba Cognillo) and version. Click Install, then Yes on the Windows User Account Control prompt.
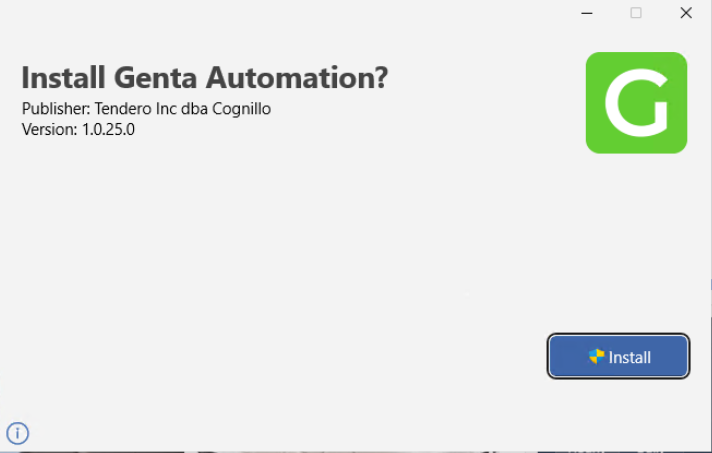
Click Install.
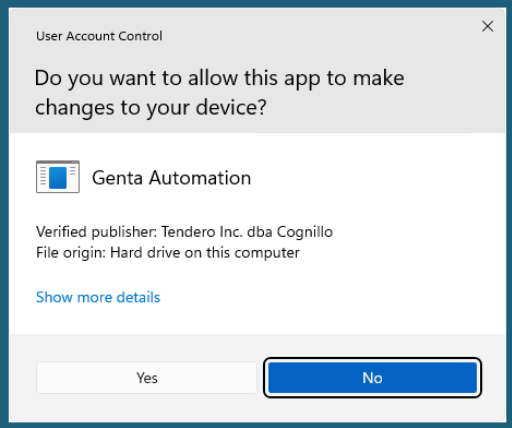
Approve the UAC prompt.
After a few seconds you'll see Genta Automation has been installed. Click Finish.
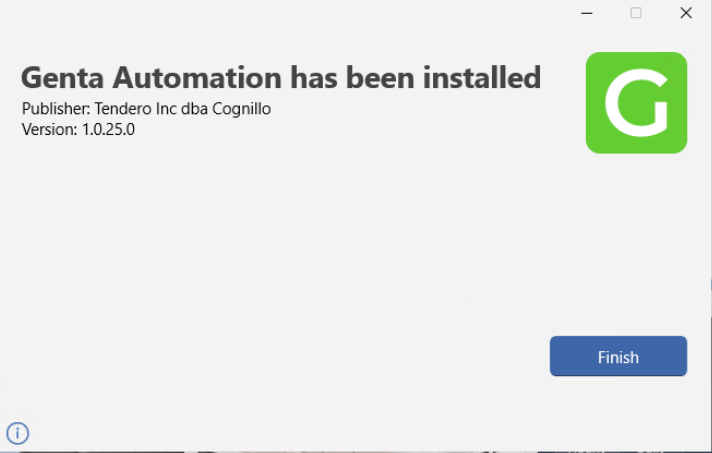
Installation complete.
Create a registration key
The agent needs a registration key to prove it belongs to your workspace. Back in Genta, on the Computers page, click New Registration Key. Give it a name and an optional description. You can also cap how many computers may use it with Max Computers. Then click Generate Key.
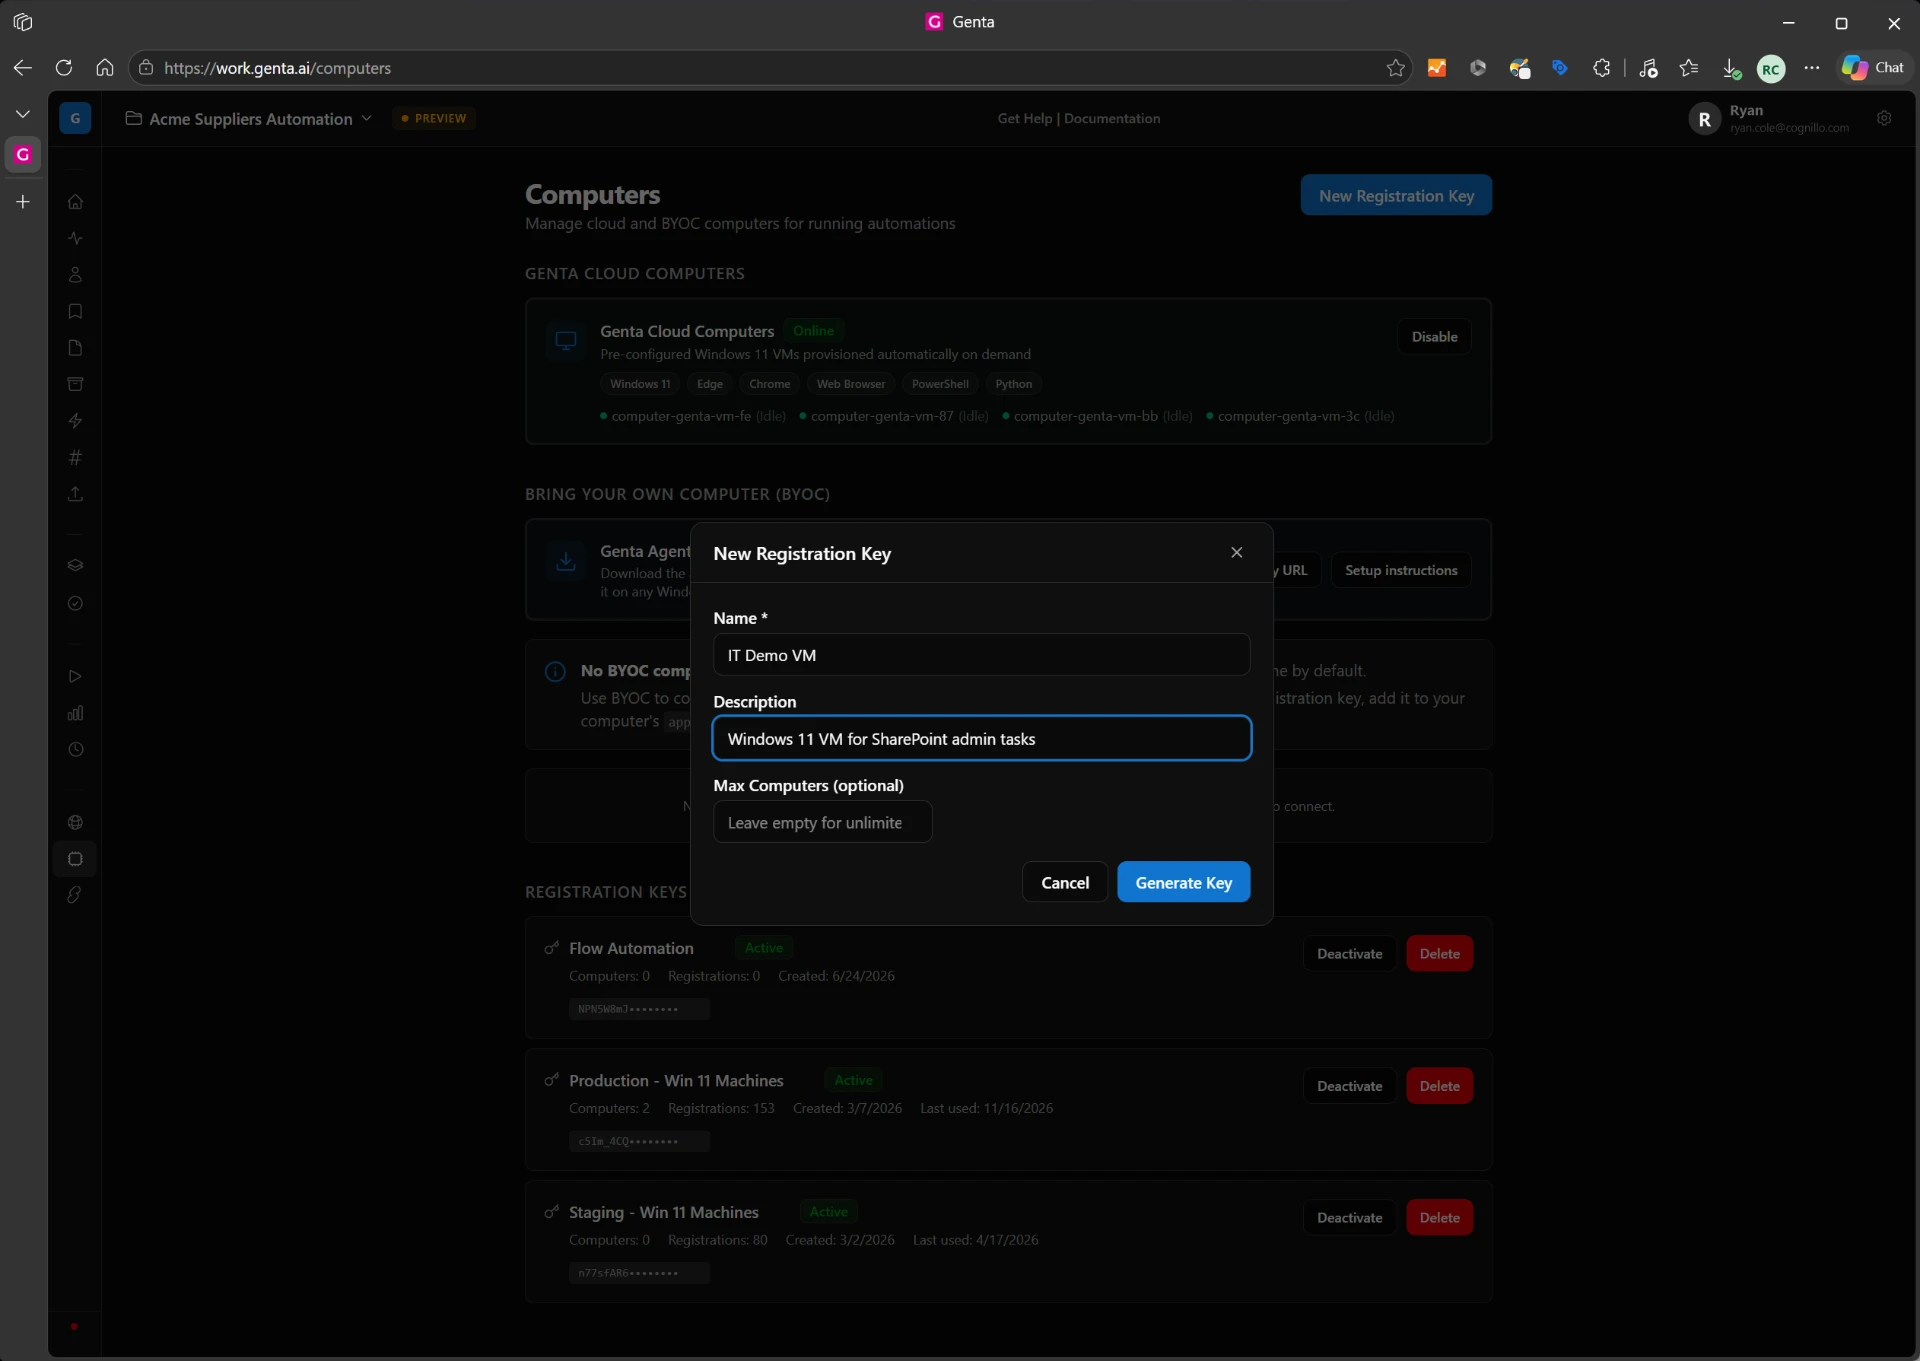
One key per machine or group of machines keeps access easy to manage.
Genta shows the new key with a Copy button and a ready-made "RegistrationKey" line for appsettings.json. Copy the key now. Users with access to this registration page can still copy registration keys.
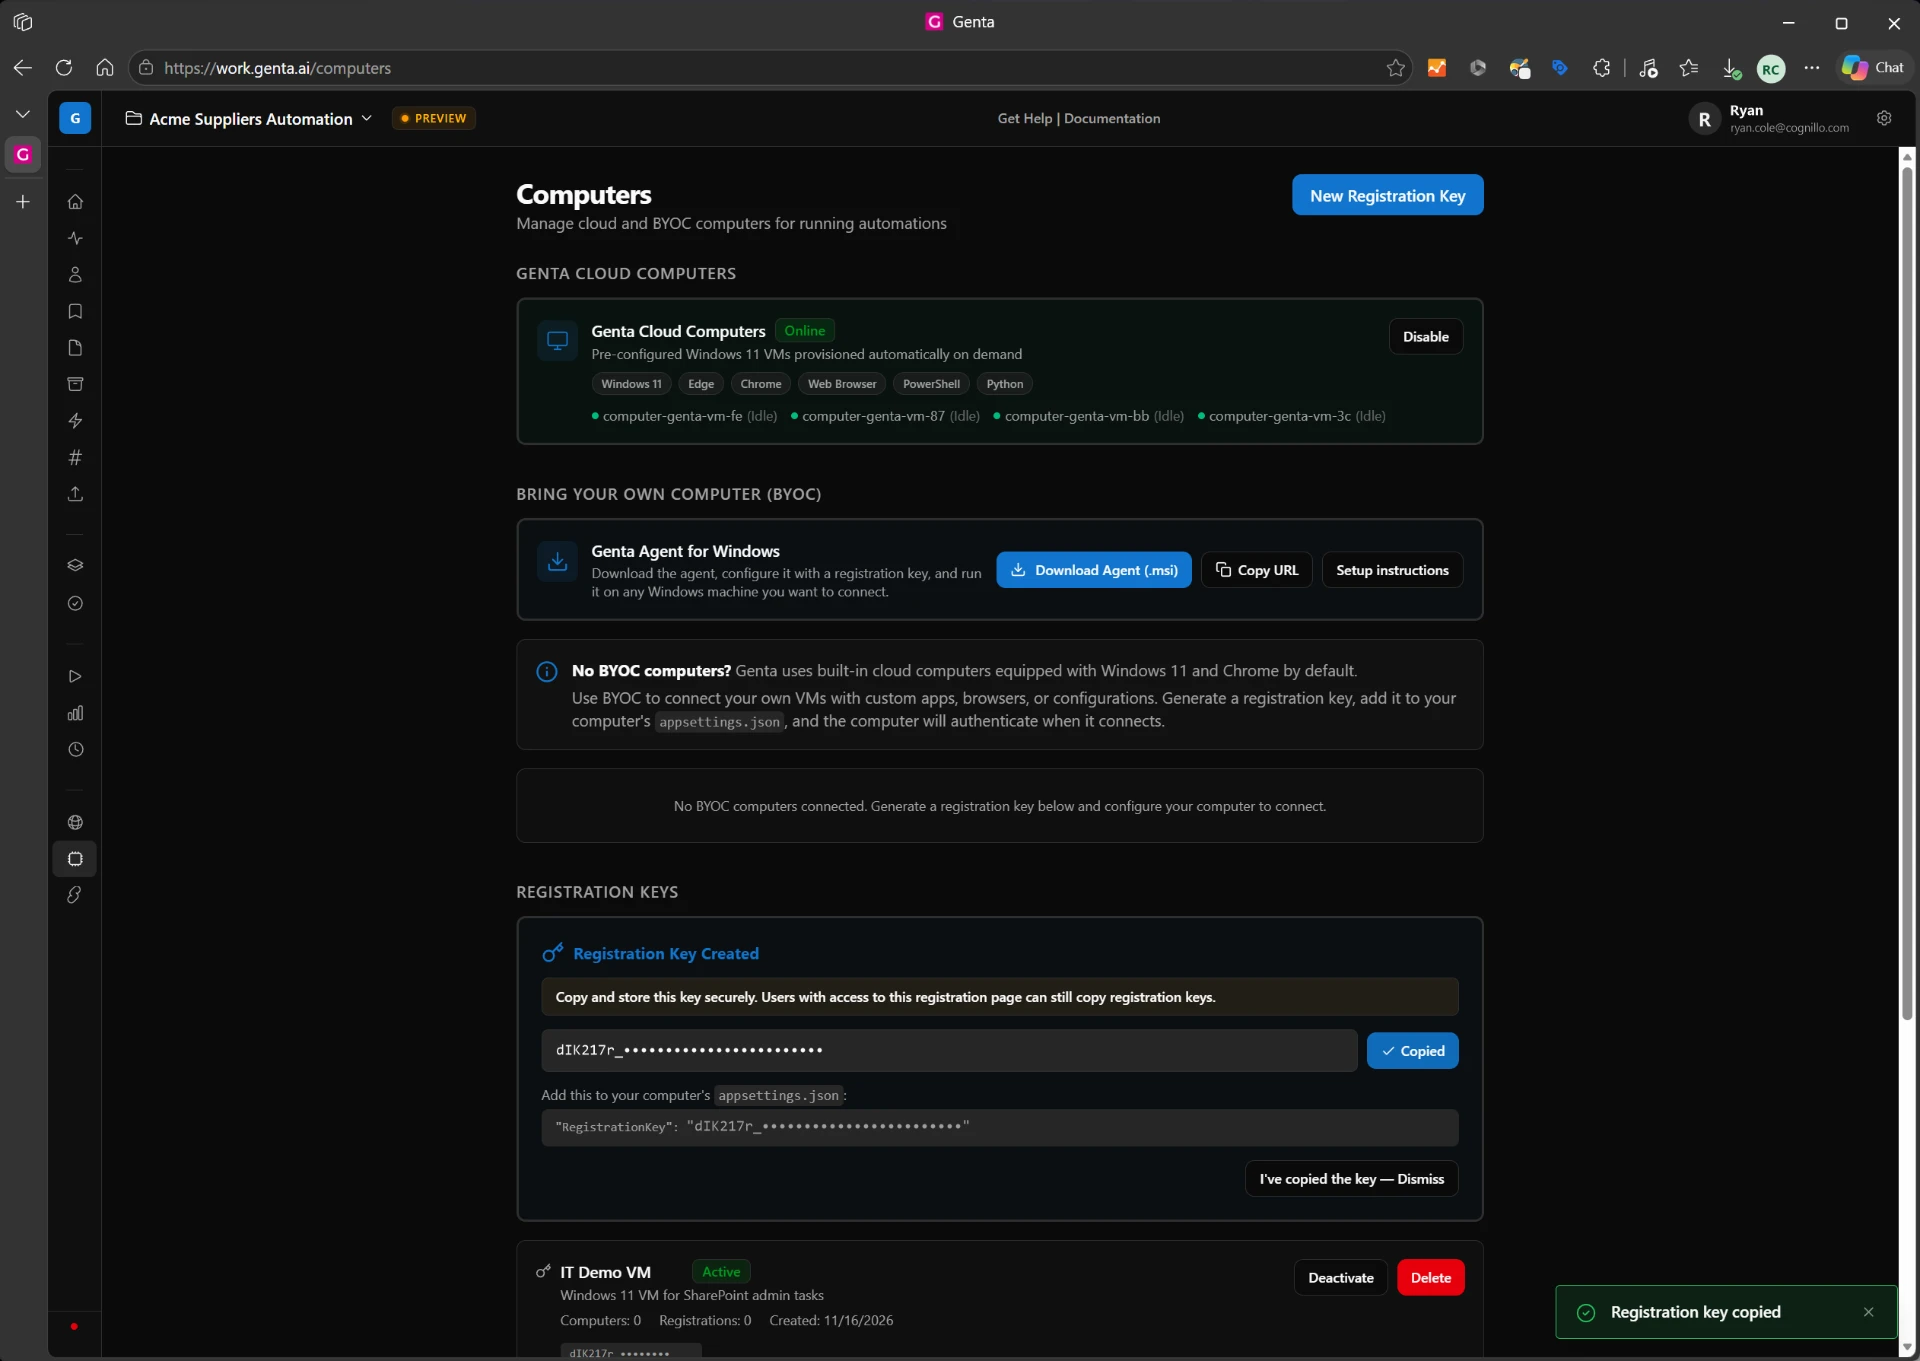
Key created and copied. The key is masked in this screenshot.
Treat the key like a password
Anyone with the key can register a computer to your workspace. If it leaks, click Deactivate or Delete next to it under Registration Keys.
Register the agent
On the computer, open Start and search for Genta. Choose Genta Desktop Agent Configuration. If the agent starts without a key, it opens the same screen on its own.
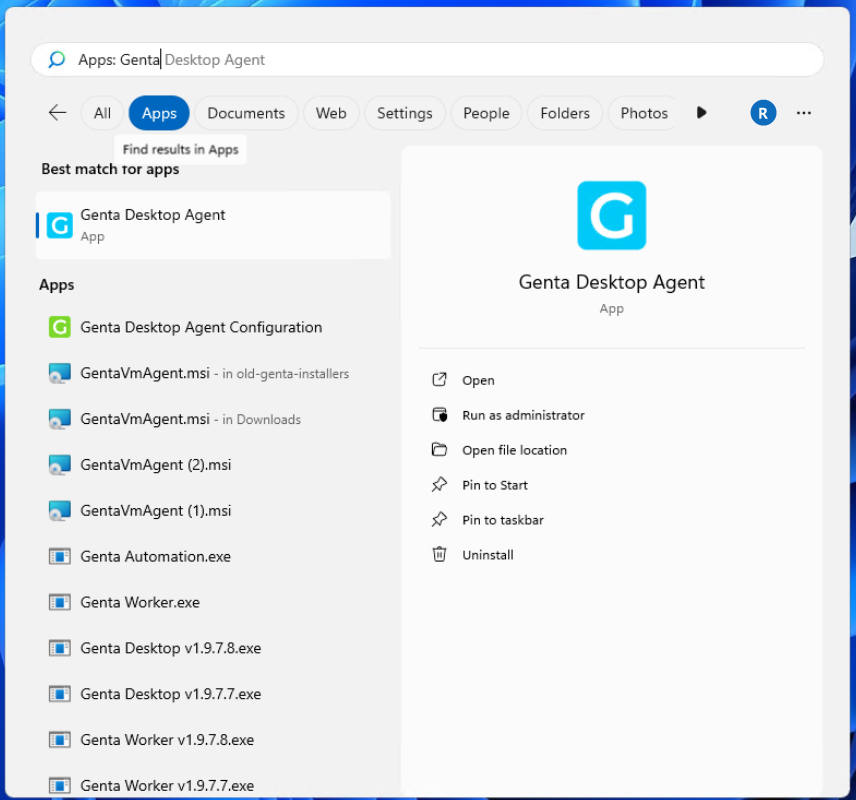
Start → Genta Desktop Agent Configuration.
Fill in the form:
Server URL: keep
https://api.genta.ai.Computer Name: the name you want to see in Genta. It defaults to the machine name.
Registration Key: paste the key you copied.
Click Save and Run. The agent saves its settings to the appsettings.json path shown on the form, then starts and connects. It keeps running in the system tray.
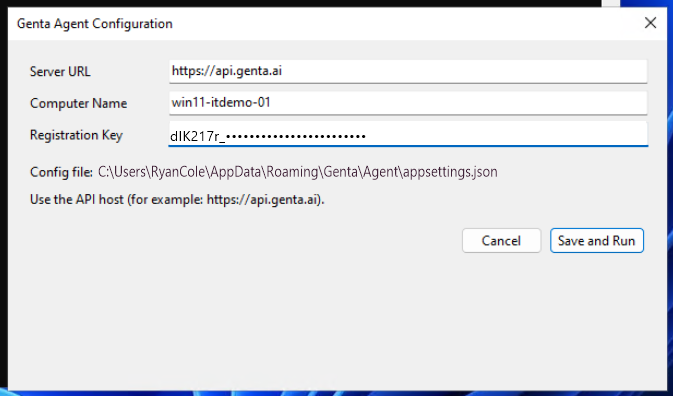
Paste the key and click Save and Run. The key is masked here.
Confirm the computer is connected
Back in Genta, the computer now appears under Bring Your Own Computer with an Idle status, meaning it's online and ready for work. Your key also shows it under Registration Keys.
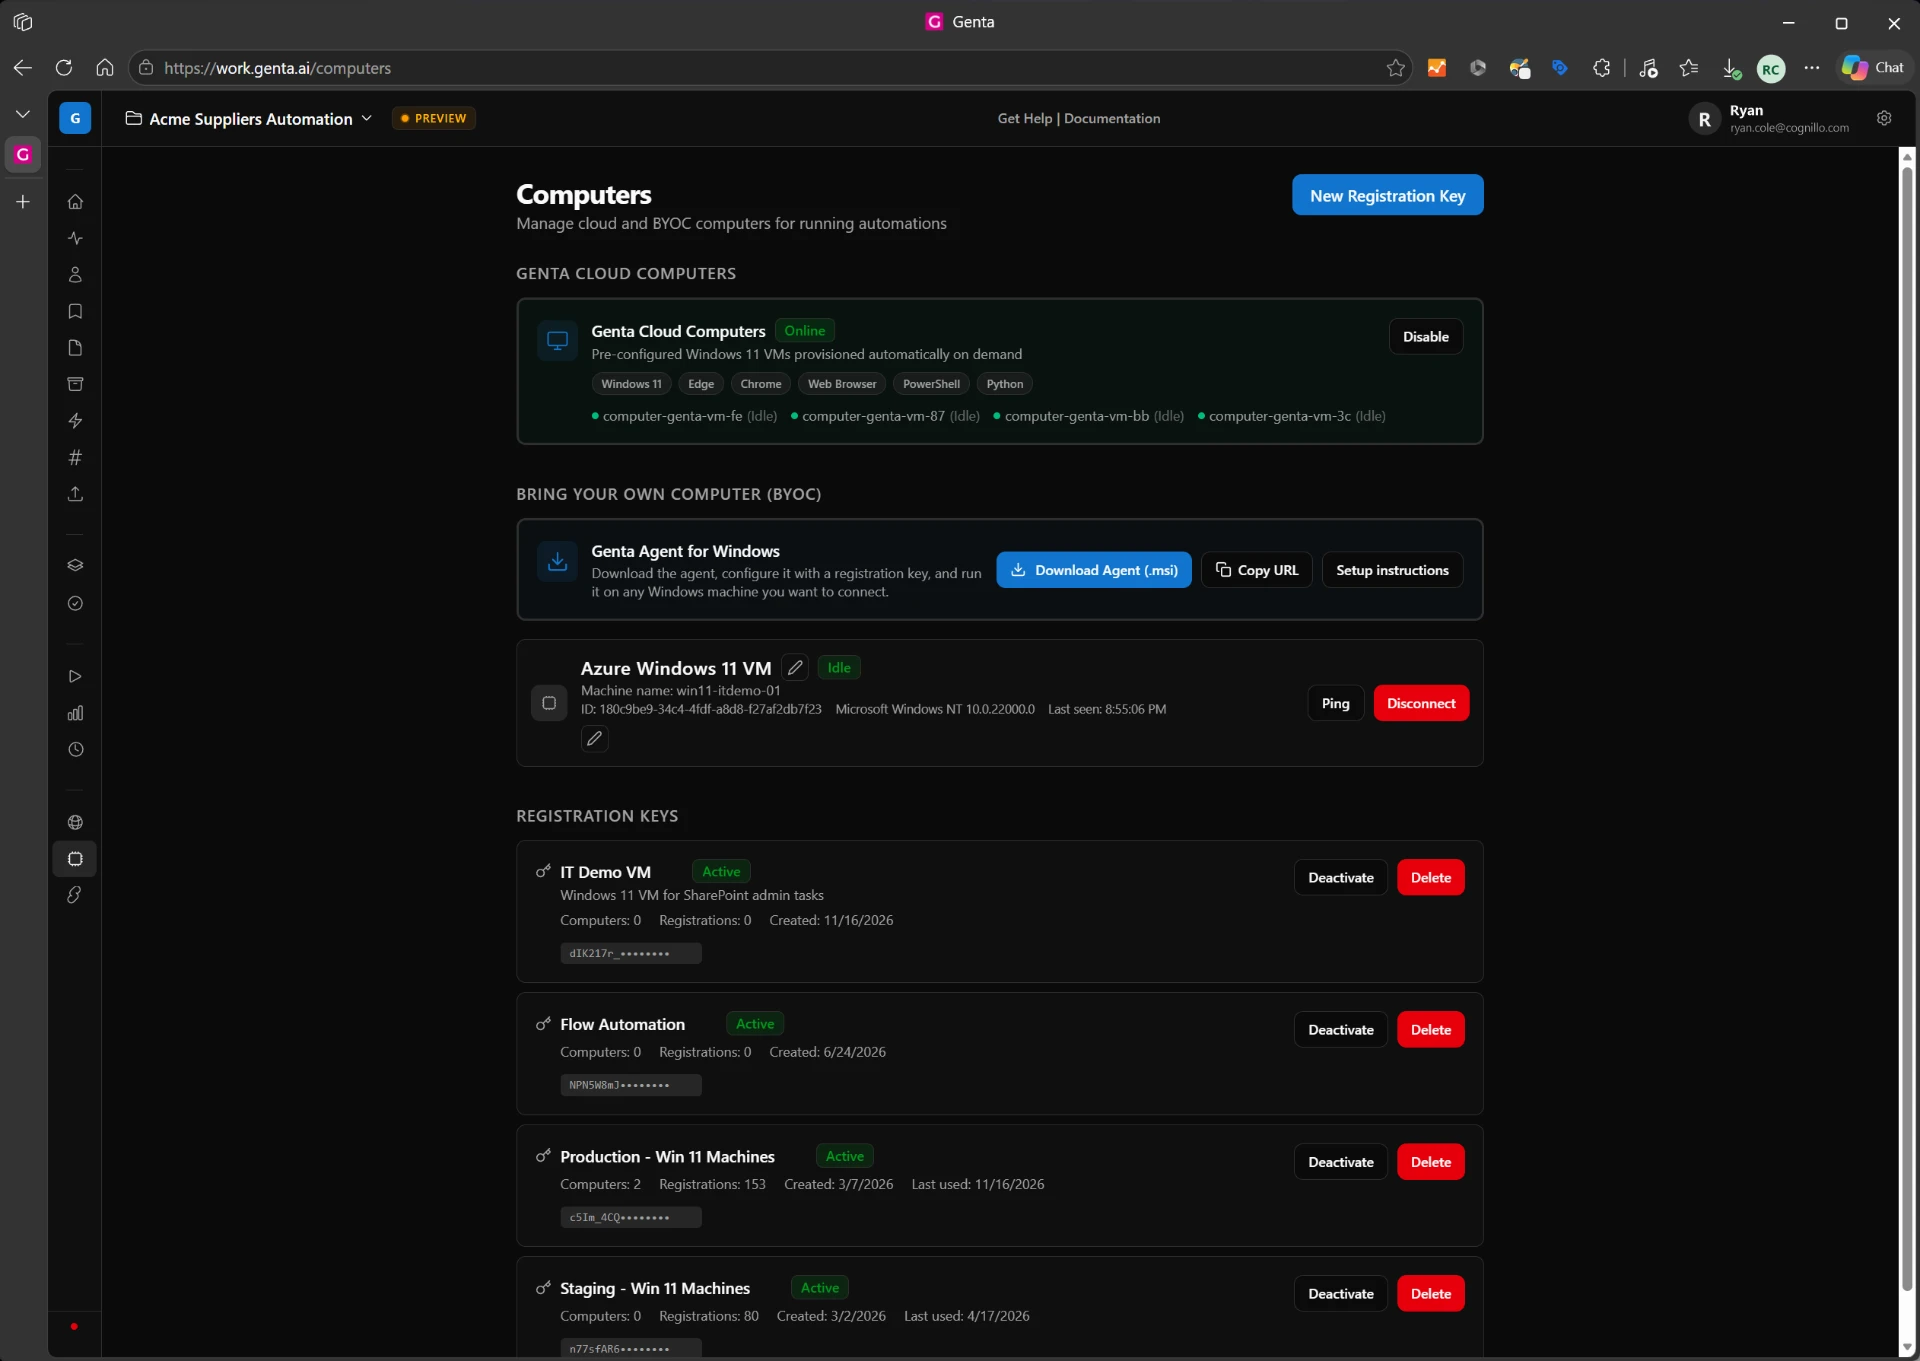
The VM is connected and idle.
Pick the computer in chat
Go to Home (chat). The toolbar above the message box has two pickers: Computer and Agents.
Open the Computer menu. Your BYOC machine is listed under Your computers next to Genta Cloud. Select it.
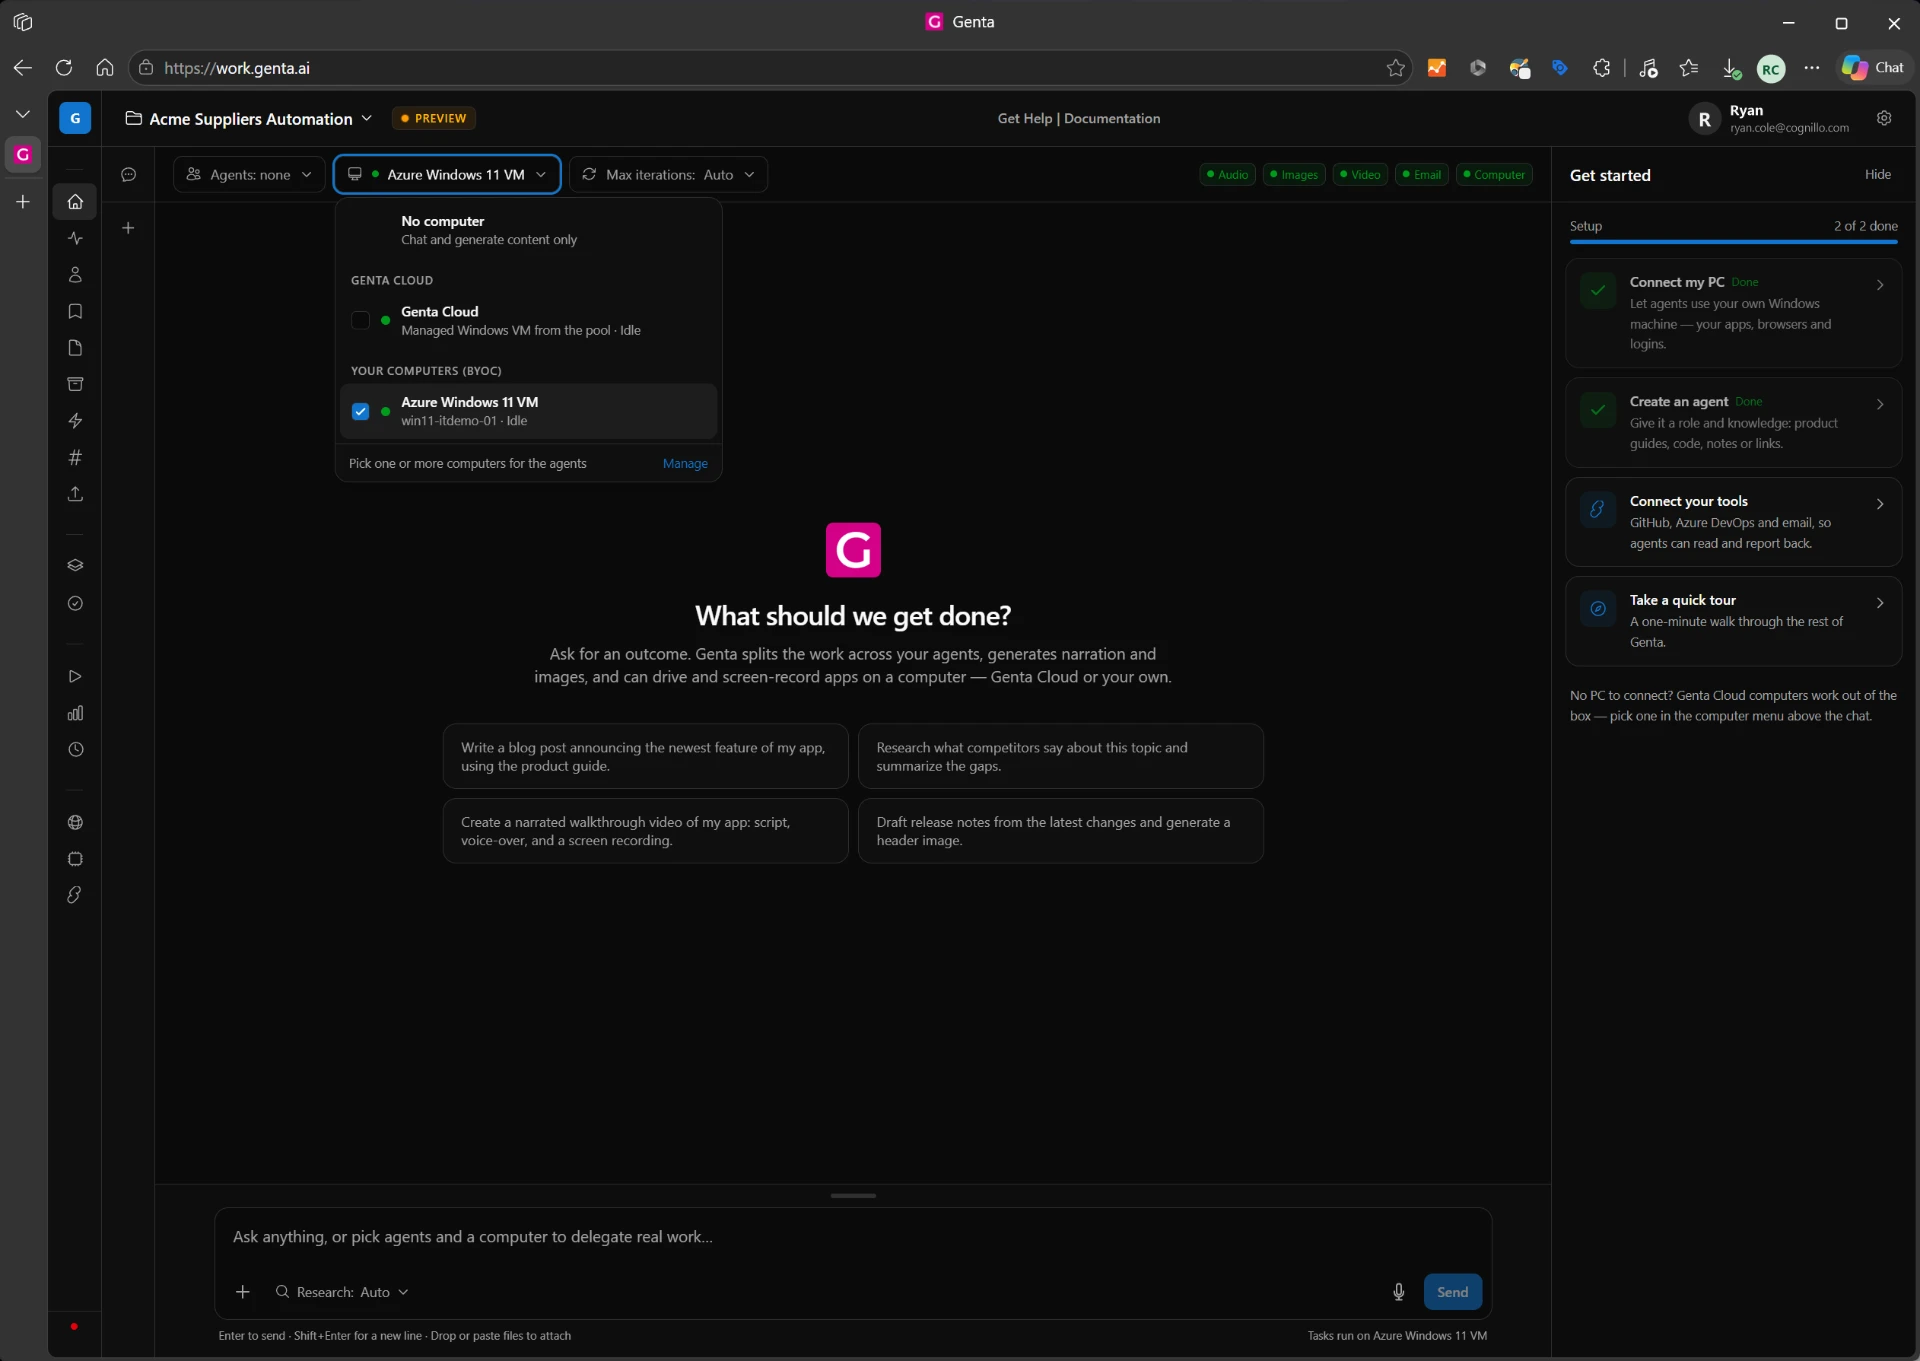
Choose the computer you just connected.
Optionally, choose an agent from Agents. An agent carries a role and knowledge, such as instructions for working in SharePoint. Here we pick the SharePoint Agent.
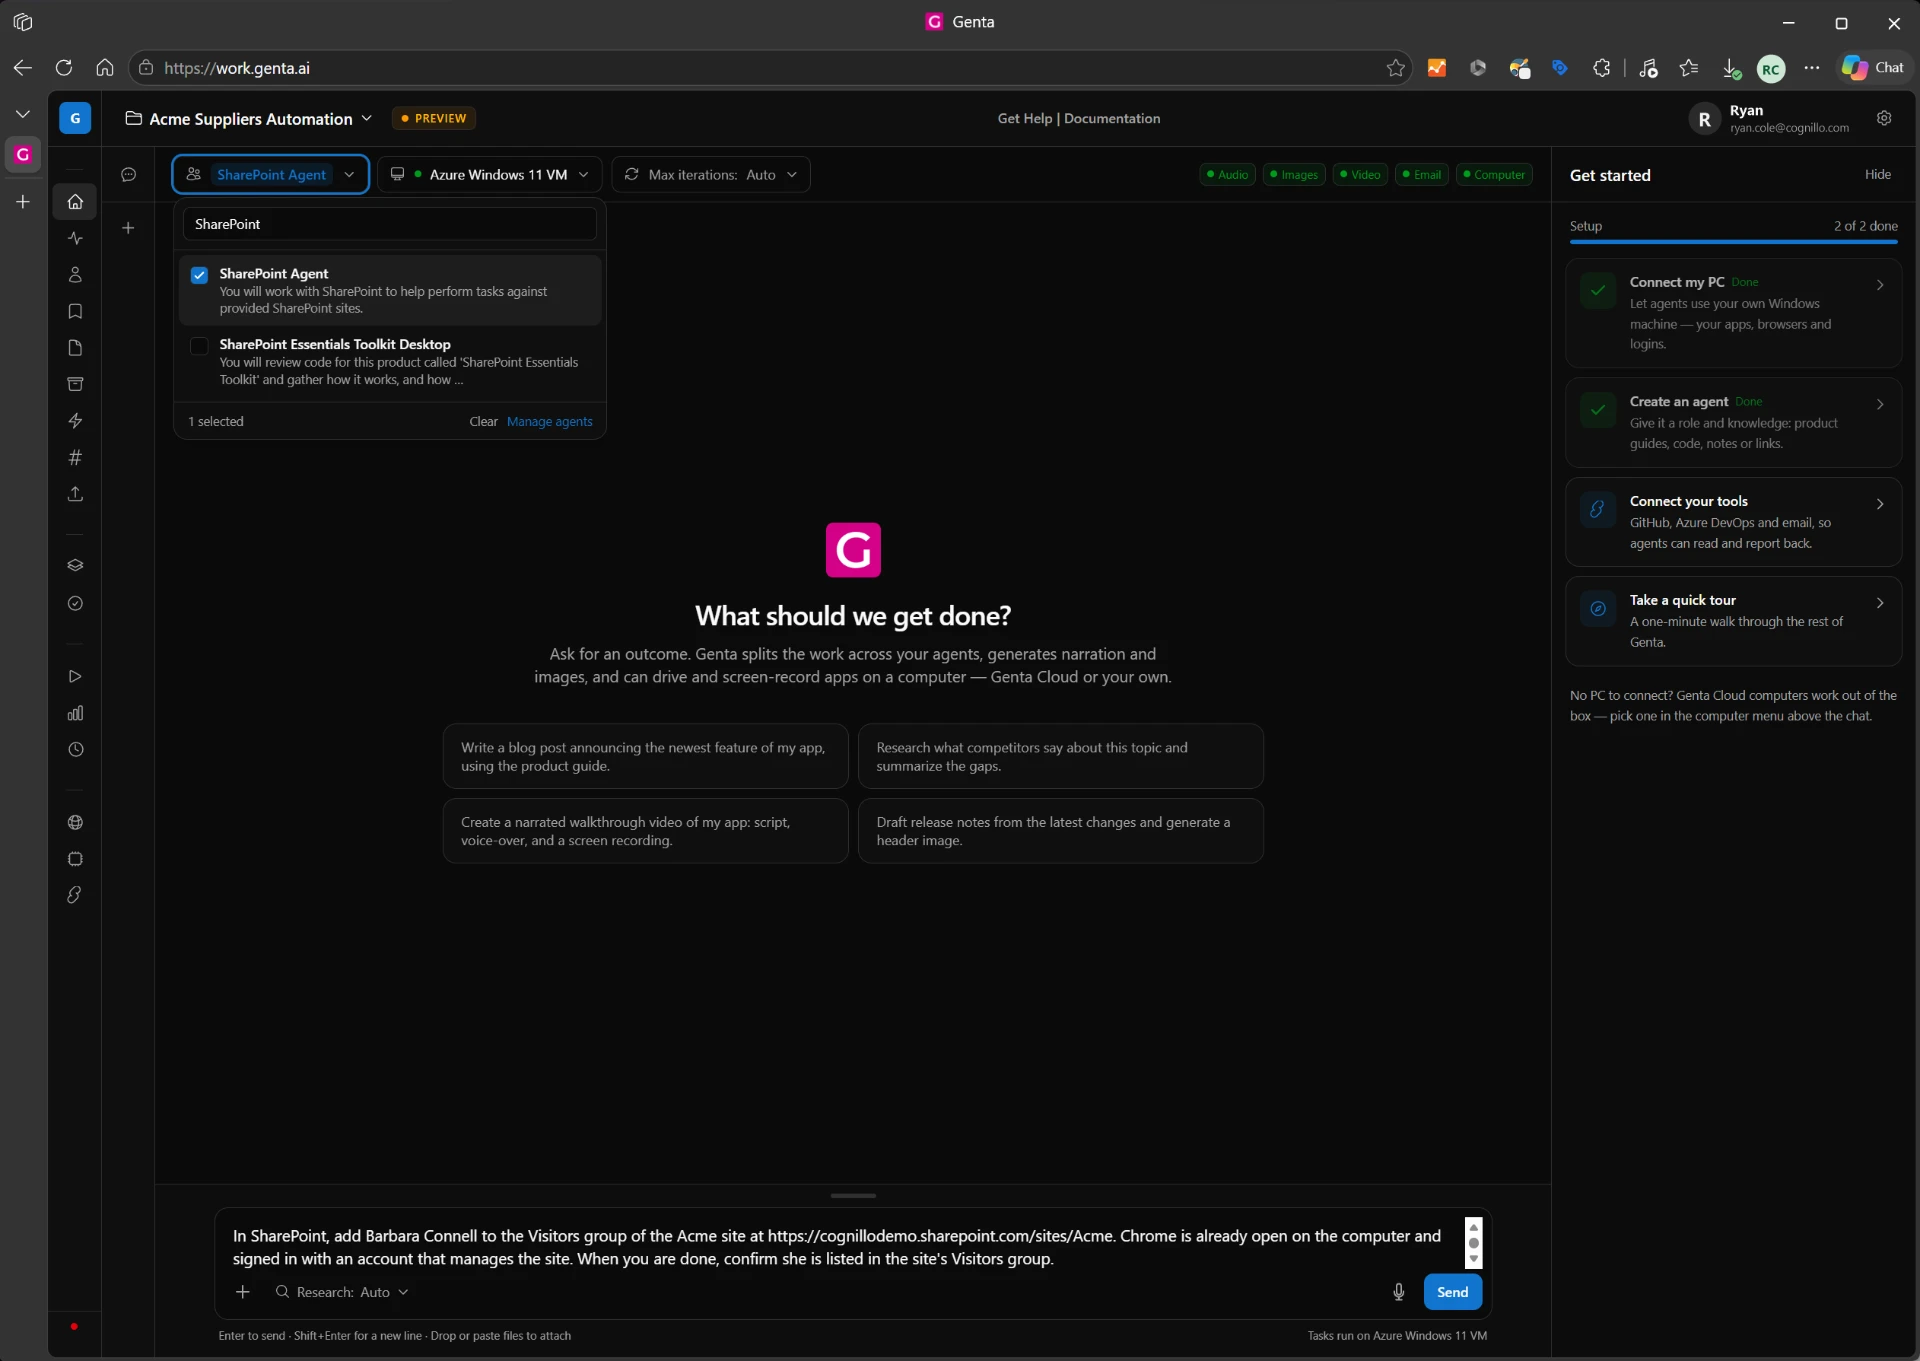
Pick an agent with the right skills for the job.
Send a task and watch it work
Describe the outcome you want in plain language. Say where to do it and how you'll know it's done.
In SharePoint, add Barbara Connell to the Visitors group of the Acme site at https://cognillodemo.sharepoint.com/sites/Acme. Chrome is already open on the computer and signed in with an account that manages the site. When you are done, confirm she is listed in the site's Visitors group.
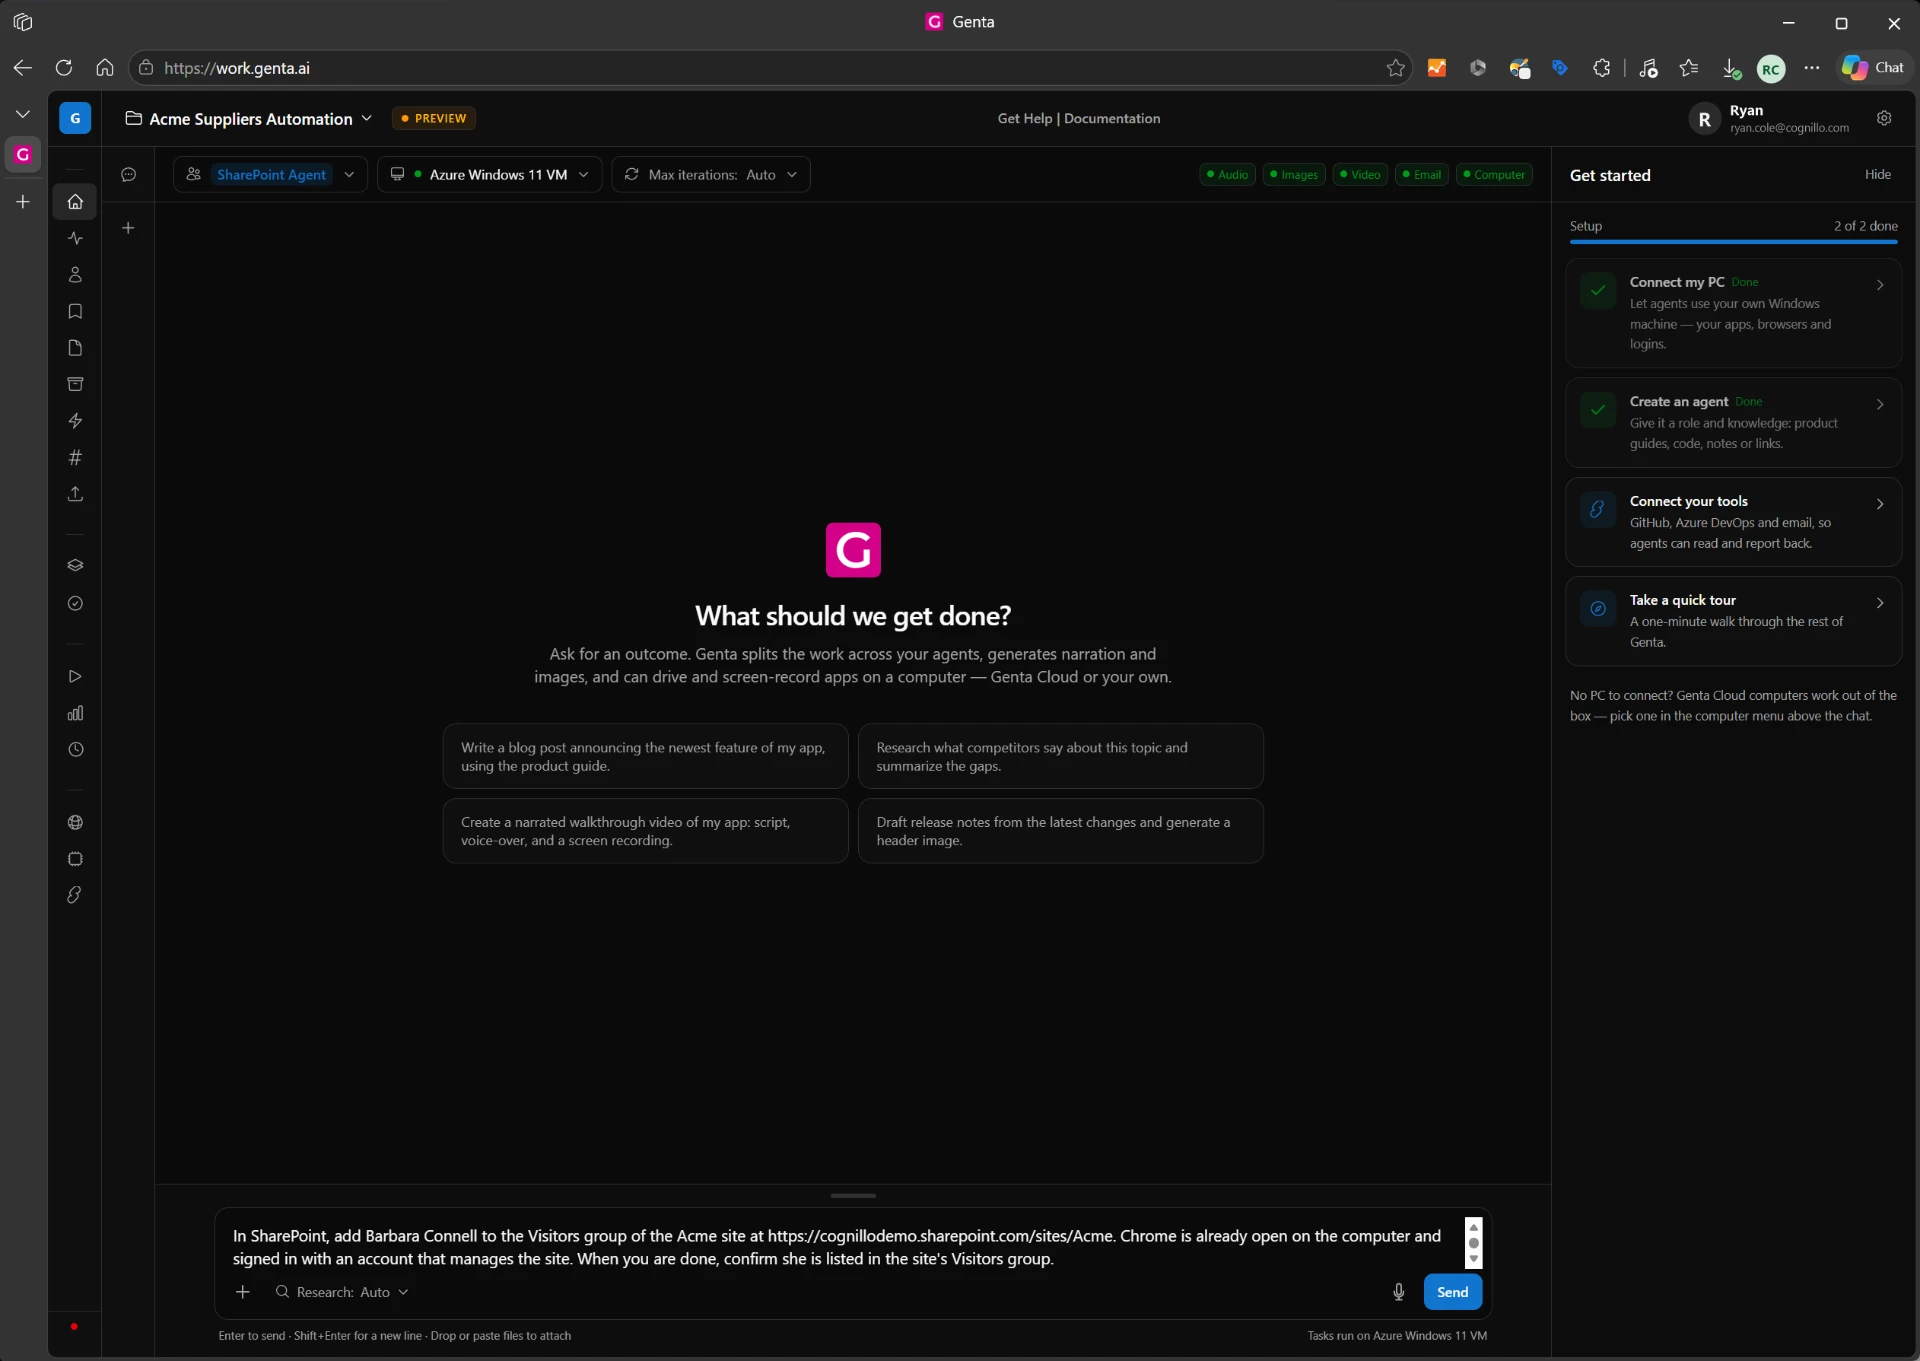
Agent and computer chosen, prompt ready. Click Send.
Genta connects to the computer and runs the task, step by step. The Work log shows what it's looking at and doing in real time. You can keep chatting or send a follow-up while it works.
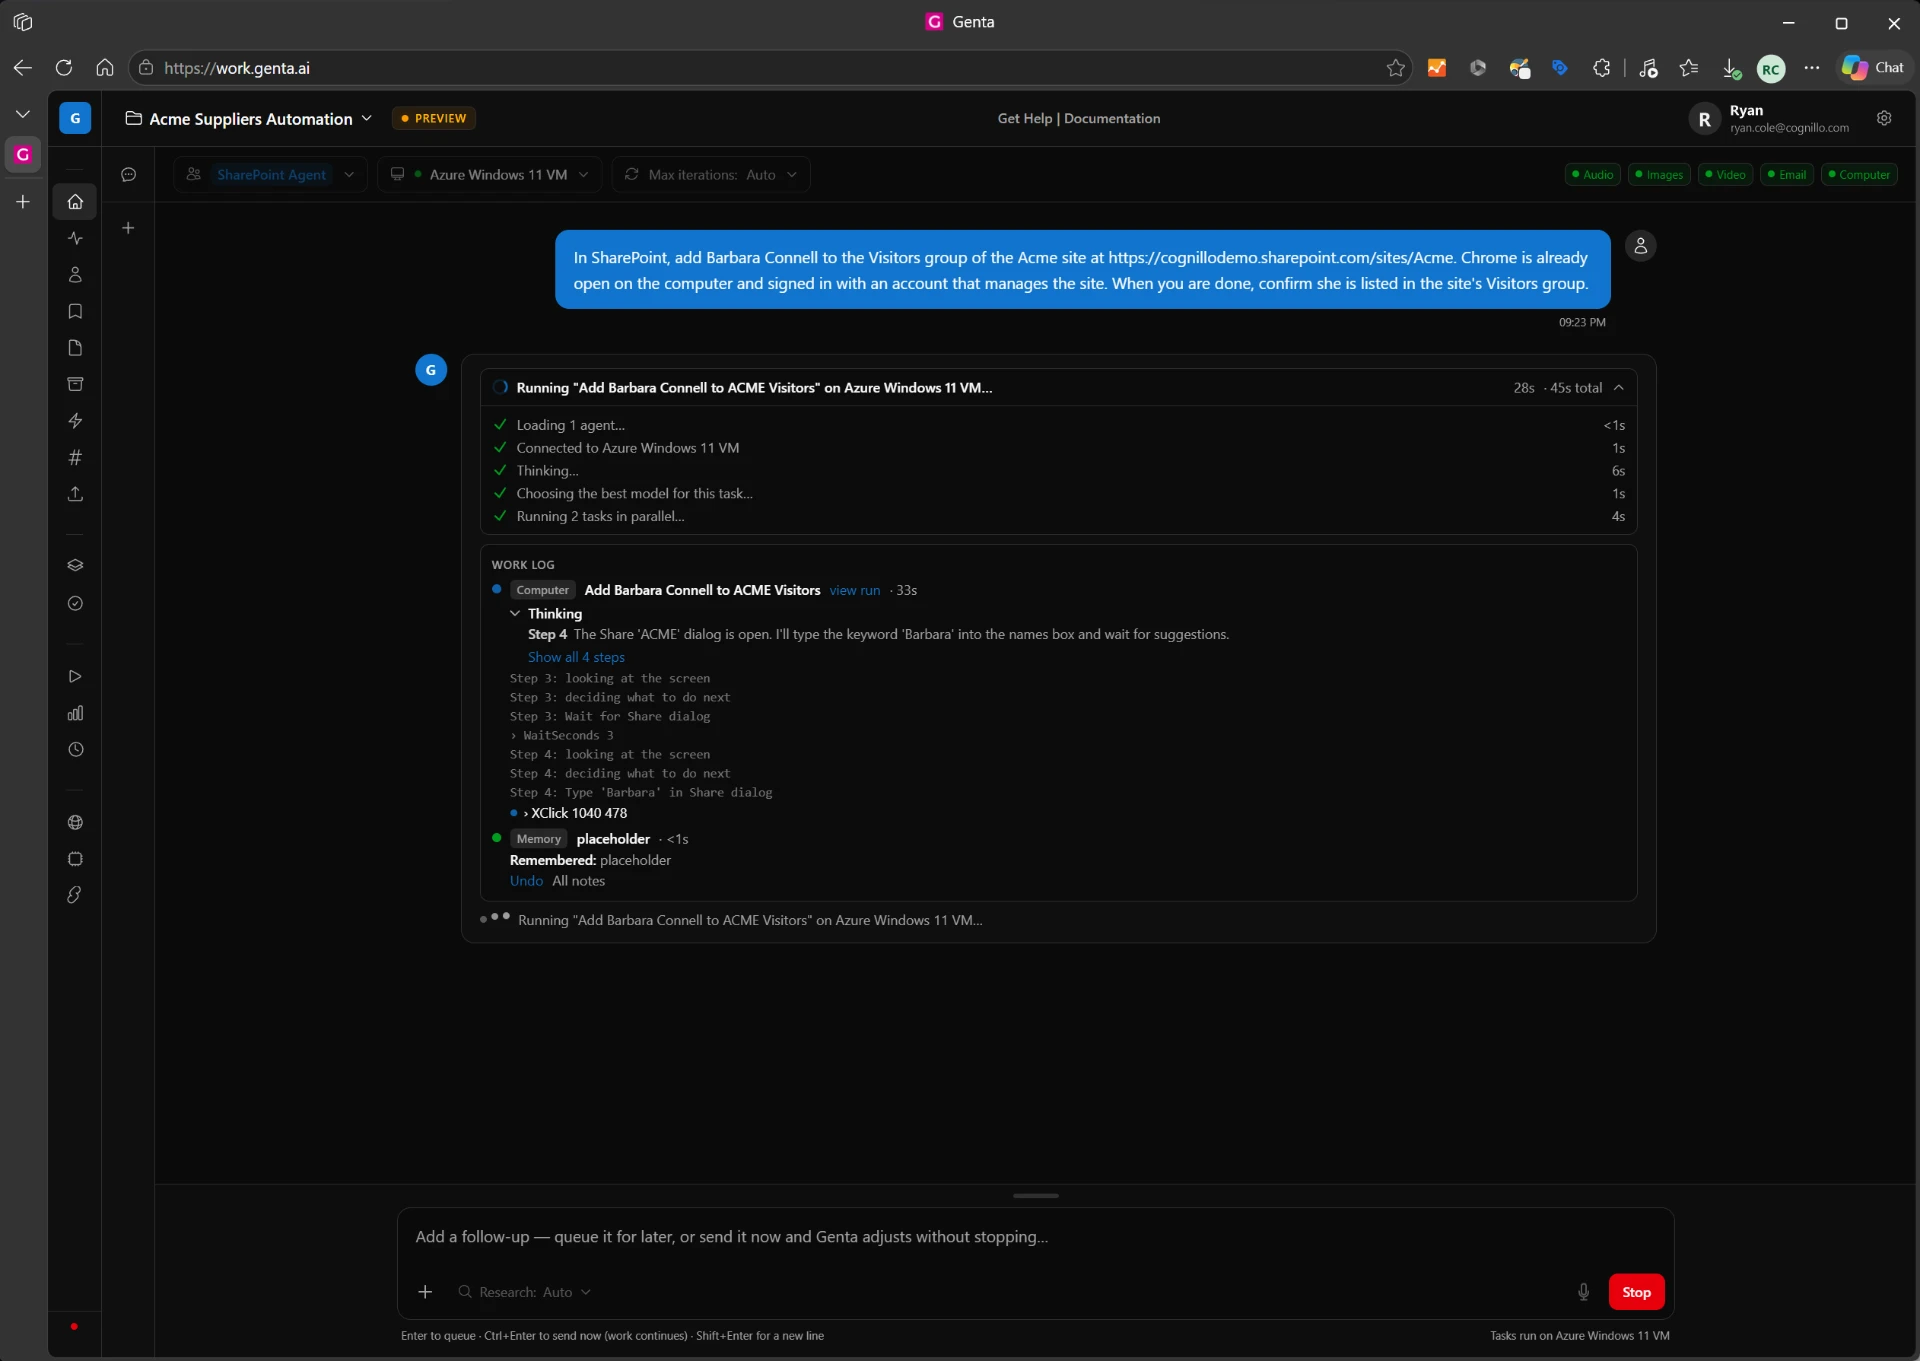
The run in progress: connected to the VM, and each step shown as it happens.
What happens on the computer
Meanwhile, on the VM, Genta drives Chrome like a person would. It opens the site's People and Groups page for ACME Visitors. Barbara isn't a member yet.
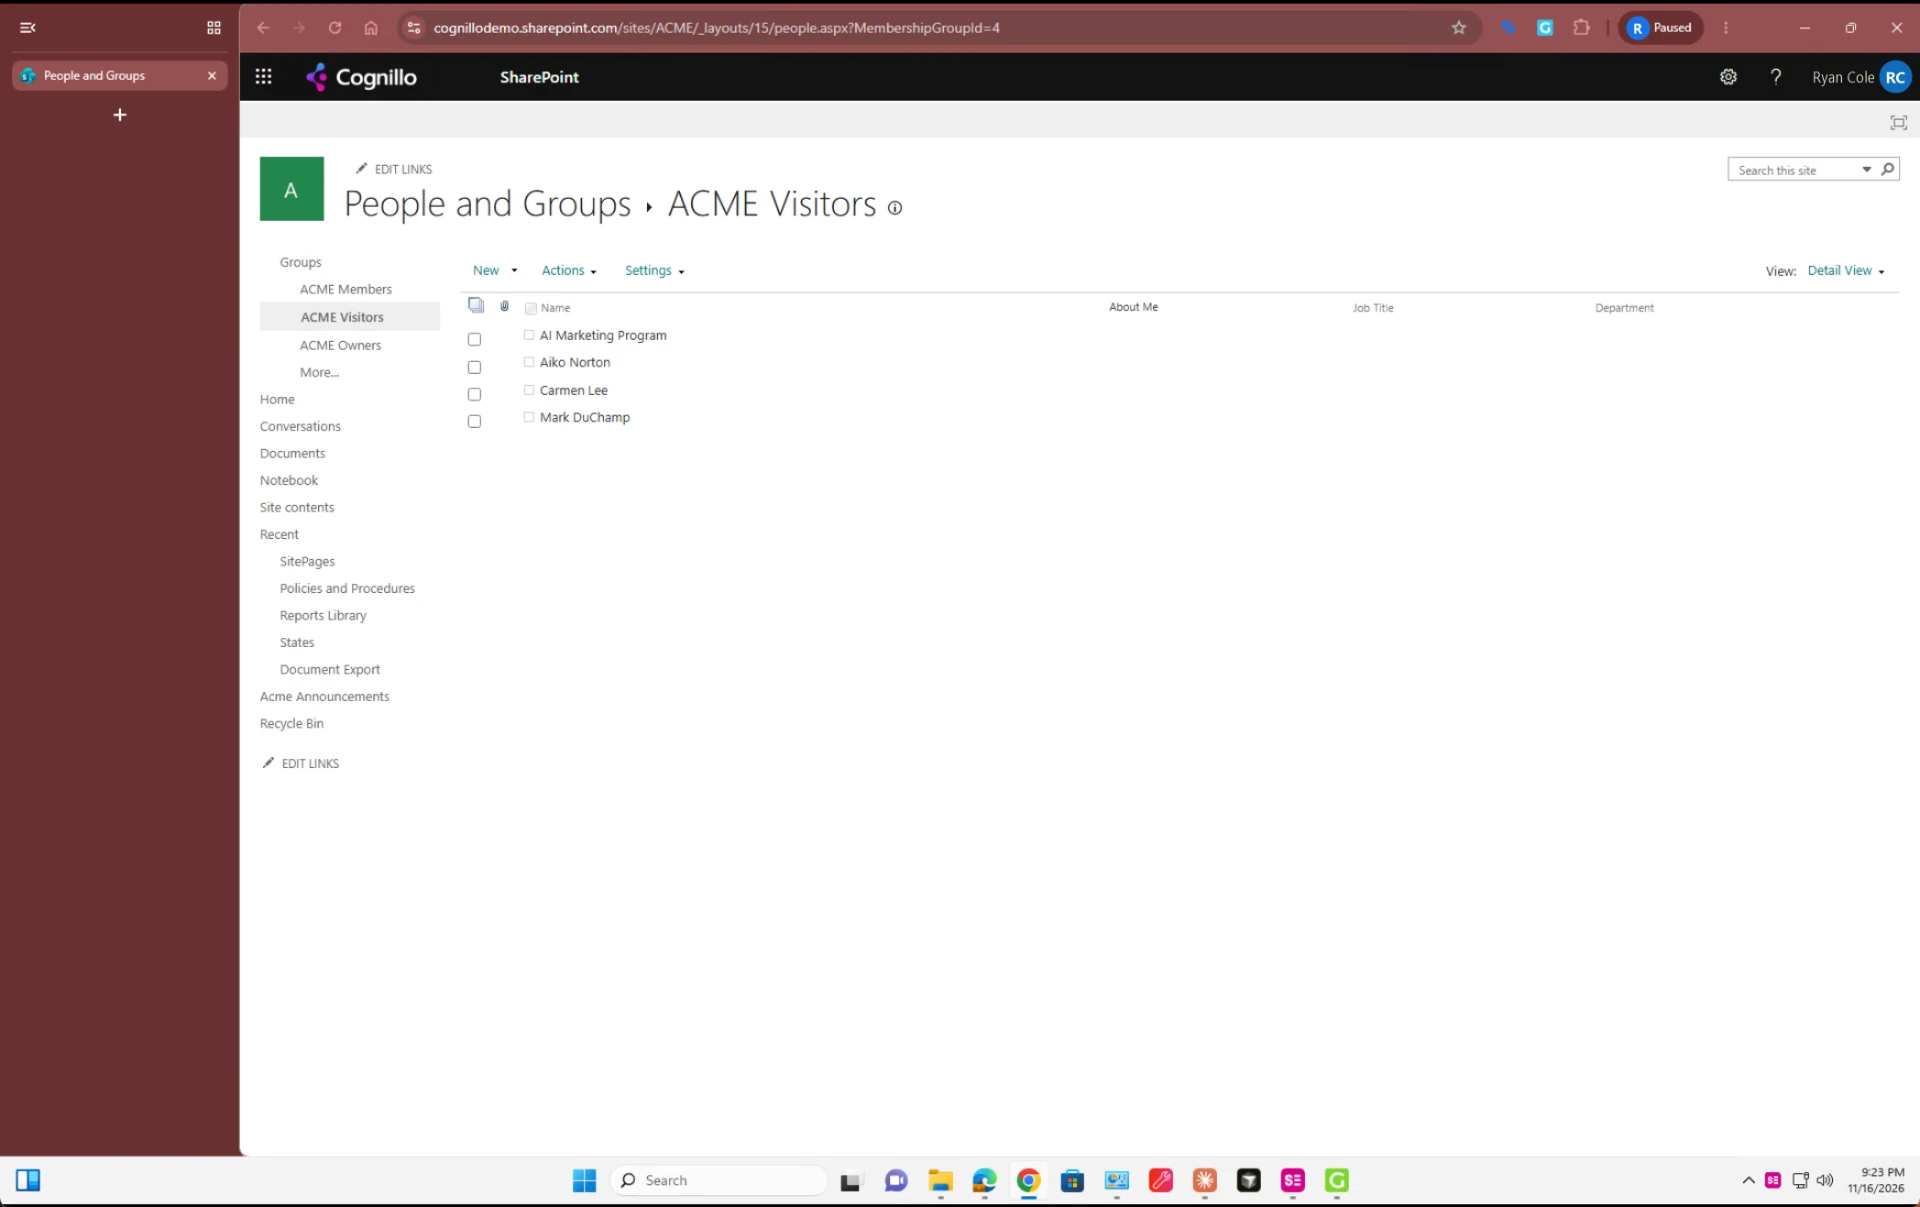
Before: ACME Visitors without Barbara Connell.
It opens New → Add users, types her name, picks the right person from the suggestions and shares.
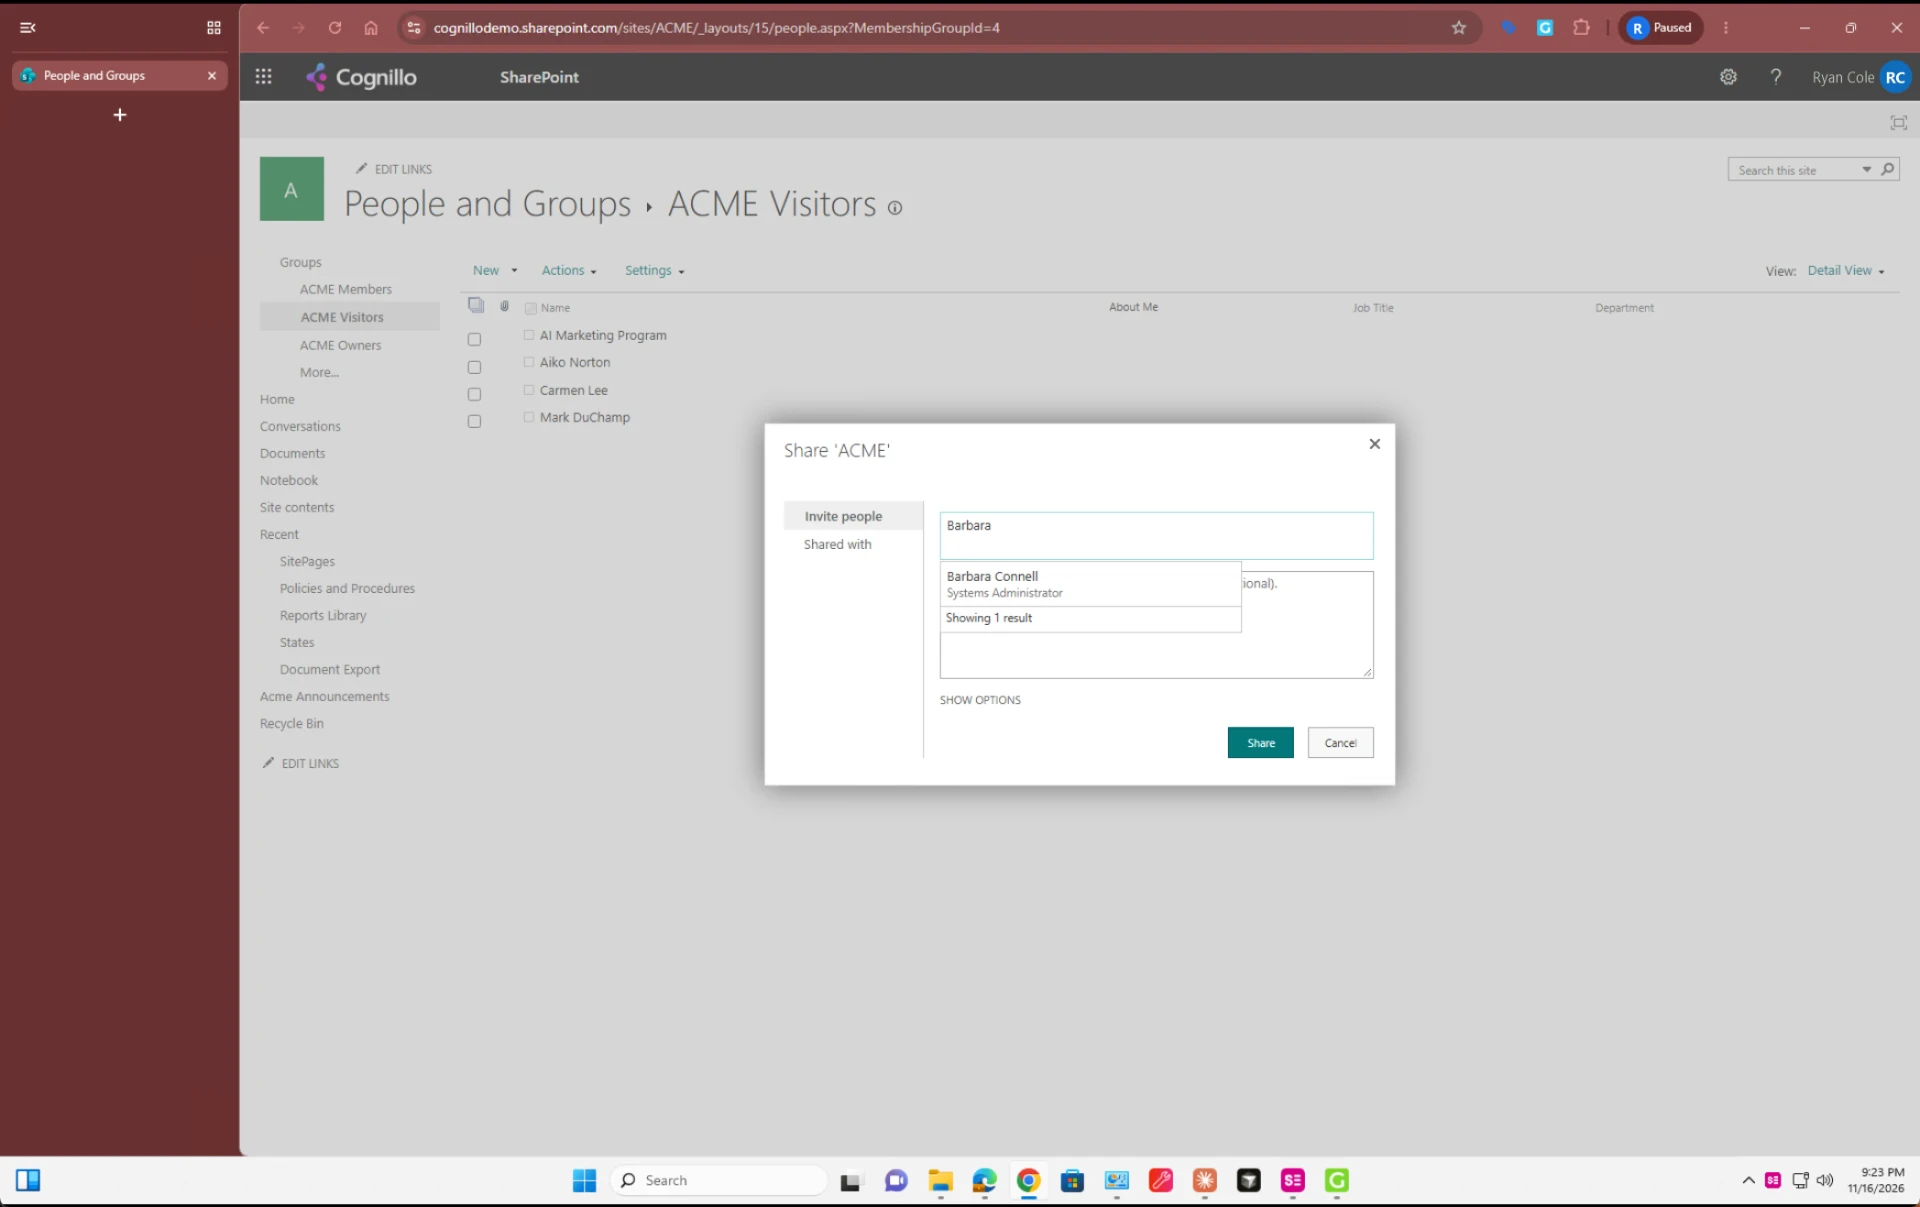
Finding Barbara Connell in the people picker.
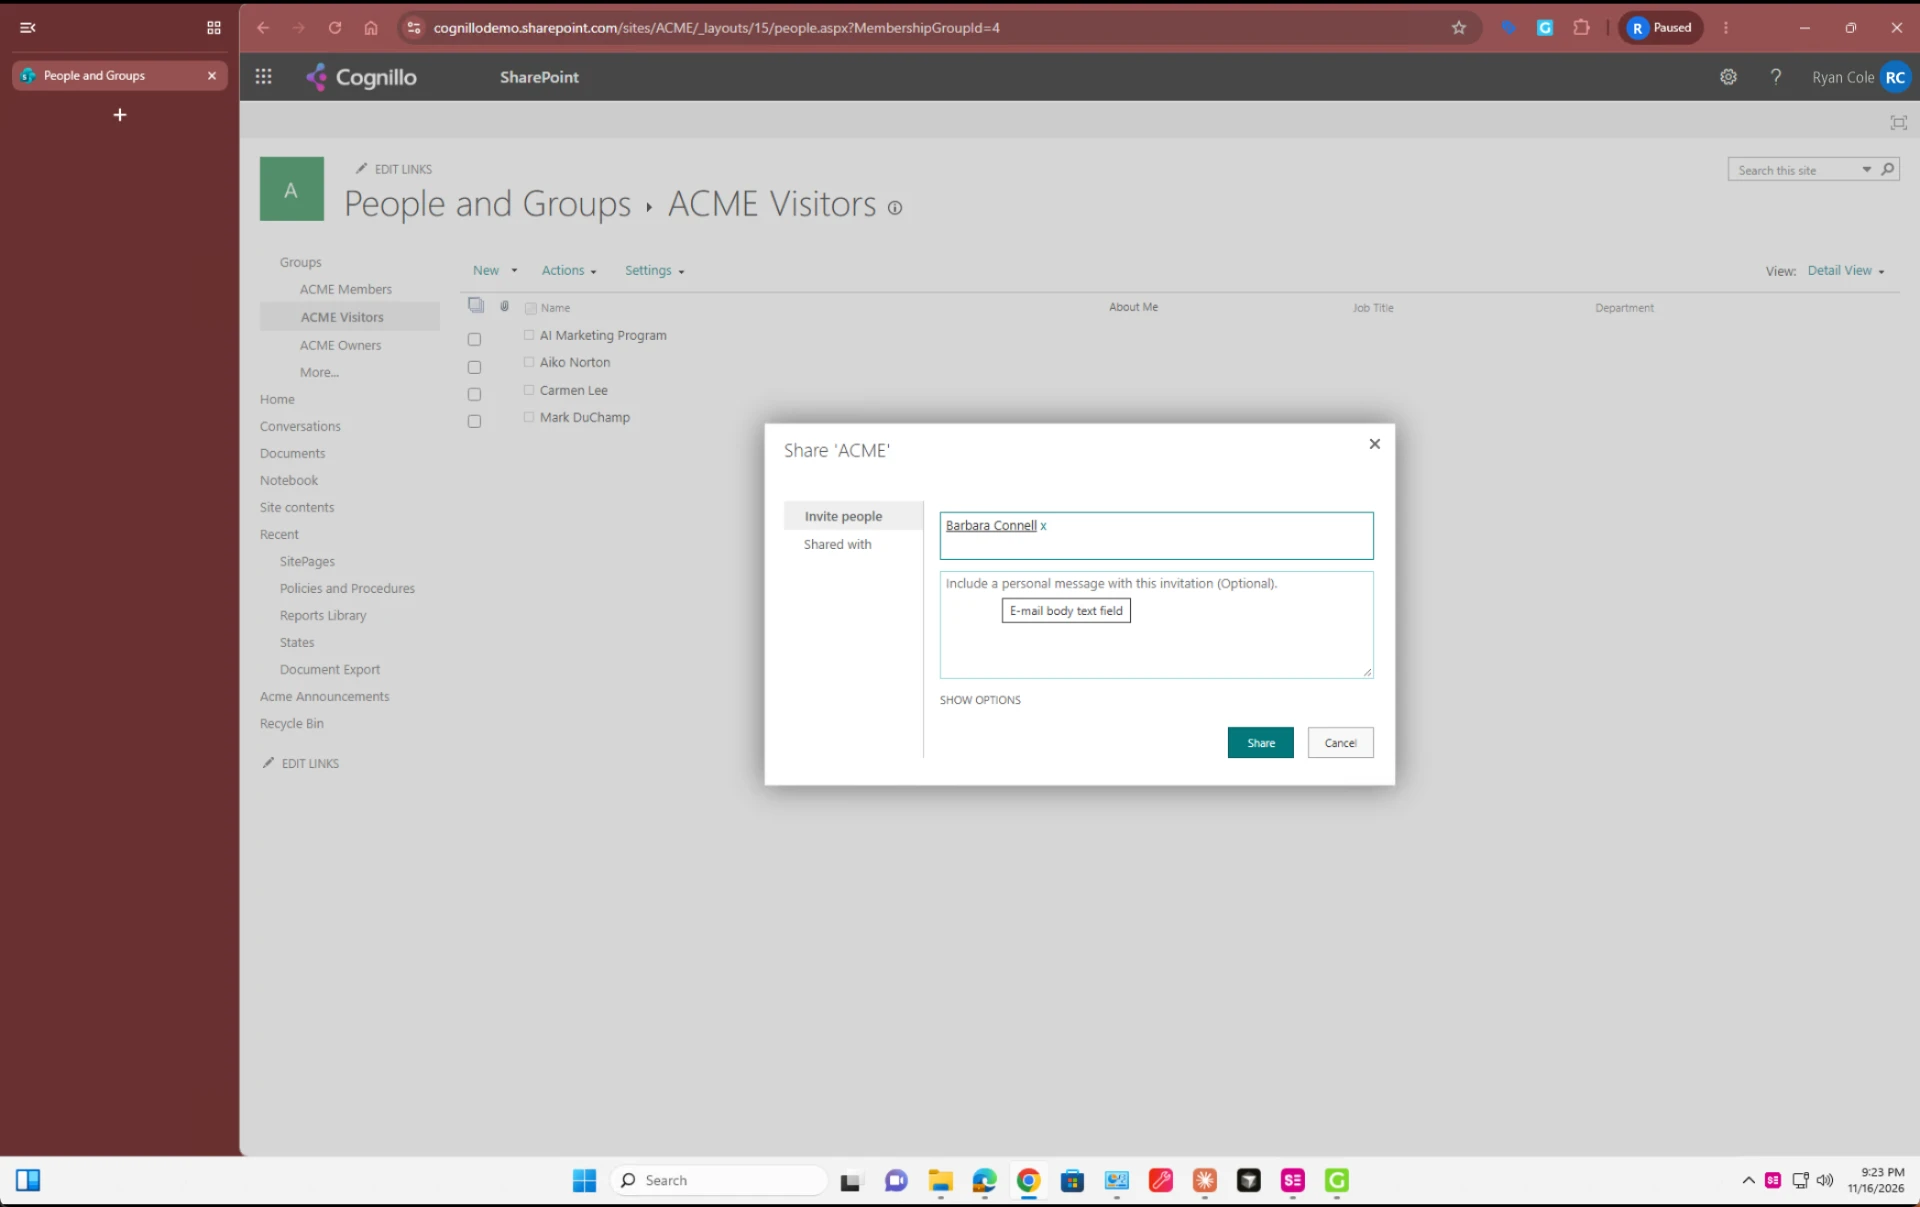
Barbara resolved and ready to share.
Finally it reloads the member list to check its work.
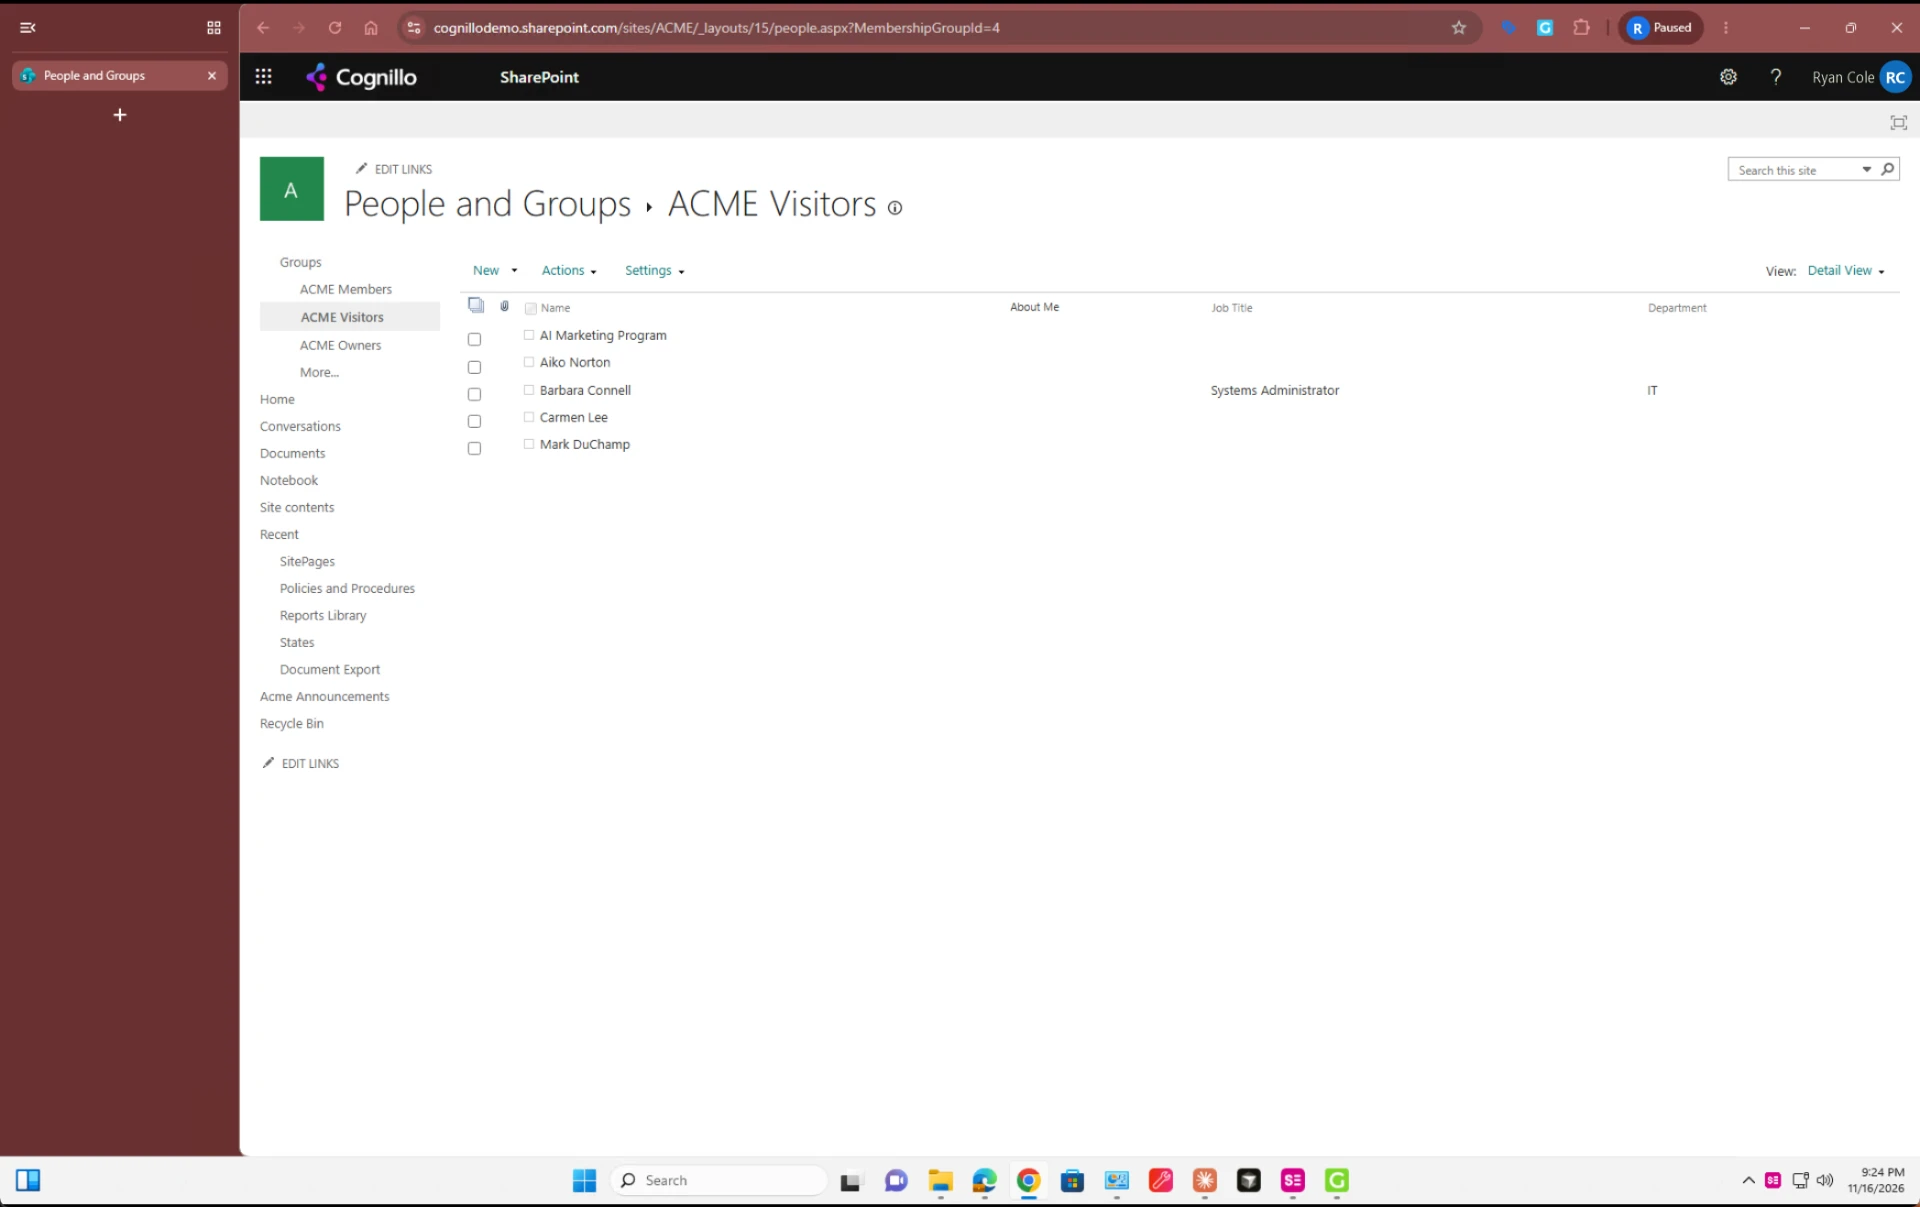
After: Barbara Connell is listed in ACME Visitors.
Review the result
When the run finishes, Genta replies in chat with what it did and how it verified the change. It also notes anything you should know, such as whether an invitation email was sent. The whole task took about a minute and a half.
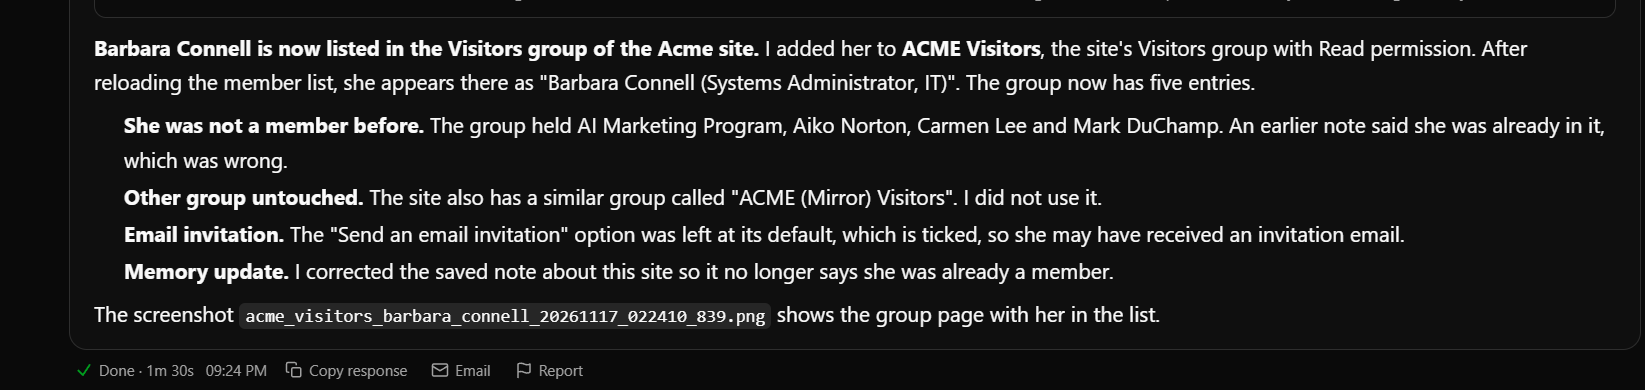
Genta's summary, with a screenshot of the group page attached as evidence.
You're set up
Your computer is now a place where Genta can do real work. Some ideas for what to try next:
Hand off routine admin work. Add or remove site members, update list items, or pull a report from a web app the computer is signed in to.
Create agents for your teams. Give each agent a role and knowledge (product guides, runbooks, links), and pick it from chat when you need it.
Connect more machines. Install the agent on each one with its own registration key, or share one key with a Max Computers limit.
No machine handy? Choose a Genta Cloud computer from the same Computer menu and start right away.
Troubleshooting
If the computer doesn't show as connected, make sure Genta Desktop Agent is running (check the system tray), and that the key is active under Registration Keys. Then reopen Genta Desktop Agent Configuration to check the Server URL and key.
Learn more about Genta AI Automation and Genta Work Automation. Need help? Submit a ticket.
Screenshots taken in a demo workspace. Registration keys are masked.