How to add sites to SharePoint Essentials Toolkit (2027)
Last updated: 2026-10-14
Add sites in the 2027 toolkit by pasting URLs, importing Excel or CSV, or searching your tenant. Learn grouping, Tasks, site removal, and saved searches.
Paste URLs, import a spreadsheet, or search your tenant, then group the sites so they are easy to find. Every report and action in SharePoint Essentials Toolkit runs against sites you have added. You can add one site or thousands at a time. If you would rather not maintain a fixed list, a saved search finds sites each time a task runs.
Applies to version 12.1.2.0 (2027 release). Based on the guide updated October 7, 2026.
If you used the previous version
The 2026 article was called How to add sites to the Home Page Dashboard and directed you to the Getting Started PDF. In 2027, sites are added on one page: Add Site in the left menu.
The old Home page has been split in two. Dashboard shows monitor trends and items that need attention. It no longer lists your sites; its Site group picker chooses which group it summarizes. Tasks is where you start a job, and its Pick sites step lists every site you have added.
A few labels still say Home: Show on Home under picks the site group, and Go to Home opens the Tasks page.
New in 2027: tenant search with a results filter, spreadsheet import with automatic URL column detection, and saved searches that find sites at run time.
Before you start
- A connection to your tenant — If you do not have one yet, see the Quick Setup guide. You can also select New connection on the Add sites page.
- Access to the sites — The account or app registration behind the connection must be able to open the sites you add. Pasted URLs are checked before adding; addresses imported from a file are checked while they are added.
Open the Add sites page
Select Add Site in the left menu. If the menu is collapsed to icons, select the + icon, or select the menu icon at the top to expand it.
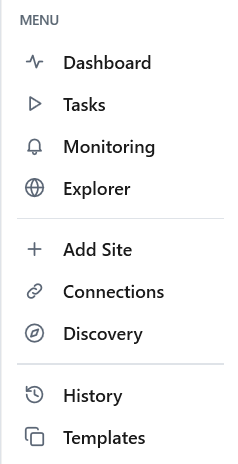
Figure 1. Add Site in the left menu.
On a new install, the setup page that opens in place of the Dashboard also has an Add your sites step. It opens the same page.
The page is one form, from top to bottom: which connection to use, where the site addresses come from, and which group the sites go into.
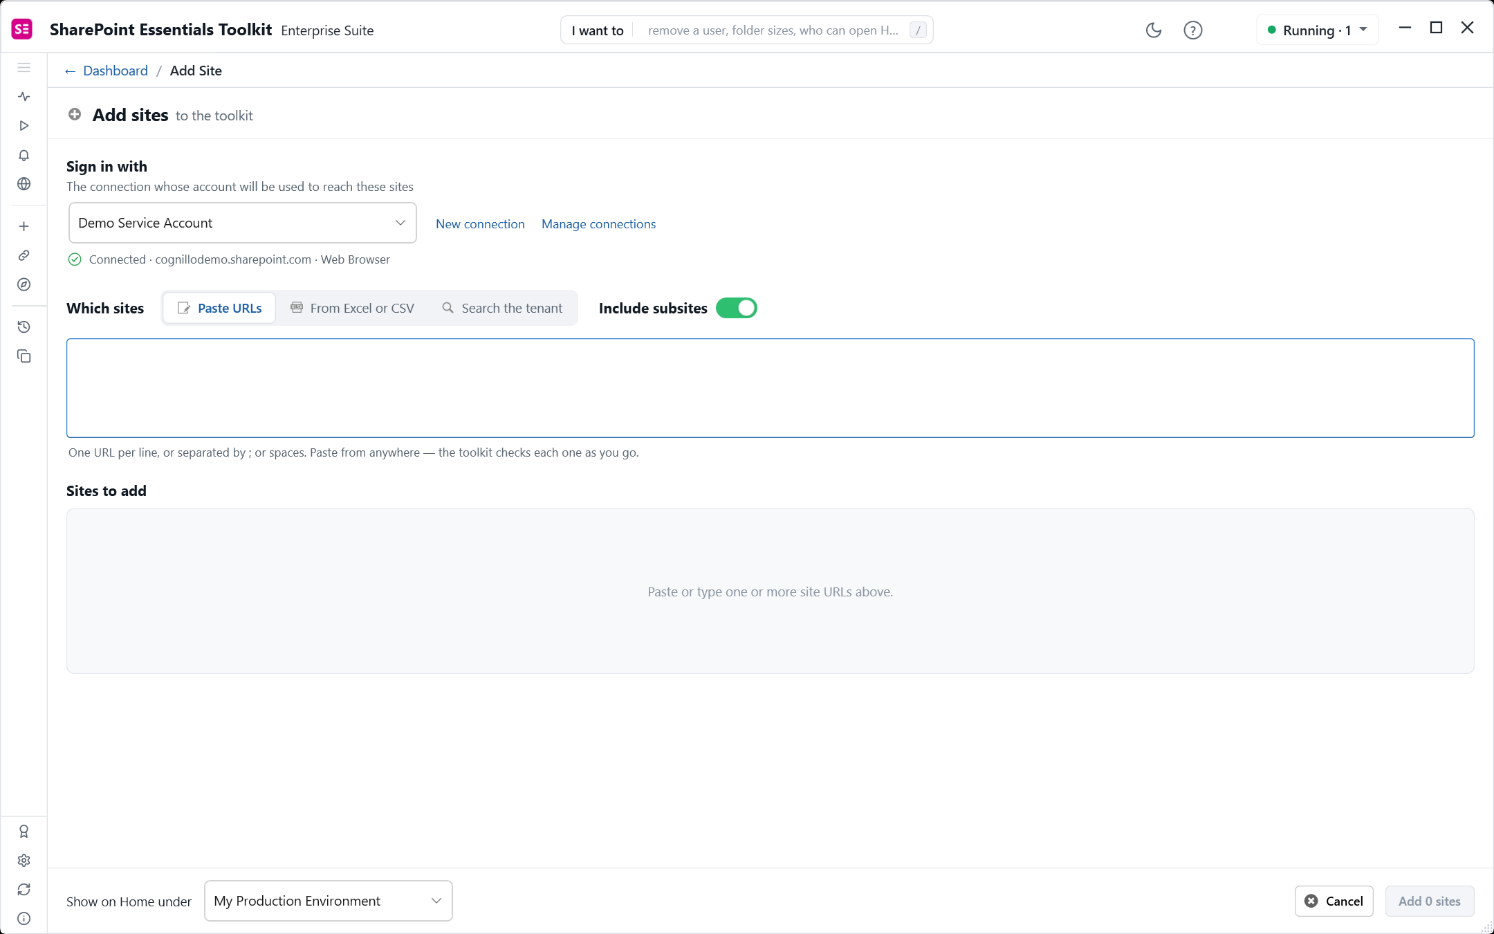
Figure 2. The Add sites page. The line under Sign in with confirms the connection has signed in before. Include subsites is on by default.
- Sign in with — The connection whose account will reach the sites. If you have more than one tenant, pick the right one here. The line under it shows whether the connection has signed in successfully, for example Connected · cognillodemo.sharepoint.com · Web Browser. New connection and Manage connections are beside the picker.
- Which sites — Choose Paste URLs, From Excel or CSV, or Search the tenant.
- Include subsites — On by default. Every subsite under each site is added too. Turn it off to add only the sites you list.
Option 1 — Paste URLs
The quickest way when you already know the addresses.
- Select Paste URLs.
- Paste or type the site URLs into the box: one per line, or separated by
;or spaces. You can paste anywhere on the page; you do not need to click in the box first. - The toolkit checks each URL as you go. Under Sites to add, each row shows the site title, path and template. A green tick means the site was found. A red ! means it could not be reached with this connection. A site already in the toolkit is greyed out as Already added and skipped.
- Select × at the right of a row to remove it. If a site is flagged but you know it is real, for example access is being granted later, select Keep to add it anyway.
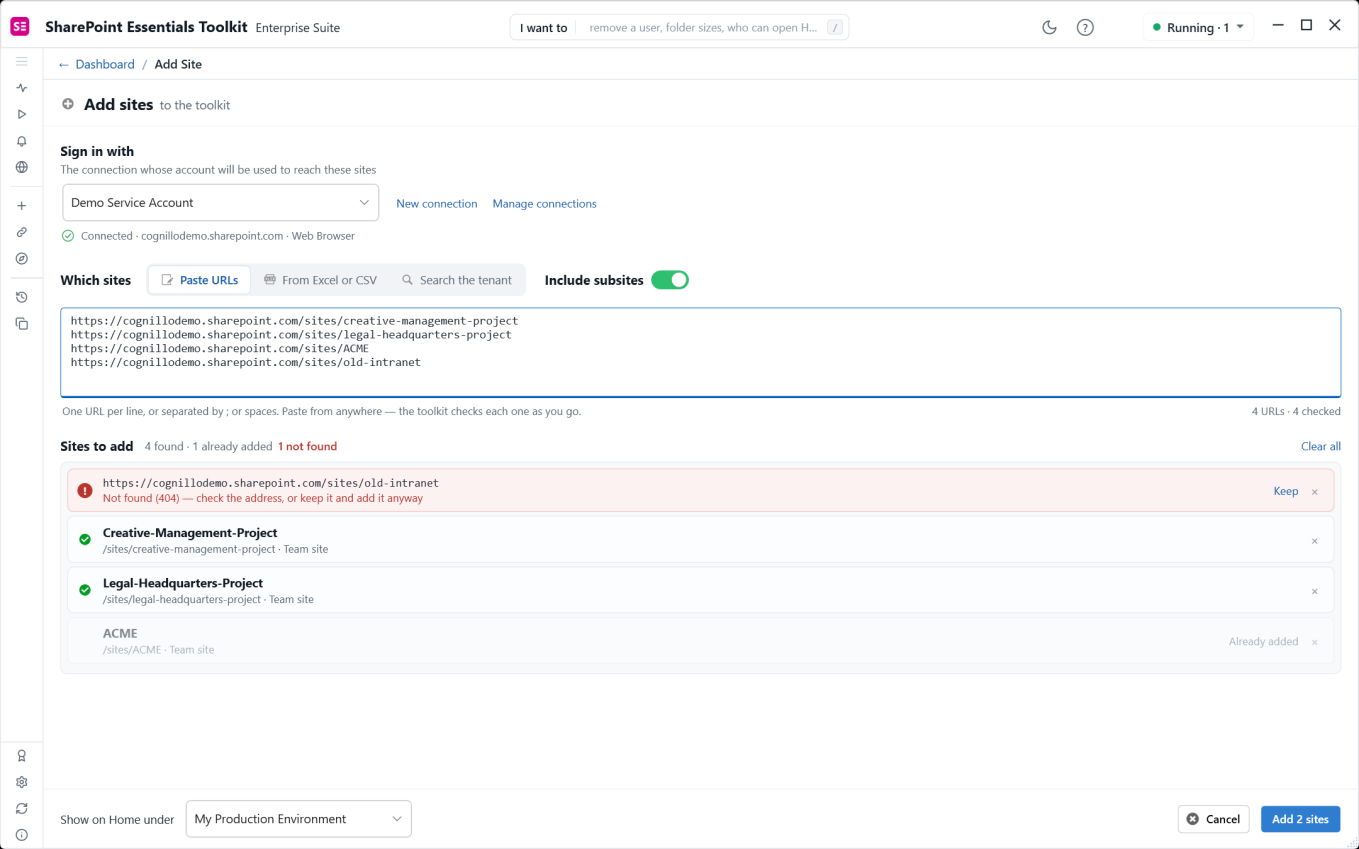
Figure 3. Four URLs pasted. One returns Not found (404) and can still be kept, two were found, and ACME is already in the toolkit.
The counts beside Sites to add include every address entered. In Figure 3, 4 found · 1 already added · 1 not found means four URLs were read, and two will be added. The number on the Add button is the one to trust.
Option 2 — From Excel or CSV
Use this for a tenant inventory, migration plan, or governance spreadsheet.
- Select From Excel or CSV, then Choose a file. You can also drop an
.xlsxor.csvfile anywhere on the page. - The toolkit reads the file, skips the header row, and picks the column that looks like site URLs. The chosen column shows how many values look like sites. If it picked the wrong column, select a different letter under URLs are in.
- The addresses appear under Sites to add. Subsites come from the Include subsites switch, so they do not need to be in the file. Select Change file to load a different file.
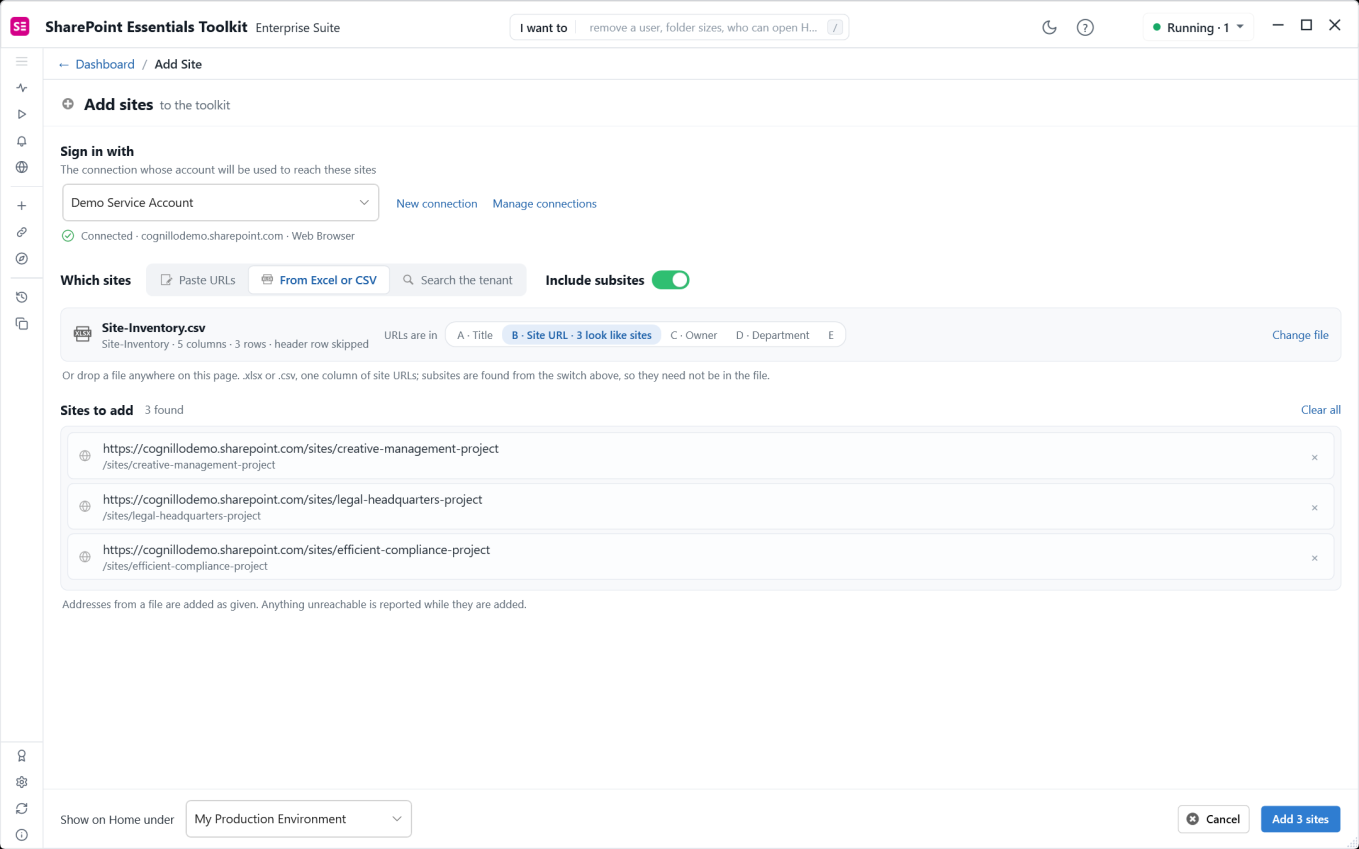
Figure 4. A CSV inventory with URLs in column B. The header row was skipped and three addresses are ready to add.
Addresses from a file are added as given. They are not checked one by one before you select Add. Anything unreachable is reported while the sites are added, so a long list does not have to wait.
Option 3 — Search the tenant
Use this when you do not know the URLs, or want to add every site the connection can see.
- Select Search the tenant.
- Type part of a site title or URL, for example
HelpDesk,financeorproject, and select Search or press Enter. Leave the box empty to list every site the connection can see. - Every match is ticked. Untick the sites you do not want. The link above the list reads Clear selection when every match is ticked, and Select all when some are not. To pick only a few, select Clear selection and tick the ones you want. Sites already in the toolkit are greyed out as Already added.
- With a long result list, type in Filter these results by title or URL to narrow what is shown.
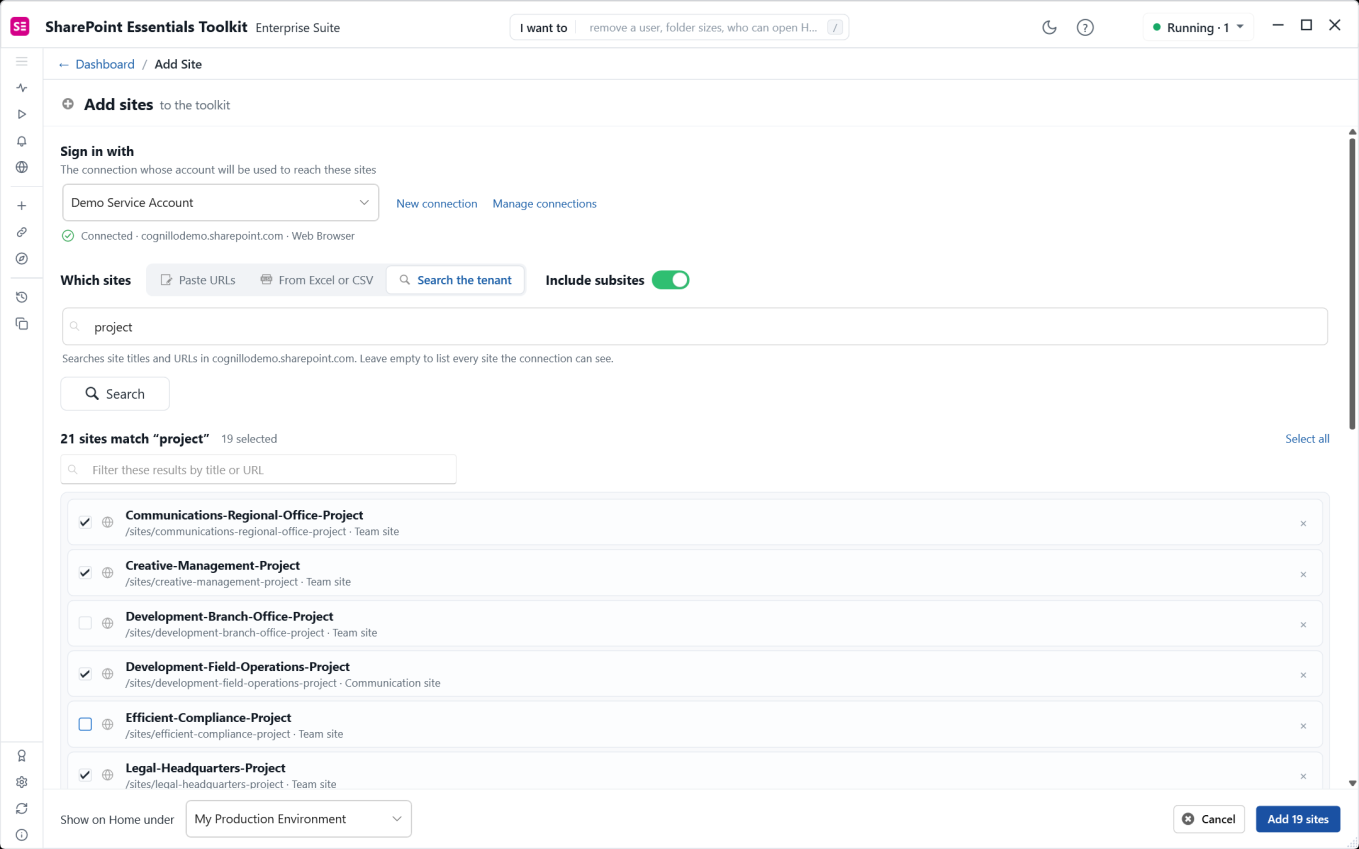
Figure 5. A tenant search for project. 21 sites match and 19 are ticked; the button adds only the ticked sites.
Add them
- Under Show on Home under, pick the group the sites should go into. Groups keep a long site list manageable, for example by environment, department or project. To create a group, type a new name.
- Select Add N sites. The number on the button is exactly what will be added, after duplicates and removed rows are taken out.
Each row reports its result as it finishes: Added, with the number of subsites included, or the reason it was skipped. The footer gives the total. To stop a long run, select Stop. Sites already added stay added, and the rest stay selected so you can carry on later.
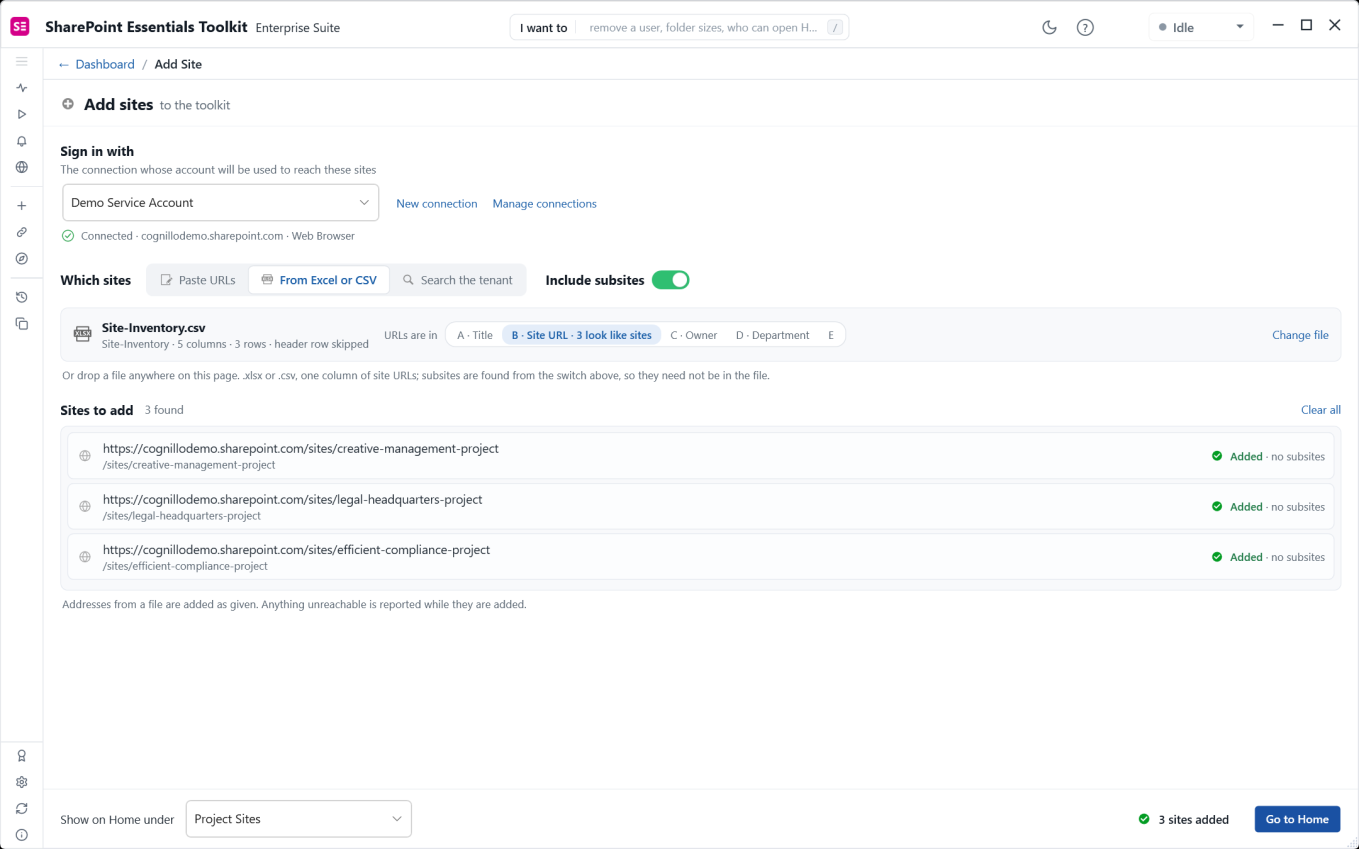
Figure 6. Three sites added to a new group, Project Sites. Go to Home opens the Tasks page, ready to start a task.
Select Go to Home to open the Tasks page and start a task against the new sites. Every Add Sites run is also recorded in History, and the latest one appears under Pick up where you left off on the Tasks page and Dashboard.
Where your sites appear
Tasks, Pick sites — After you choose a task, the Pick sites step lists every site you have added, under its group. Tick the sites the task should run on.
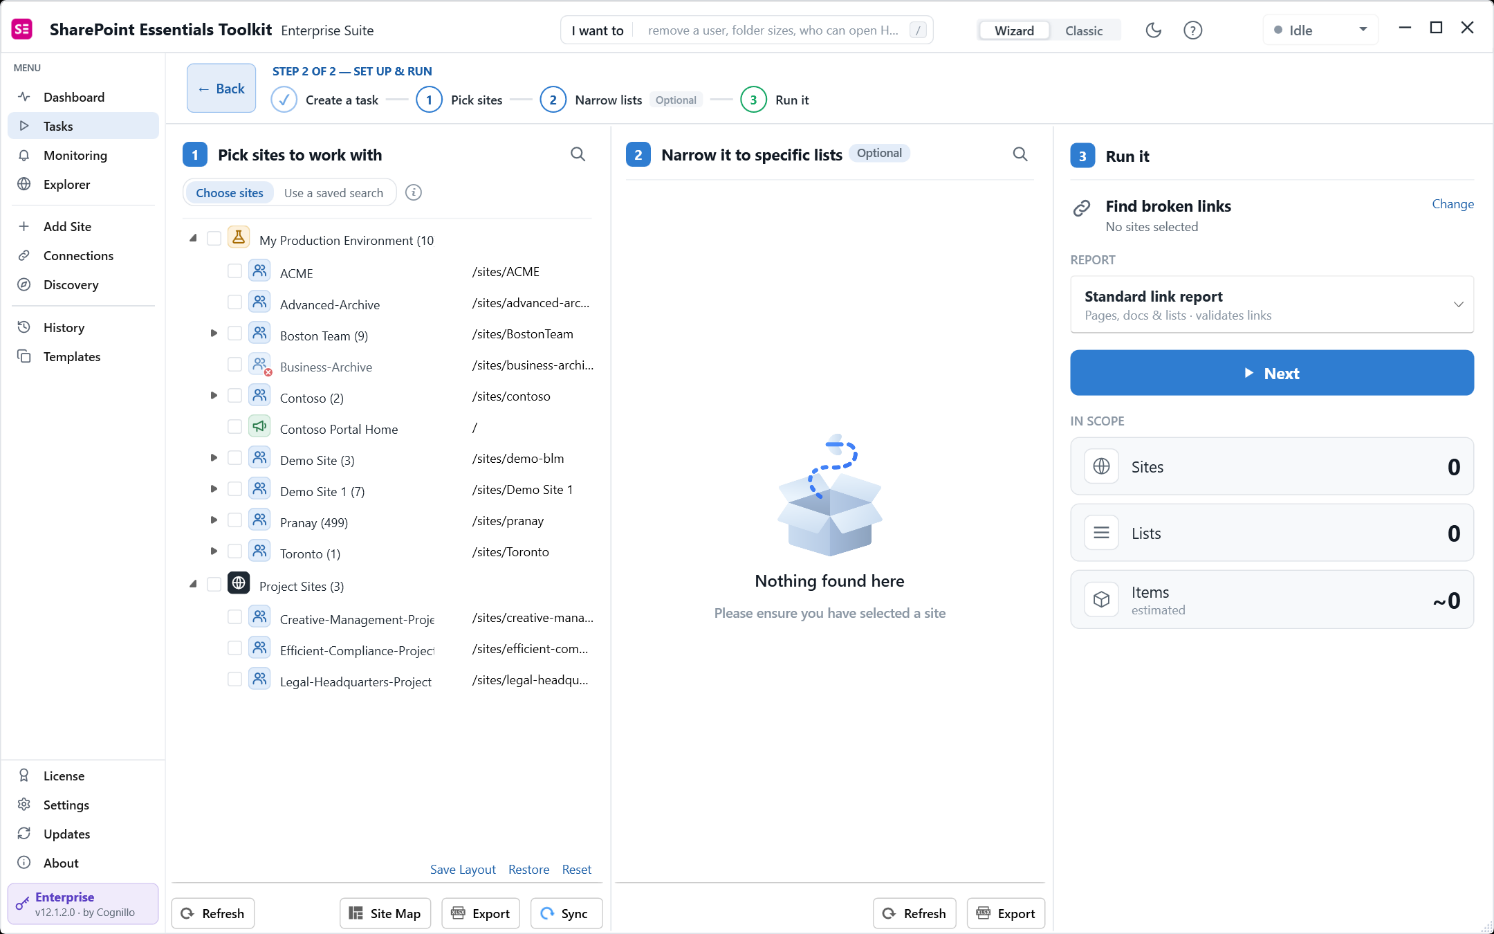
Figure 7. The Pick sites step on the Tasks page. Project Sites holds the three sites added in Figure 6.
Dashboard — The Site group picker at the top chooses which group of sites the Dashboard summarizes.
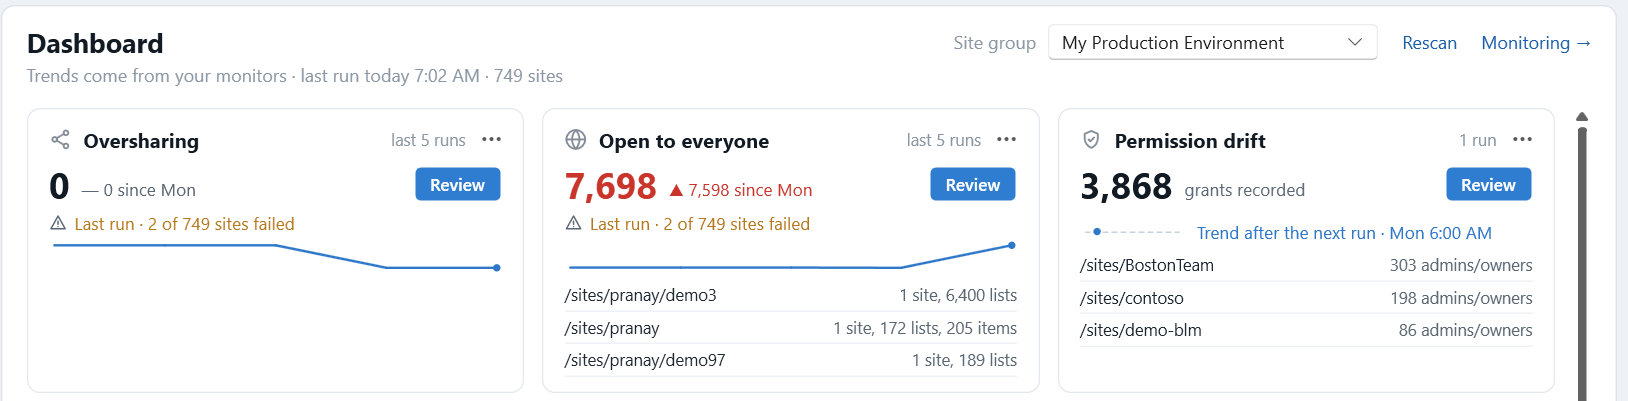
Figure 8. The Site group picker on the Dashboard.
Explorer — Browse the sites, lists and libraries you have added, and their permissions.
Change or remove a site
Right-click a site in the Pick sites list. The menu has:
- Open in SharePoint, Copy link — Open the site in your browser, or copy its URL.
- Sync this site — Refresh the site's lists and subsites from SharePoint, for example after new libraries were created.
- Add site, New group, Move to group — Add more sites, create a group, or move the site to another group.
- Remove from toolkit — Choose This site or the ticked sites, for example 2 selected sites. The sites are taken out of the toolkit and new jobs. Nothing changes in SharePoint, and reports that used the sites are kept.
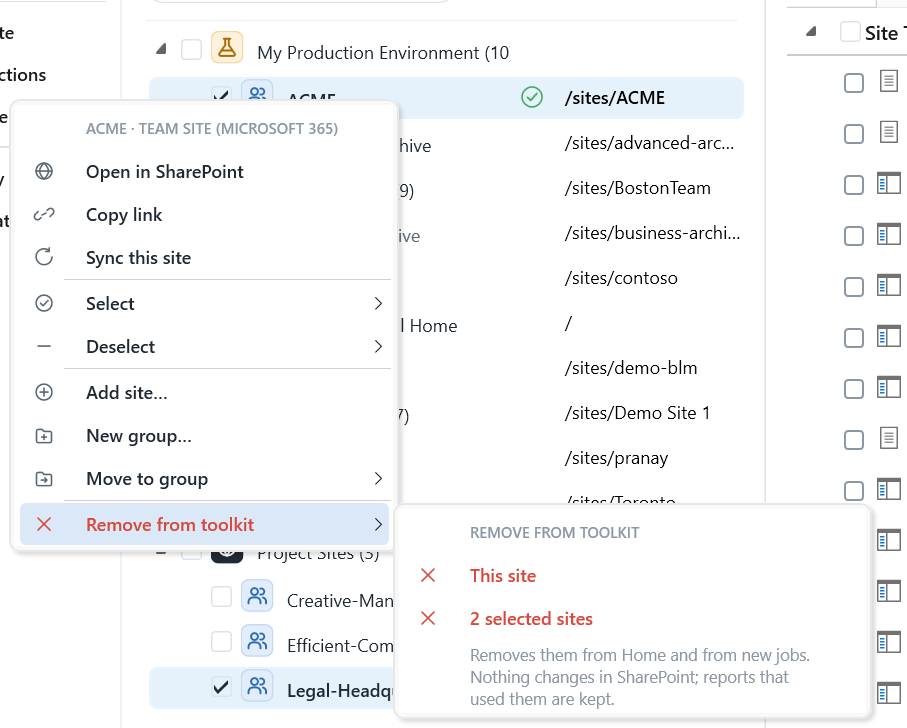
Figure 9. Right-click menu on a site. Remove from toolkit can remove the site you clicked or all ticked sites.
Don't want a fixed list? Use a saved search
Everything above adds sites once: the list is fixed when you select Add. If your tenant keeps changing, use a saved search instead. It runs SharePoint Search when a task starts and finds matching sites each time, so new sites are picked up automatically and nothing has to be re-added.
Create one
- Select Discovery in the left menu.
- Pick a card under Start from, for example Team sites, Created in the last 90 days, or Sites matching a URL pattern. Alternatively, select New search to write the rules yourself.
- Set the rules, for example URL contains
/sites/proj-, template is Team site, created in the last 90 days. Run it to preview the results, then save it with a name you will recognize.
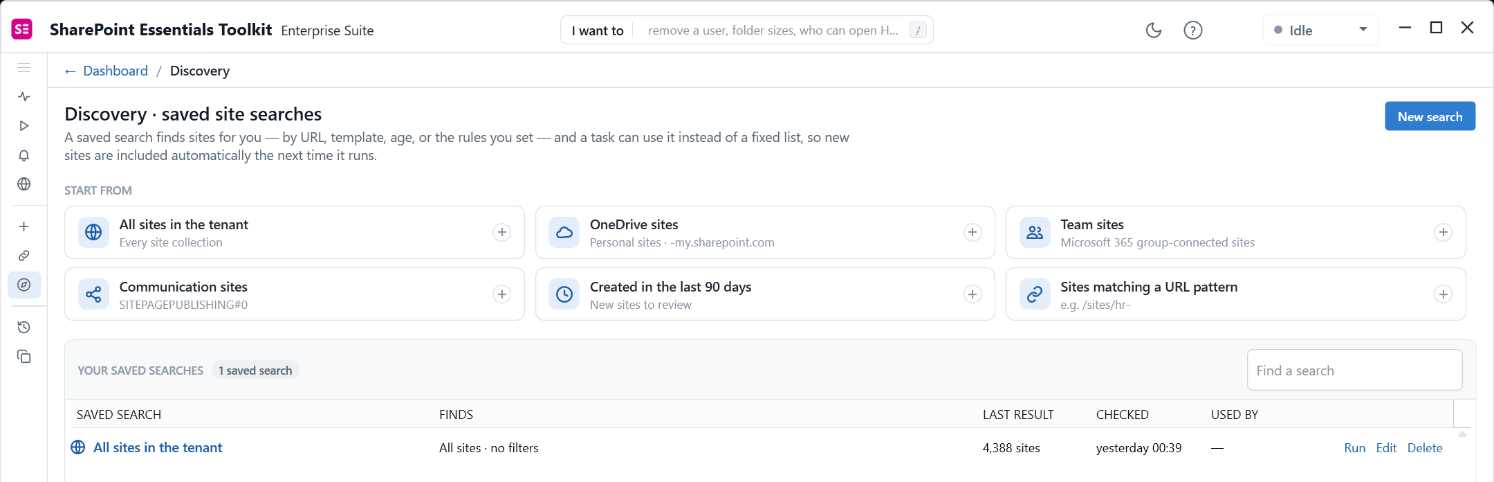
Figure 10. The Discovery page. Start from a common search, or select New search. Saved searches list their last result and when they were checked.
Use it in a task
- Open Tasks and choose a task, for example Permissions report.
- On the Pick sites step, switch from Choose sites to Use a saved search.
- Pick your saved search. It shows what it found last time, and the task runs the search again when it starts.
Because the sites are not known until the task runs, you cannot tick individual lists ahead of time. Choose which kind of list to include instead; it becomes the task's list filter. To go back to a fixed set, switch back to Choose sites.
Tips
- Adding sites from a second tenant? Create a connection for it first using New connection, then pick that connection under Sign in with before you paste or search.
- Thousands of sites? Use Search the tenant with an empty box, or import your inventory spreadsheet. The page lists the first batch and counts the rest; problems sort to the top.
- Site shows a red !? Check the address and connection's access. Grant the account access, switch to a connection that has access, or select Keep to add the address and resolve access later.
- A site shows Already added? It is already in the toolkit, possibly in another group. Use Move to group from the right-click menu to change its group.
- Added the wrong site? Right-click it in Pick sites and select Remove from toolkit.
Questions? Contact support@cognillo.com.