How to Create a SharePoint Permissions Report
Last updated: 2026-10-08
Step-by-step guide to creating a SharePoint permissions report using SharePoint Essentials Toolkit 2026.
Learn how to generate a comprehensive SharePoint permissions report using SharePoint Essentials Toolkit, covering site, list, library, and item-level permissions.
Introduction
Creating SharePoint permission reports using the SharePoint Essentials Toolkit is quick and easy. This article walks you through the steps to create your first permission report.
Note: Items, files, pages, and folders that have inherited permissions do not appear in the report. Only those with unique permissions are shown. This is by design to reduce report size. SharePoint Sites, Lists, and Libraries will show both inherited and uniquely defined permissions.
SharePoint Online only: Domain Group members (including Teams & Microsoft 365 Group Owners and Members) will not be displayed unless Azure App Registration is configured. Azure Entra ID requires app registration before the SharePoint Essentials Toolkit can read Azure resources such as domain groups and their members. See the user guide for setup instructions.
Step-by-Step
Select one or more SharePoint sites.
Optional: Select specific SharePoint lists from Live Explorer to include in the report. If none are selected, all lists are included automatically.
Go to the Manage section and click Permissions, then Permissions Report.
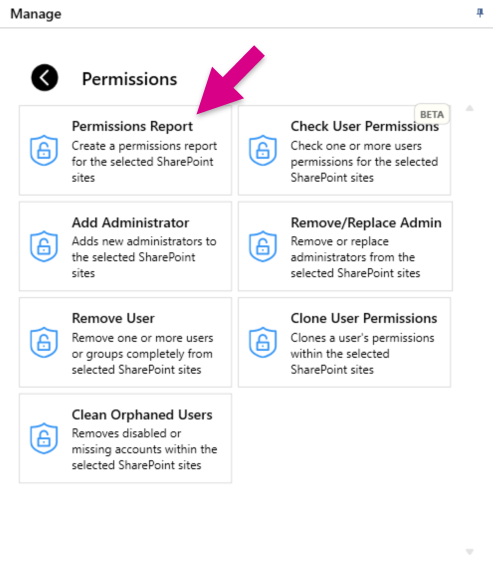
Alternatively: Right-click a site and choose Permissions → Permissions Report.
Review your selections. You can modify the Job Name, Selected Sites, and Selected Lists before proceeding.
Click Next: Options.
On the Job Options screen, select the options and types of information you wish to capture.
Tip: Hover over each option to see a description of what it does.
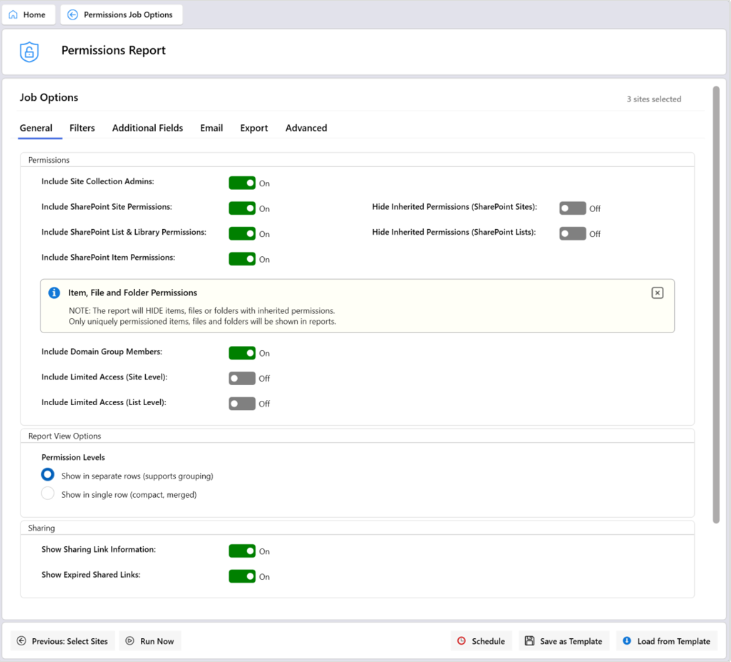
Click the Run Now button.
The report will populate with data. You can review the report while the job is still running.