How to Create a Test Case in Genta
Last updated: 2026-09-21
Step-by-step guide to creating, configuring, running, and saving a test case in Genta.
How to Create a Test Case in Genta
This guide walks through creating, editing, running, and saving a test case.
Before you start
Open Genta and select your project.
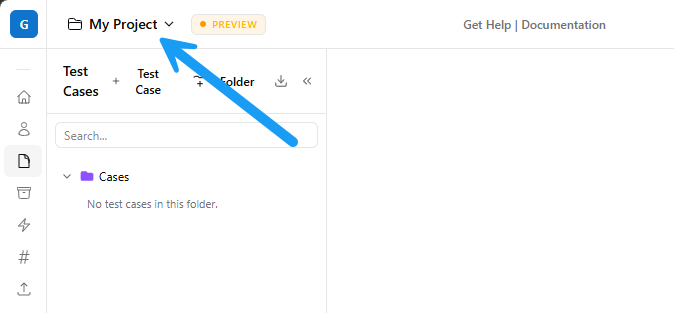
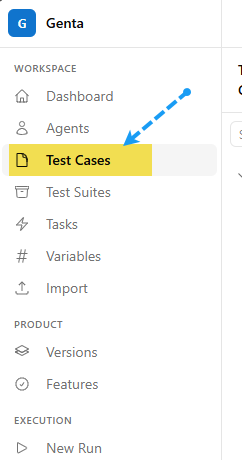
In the left sidebar, go to Test Cases.
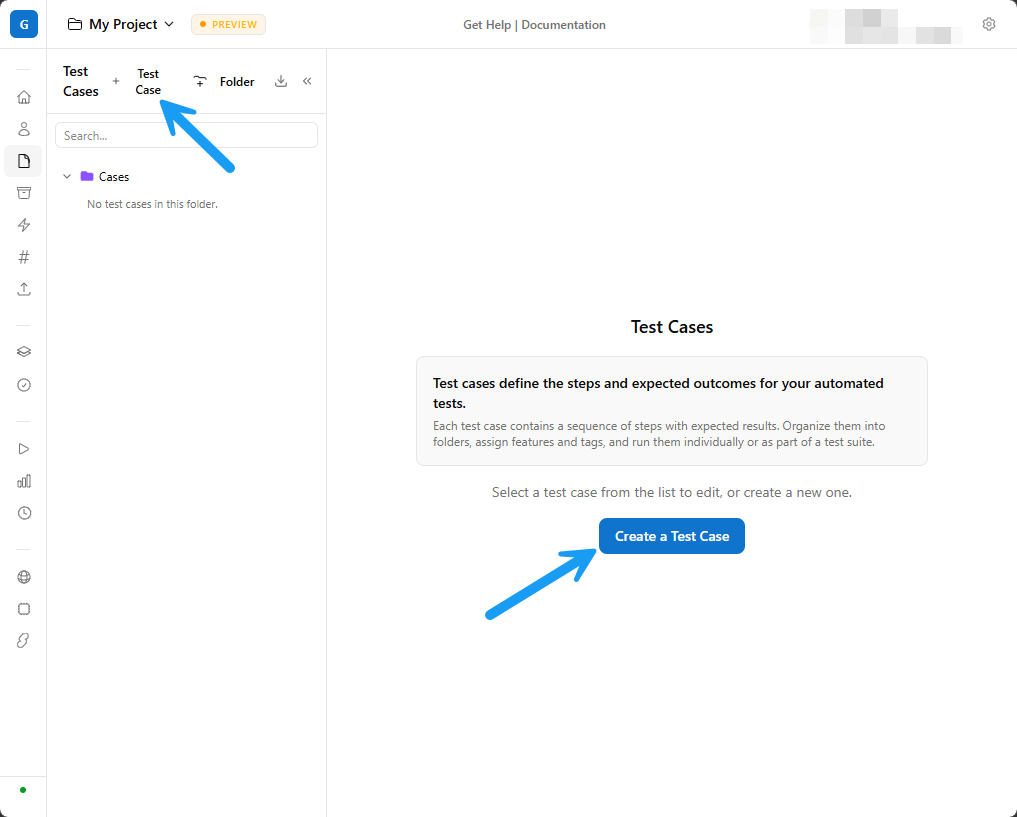
Create a new test case
In the Test Case Explorer, click the Case button (top-right of the explorer panel) or click "Create a Test Case" in main page area.
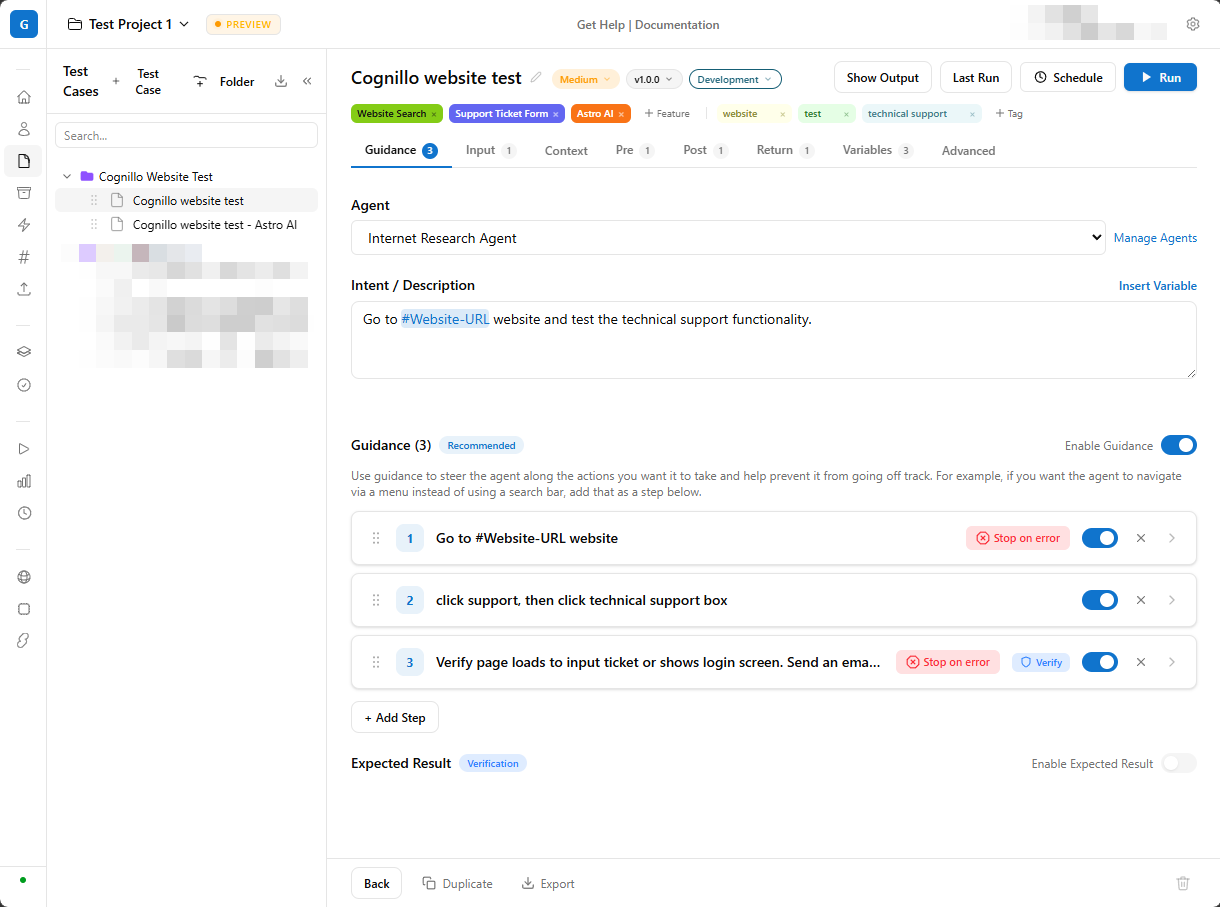
Select the new test case in the tree.
Enter a test case name.
Add your instructions in the Guidance tab.
Configure the case
Use these tabs based on your needs:
Input: define required inputs before execution.
Context: add context that helps AI understand intent.
Pre / Post: actions that should run before or after Guidance.
Return: configure what value the case returns. This can be used to pass values to another test case (in a Test Suite).
Variables: create and manage test case variables.
Advanced: advanced execution controls.
Run the case
Click Run in the case editor.
In the run modal, choose a target computer:
BYOC machine (if connected and idle), or
Genta Cloud Computers pool.
Set Max Iterations and optional Include screenshots in AI context.
Click Start Execution.
Save behavior
Test Case edits are auto-saved.
If auto-save is blocked by validation, fix the highlighted issue (for example, required fields).
Pro tips
Keep each case focused on one business flow.
Use clear expected outcomes in Guidance to reduce retries.
Reuse variables/tasks instead of hardcoding values in steps.