How to find specific links in SharePoint
Last updated: 2026-10-08
Use job options and filters to find specific types of links in SharePoint — filter by URL pattern, status code, link location, and more.
Learn how to search for specific links across your SharePoint environment using the Broken Link Manager in the SharePoint Essentials Toolkit.
Overview
The Broken Link Manager component in the SharePoint Essentials Toolkit lets you scan SharePoint sites and filter results to locate specific URLs. This is useful when you need to find and update outdated links, identify references to decommissioned servers, or audit links pointing to a particular domain.
There are three methods to find specific links.
Method 1: Apply a filter to the report
Use this approach to pre-filter the results to find the links you are looking for.
Step 1: Pick Sites to Include
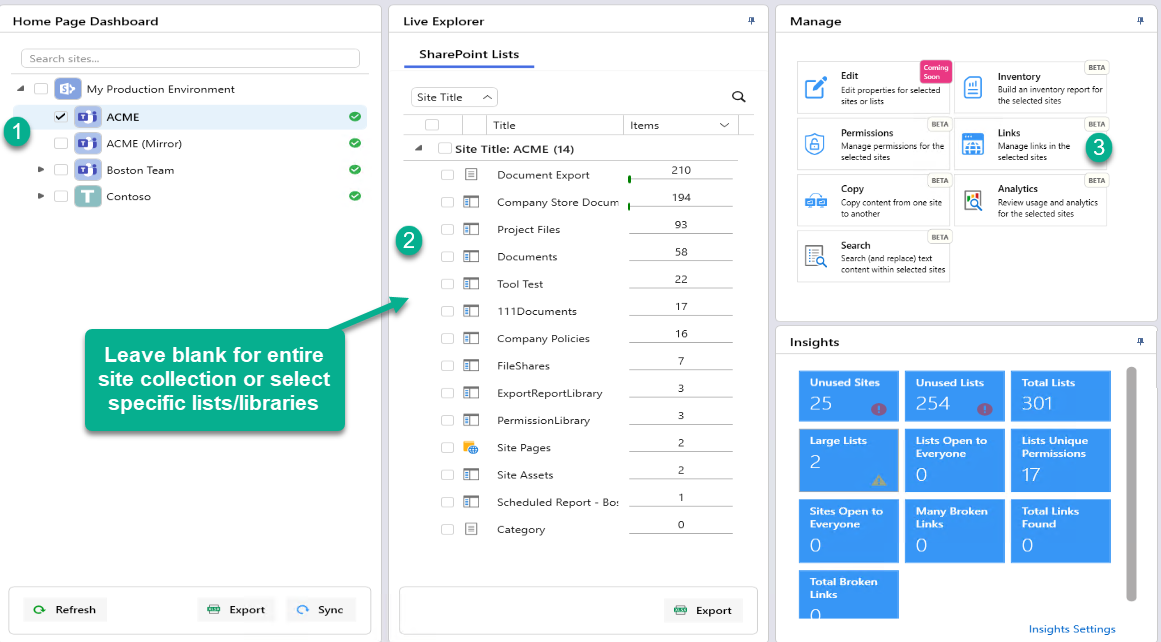
On the Home Page Dashboard, select the SharePoint sites you want to include in the job.
Optionally, check specific lists or libraries in the Live Explorer to narrow the scope. Leave blank to scan everything.
Navigate to Links → Find Links in the Manage section.
Step 2: Configure job information
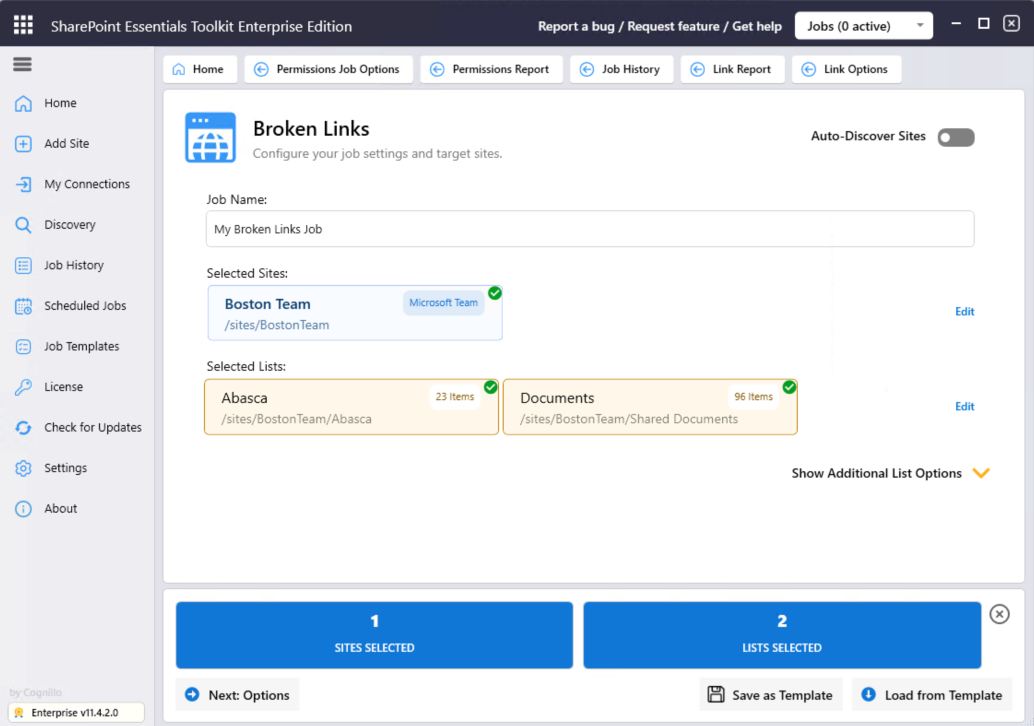
After clicking Links in the Manage tab, the first Job Options page will appear.
Job Name — give the job a meaningful name so you can find it later in Job History or save it as a template.
Selected Sites / Lists — review and adjust the scope if needed.
Auto-Discover Sites — enable this to automatically detect new sites during the scan.
Save as Template — save the job settings so you can re-run the same scan later.
Click Next: Options.
Step 3: Review job options
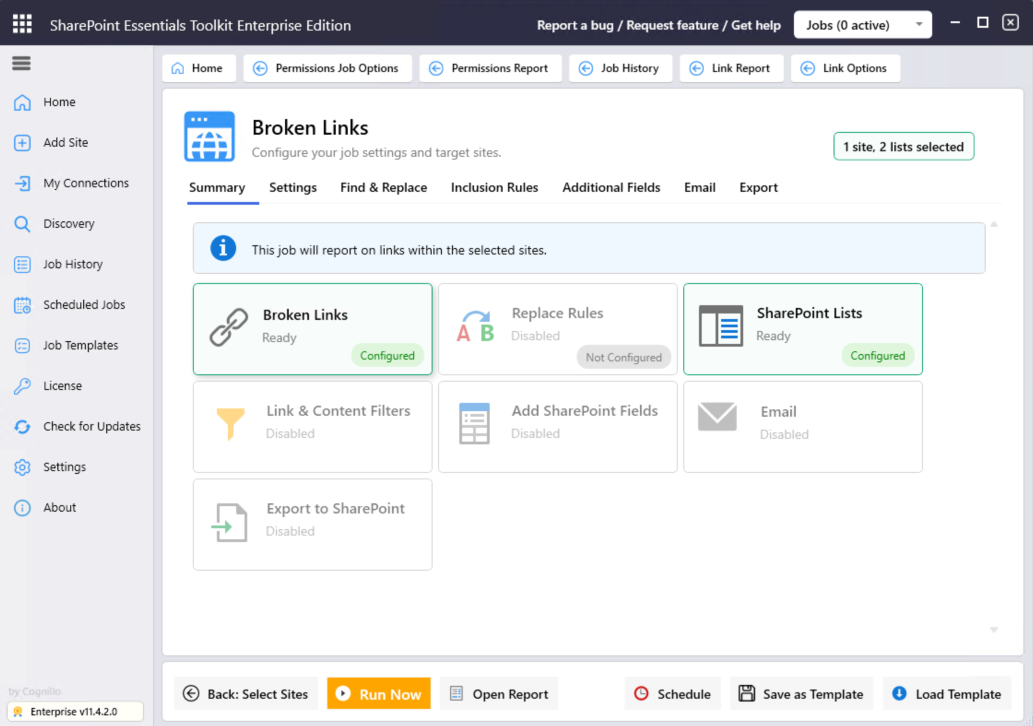
The Job Options page includes the following sections:
Summary — displays what options are configured for the job.
Settings — shows general options such as whether to validate links (check if broken or not) and link validation timeout settings.
Find & Replace — enter URLs to replace, flag items for review, and set versioning preferences.
Inclusion Rules — specify what to include, apply content filters such as folder level filtering, link filters, etc...
Additional Fields — allows user to include additional custom SharePoint metadata values in the report.
Email - allows user to send the report by email to users and teams.
Export - allows user to export the report to SharePoint as Excel or SharePoint list items
Step 4: Specify the links to find
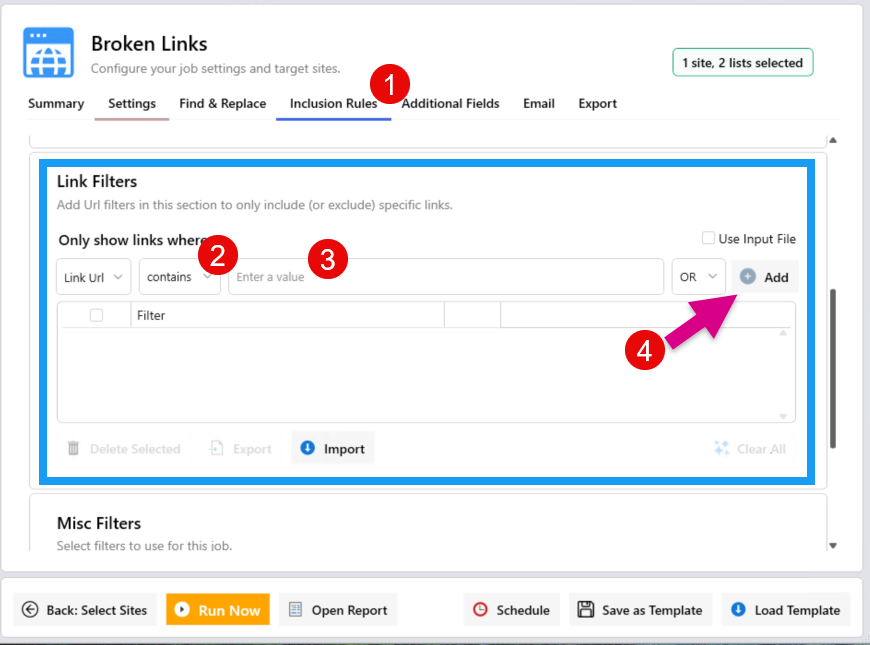
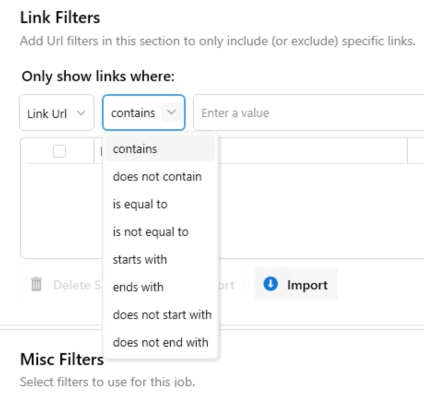
In the Inclusions tab, specify the links you are looking for. Do not add * for wildcards, use the 'Contains' option in the drop-down list.
Step 5 - Start the Job
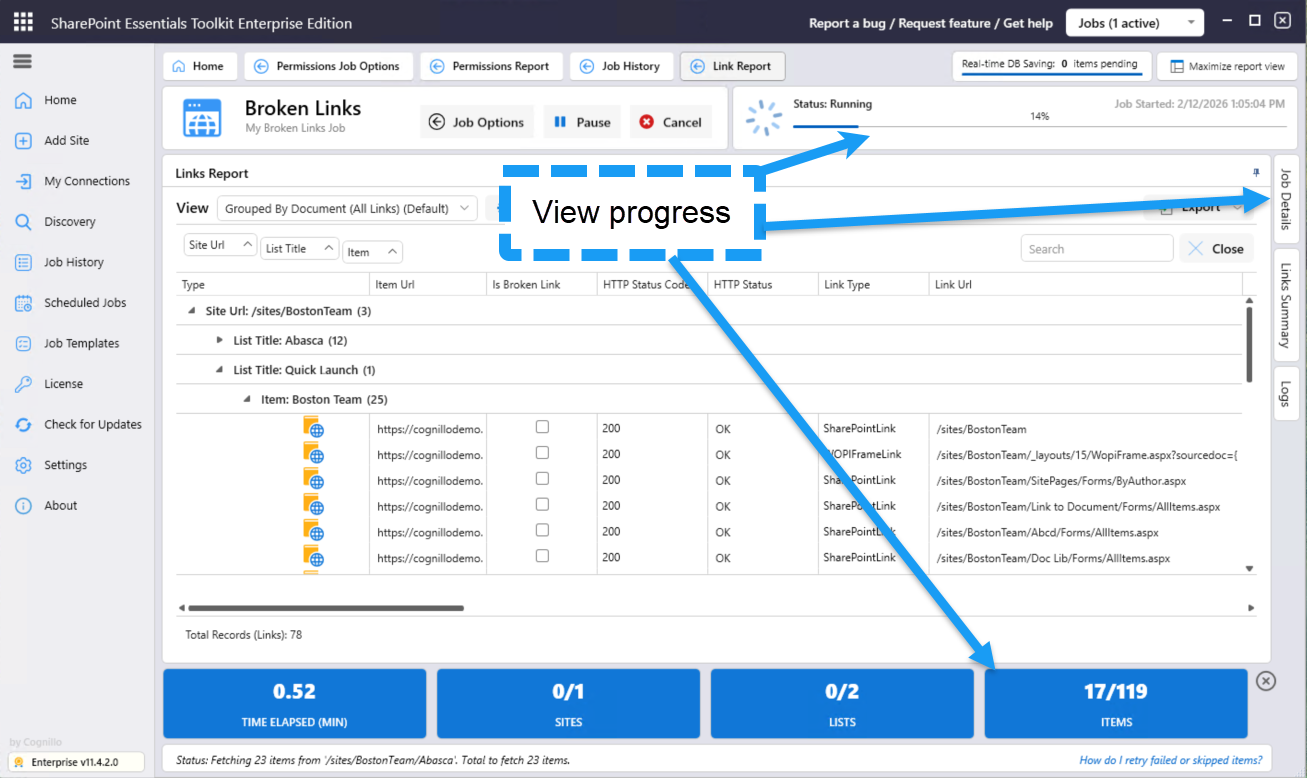
Click Run Now to start the scan.
Optional: Filter the results
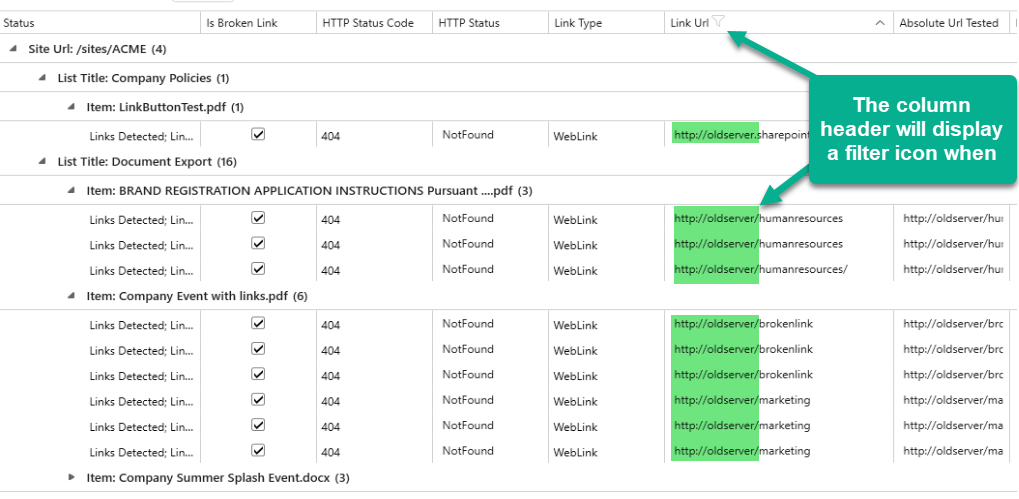
You can use this approach to skip the Link URL filter step above and instead apply a Link Url filter.
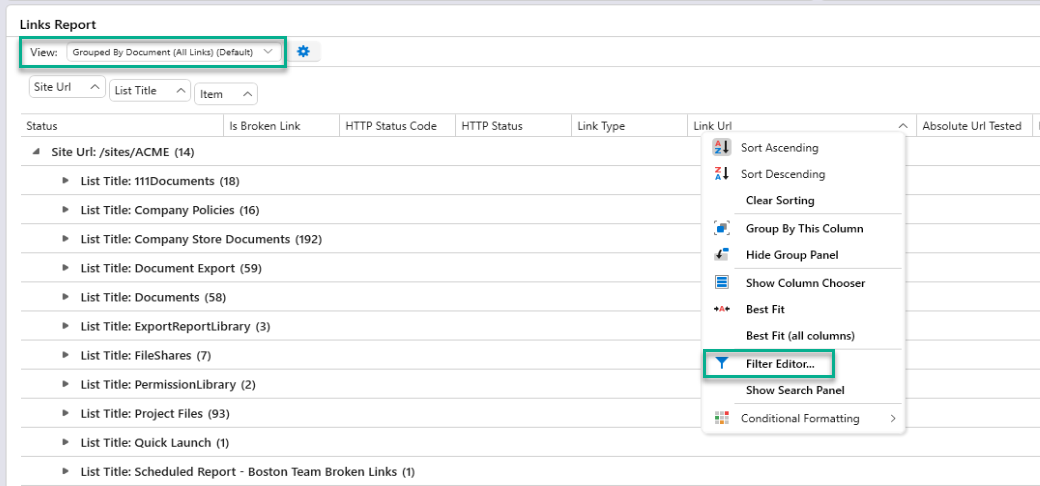
In the report view, right-click the Link Url column header and select Filter Editor.
Enter the URL or keyword you want to find. For example, entering
http://oldserverwill filter the report to show only links containing that text.
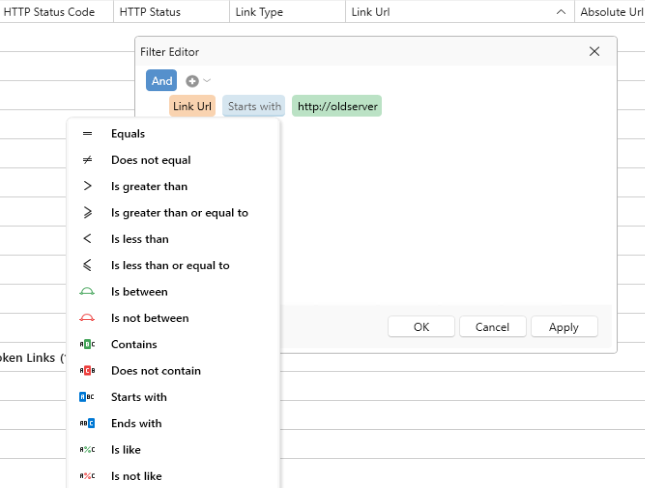
Click OK to apply the filter. Only matching links will be displayed.
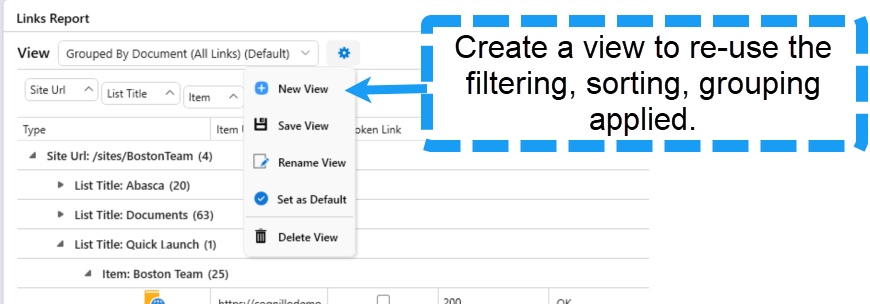
Click the gear wheel beside "View", then click "New View" to save your filter, grouping, and sorting settings. You can then reuse this view when scanning other sites, saving time on repeated searches.
Optional: Use Find & Replace to flag links
This method lets you flag specific URLs during the scan itself, so they appear highlighted in the report without needing to filter afterwards.
Set up a new Find Links job as described in Method 1.
On the Job Options page, open the Find & Replace tab.
Enter the URL you want to find — for example,
http://oldserver.Tick Flag Only to mark matching links in the report without replacing them.
Click Run Now.
Once the job completes, the report will highlight all links matching your search term.