How to Create a Sharing Links Report
Last updated: 2026-09-21
Learn how to generate a Sharing Links report to audit document sharing across your SharePoint environment.
Learn how to generate a comprehensive Sharing Links report using the SharePoint Essentials Toolkit - to audit and manage document sharing across your SharePoint environment.
Introduction
Sharing Links are created when a user clicks on a SharePoint document, page, or folder and selects Share. This automatically generates a "Sharing Link" and changes the permission setting on the item to "Unique," which breaks inheritance from the parent Document Library.
Having deep insight into Sharing Links across your SharePoint environment is crucial to prevent unauthorized access.
Azure App Registration is required to include all Sharing Link details outlined in this article. Without it, you can still generate Sharing Link reports, but some information—such as Sharing Link Created By, Sharing Link Blocks Download, and externally shared Sharing Links—will not be available.
Step-by-Step
Select one or more SharePoint sites.
Optional: Select specific SharePoint lists from Live Explorer to include in the report. If none are selected, all lists are included automatically.
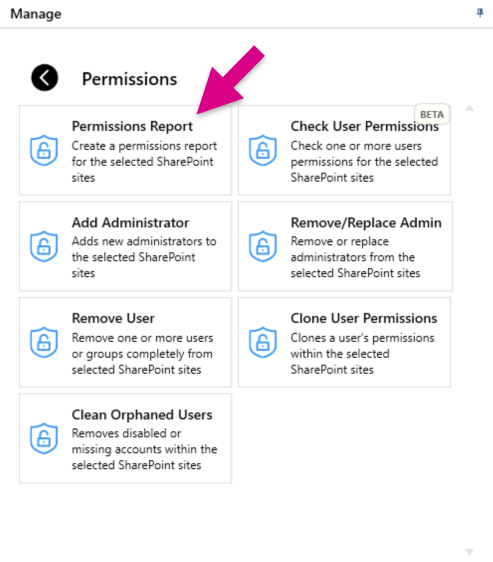
Go to the Manage section and click Permissions, then Permissions Report.
Enter the Job Name and any other job information.
Click Next: Options.
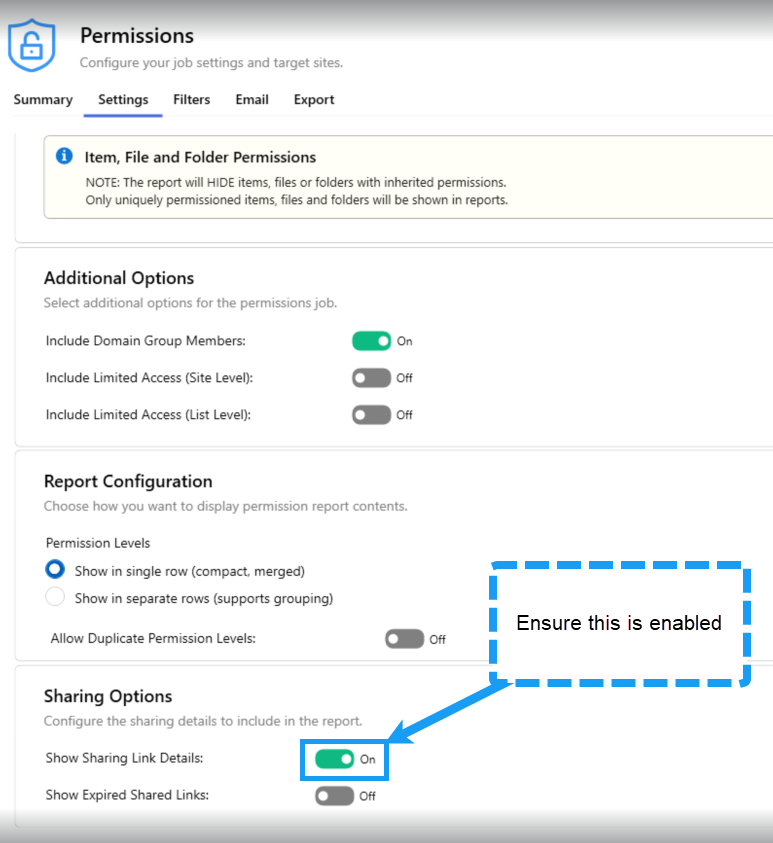
On the Job Options screen, click Modify.
Ensure Show Sharing Link Details is enabled.
Click the Run Now button.
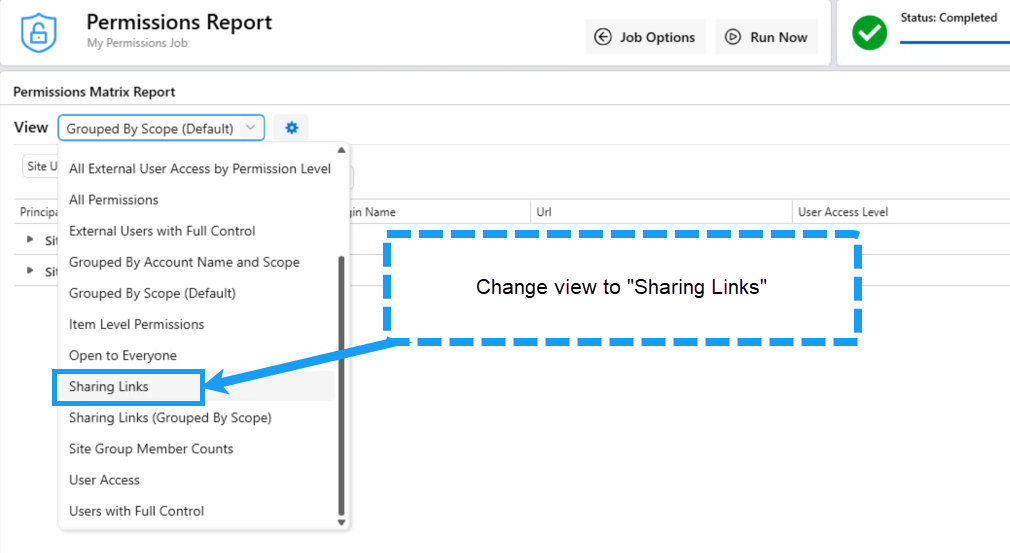
Once the report is populated with data, change the View to Sharing Links.
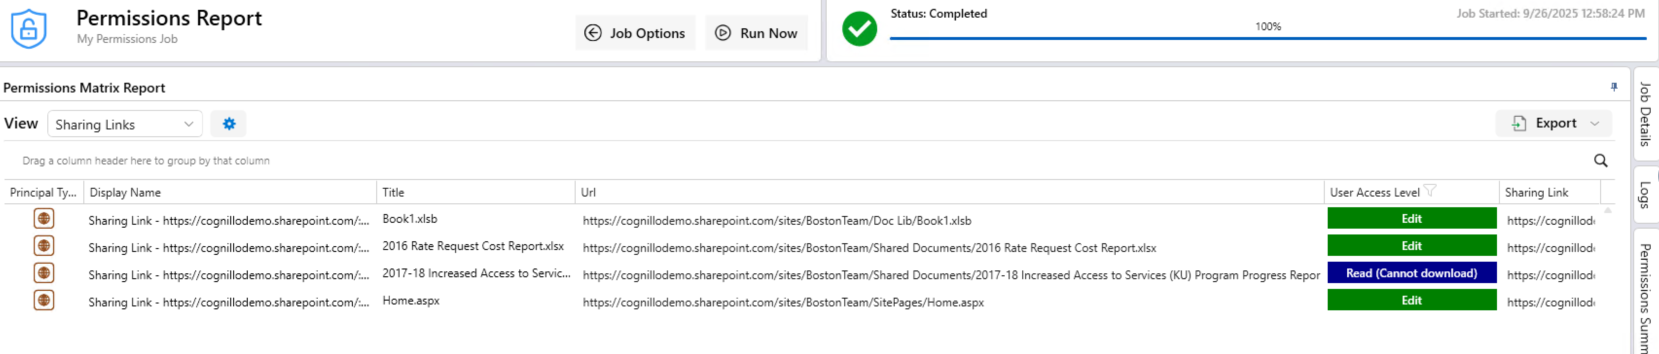
You can now view information such as the actual Sharing Link URL, the permission granted by the link, and who created it. Scroll to the right to view additional details.

Change the view to Access via Sharing Links to see which users were shared the links.
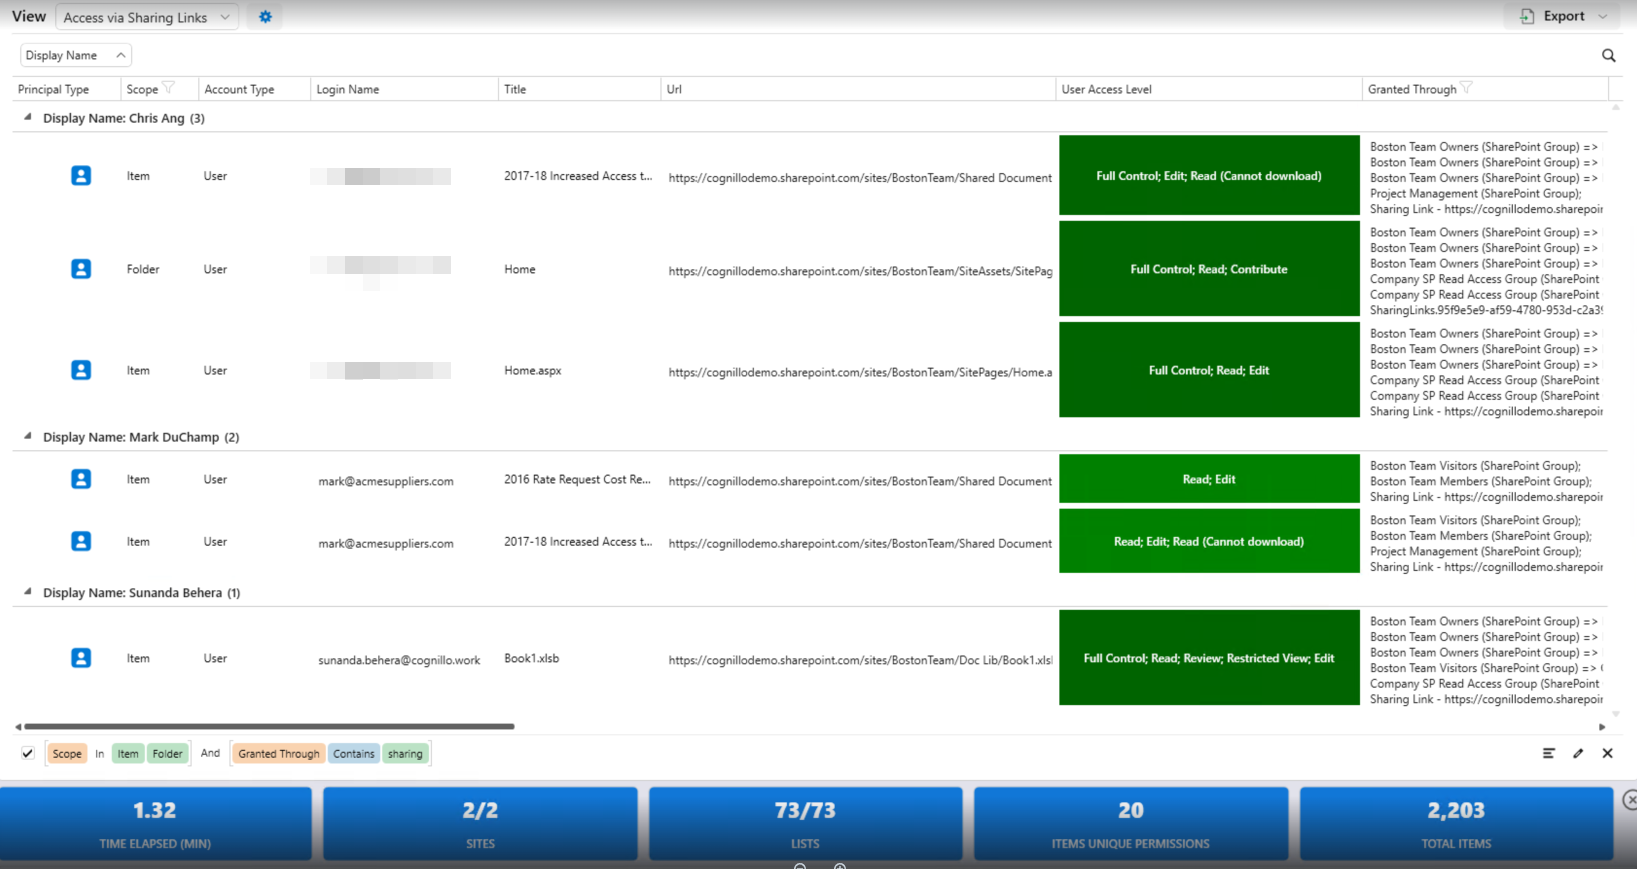
You can filter, sort, remove columns, and export the report as needed.