How to Fix Broken Links from a File Share Migration
Last updated: 2026-10-01
This article will help you with fixing links after a file share migration to SharePoint.
This article will help you with fixing links after a file share migration to SharePoint.
Introduction
With the SharePoint Essentials Toolkit, you can fix links after a migration from File Shares to SharePoint or OneDrive.
This is achieved by using the Broken Link Manager component within the toolkit.
Step-by-Step Guide
See this article first for basic find & replace concepts: https://www.cognillo.com/help/how-to-automatically-fix-links-in-sharepoint
Select the sites that you want to process (one or more sites). For testing, we recommend starting with one site selected.
Optionally select a SharePoint List or Library.
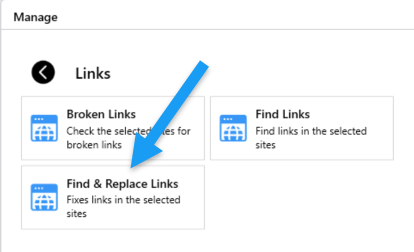
Click Links -> Find & Replace Links
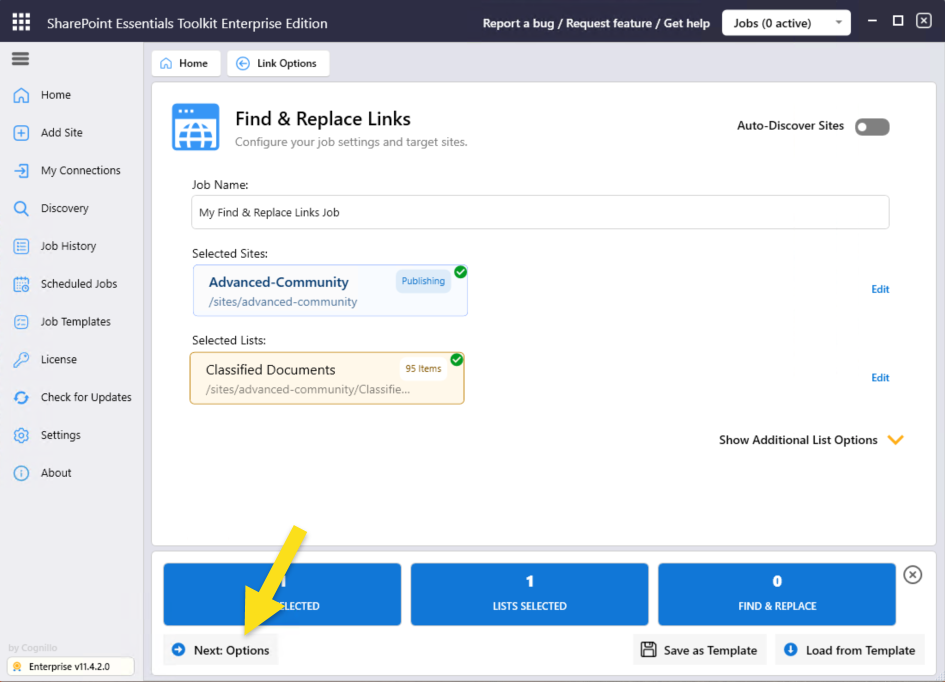
Review Job Settings and Click Next Options
Go to Inclusion Rules tab, turn off Navigation Links, Page Libraries, SharePoint Lists, and SharePoint Document Library Metadata. We only need SharePoint Document Libraries file content.
For File Share migrations, you likely only need to fix the links from uploaded/migrated documents in Document Libraries. Enable any options if needed.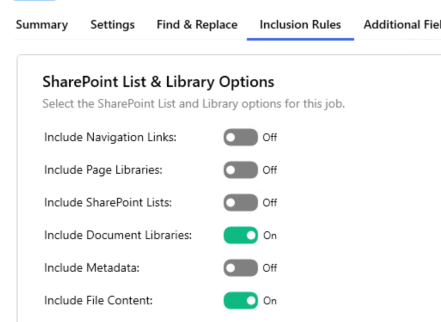
Expand Find Replace
NOTE on paths with "FILE:\"
In SharePoint Essentials Toolkit,
When you enter a UNC path in the INCLUSION RULES (URLs that start with \\ such as \\server01\public\finance\)
The following paths will automatically be considered, and you do not need to add these variations for each replacement rule:
File://
File:///
File:////
File://///
For example, if you add \\oldserver
The SharePoint Essentials Toolkit will automatically also discover these variations and replace them accordingly:
File://oldserver
File:///oldserver
File:////oldserver
File://///oldserver
Below you see in PDF it is stored as file://///oldserverBelow you see in MS Word it is stored as file://oldserver
These link variations will automatically be handled.Enter the file share path of server as an entry, example:
Here is an example where we have migrated the entire Finance department folder to a SharePoint Team site (default Shared Documents library):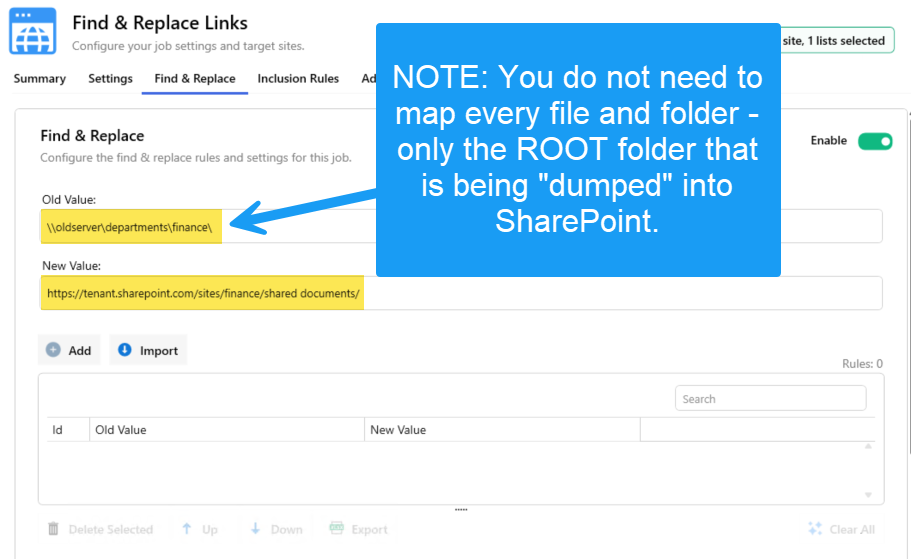
However,
Let’s say you also have a sub folder in Accounts Payable called "Reports" that is moving to a different location than the root folder, we can do this by adding that rule:
A good rule of thumb:
Ensure ALL Find Replace rules that have the most slashes, are at the top of the list. You can use MS Excel to make this easier and put all mappings there first.
Then import them into the tool using Import button in the Find Replace section.
See https://www.cognillo.com/help/broken-link-manager-links-not-picked-upClick "Add" button
Since the path slashes are different (forward slash vs. backslash), there is a safety mechanism alerting us of this, click OK to continue as we want to change path slashes.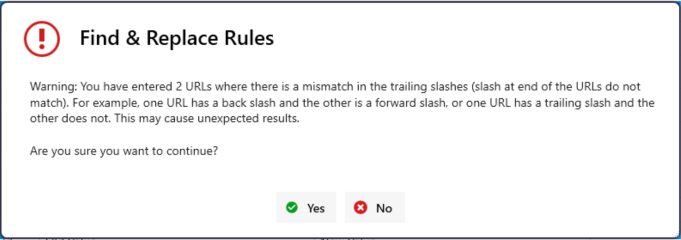
Next let's say we also have user folder paths we need to fix to point to their OneDrive folders.
IMPORTANT
MS Office tries to correct links automatically since MS Office 97. When uploading a file to SharePoint, mapped drives and local paths such as C:\ or P:\ links may automatically change from Screenshot A below to Screenshot B
Depending on how the path is saved originally in the MS Office document.
"For example, if the linked file C:\Mydir\Linked.xls is dependent on C:\Mydir\Files\Source.xls, the only portion of the path that is stored is \Files\Source.xls."References:
https://support.microsoft.com/en-us/help/328440/description-of-link-management-and-storage-in-excel
https://support.office.com/en-us/article/undo-automatic-formatting-54eba206-110c-445a-89f1-c4eb67a36bd4
Screenshot A
Source File: (before uploading to SharePoint)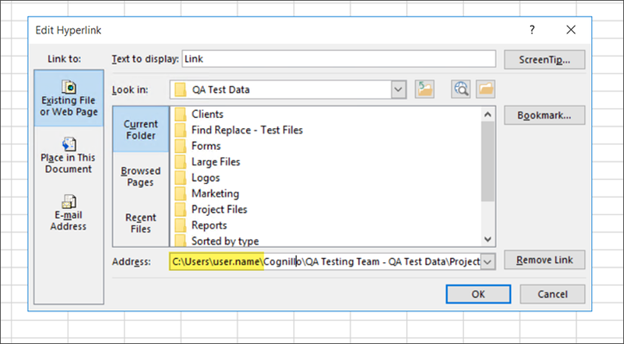
Screenshot B
Source File: (after saving in Excel)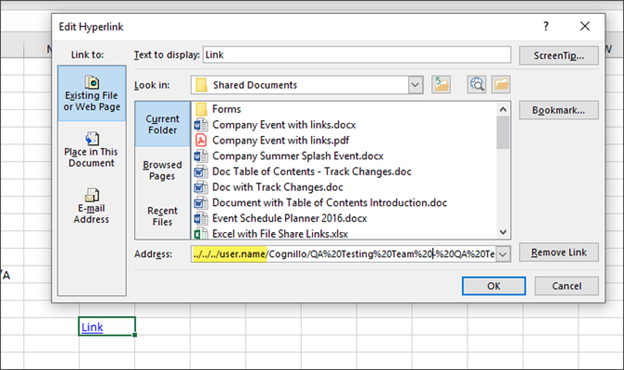
You will notice the slashes are changed and it becomes a relative path.
Depending on the migration tool or process used to upload the files,If the paths do not change
(If the path in the SharePoint site still shows the mapped drive letter as in Screenshot A above)Then set values as below:
Old Value = C:\Users\user.name\
New Value = https://contoso-my.sharepoint.com/personal/user-name/
If the paths changed automatically
(If the path in the SharePoint site still shows a relative URL now as in Screenshot B above)
Then we would replace these as standard http/https links and do a separate job for these by skipping step #7 above (do not exclude links with forward slashes '/' ).
Then set the values as below: (in a NEW Job)
Old Value = ../../../user.name/
New Value = https://contoso-my.sharepoint.com/personal/user-name/