How to Automatically Fix Links in SharePoint
Last updated: 2026-10-15
Learn how to use Find Replace in Broken Link Manager to automatically fix broken, outdated, or migrated links across your SharePoint environment.
This article will help show you how to find and replace links in SharePoint using the SharePoint Essentials Toolkit.
Introduction
After running a “Broken Link” report the next logical step is to automatically fix the broken links with the correct values.
See this article for details on what is supported and not supported:
What Type of Links Does SharePoint Broken Link Manager Process?
The SharePoint Essentials Toolkit (SPE) can find links and fix them using the Broken Link Manager component. Note that the tool cannot automatically figure out what the correct link will be, the list of correct URL mappings must be provided. For migrations, you can use ‘partial mappings’ to fix most links. For example, https://oldserver/ => https://tenant.sharepoint.com will replace any link that contains that path.
Note that links do not have to be broken before the tool will fix/replace them.
In this Article
Fixing Links
Important Notes and Best Practices
Preserving Last Modified Information
Understanding the Report
Maintaining Valid Links
Recommendations
Performance Improvements
Fixing Links
Step 1: Select one or more SharePoint sites
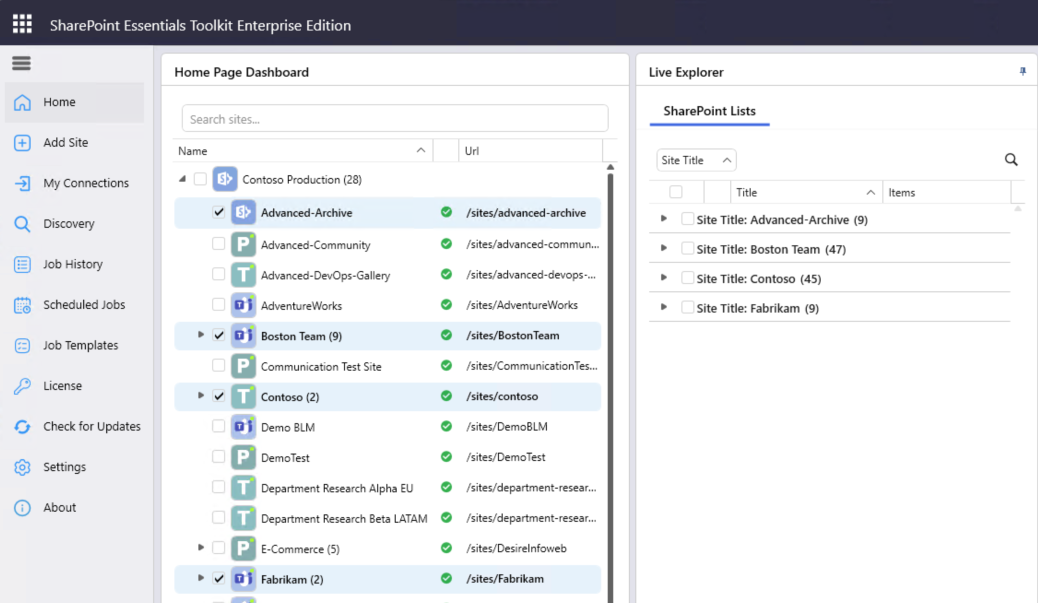
Select the sites to include in the job.
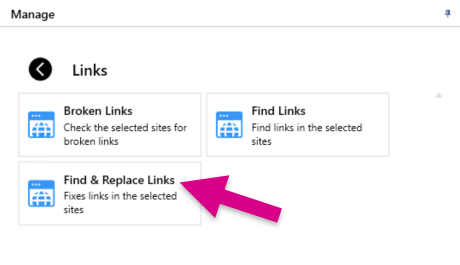
Click “Links” button on the right, then "Find & Replace Links".
Step 2: Review Sites & Lists Selected
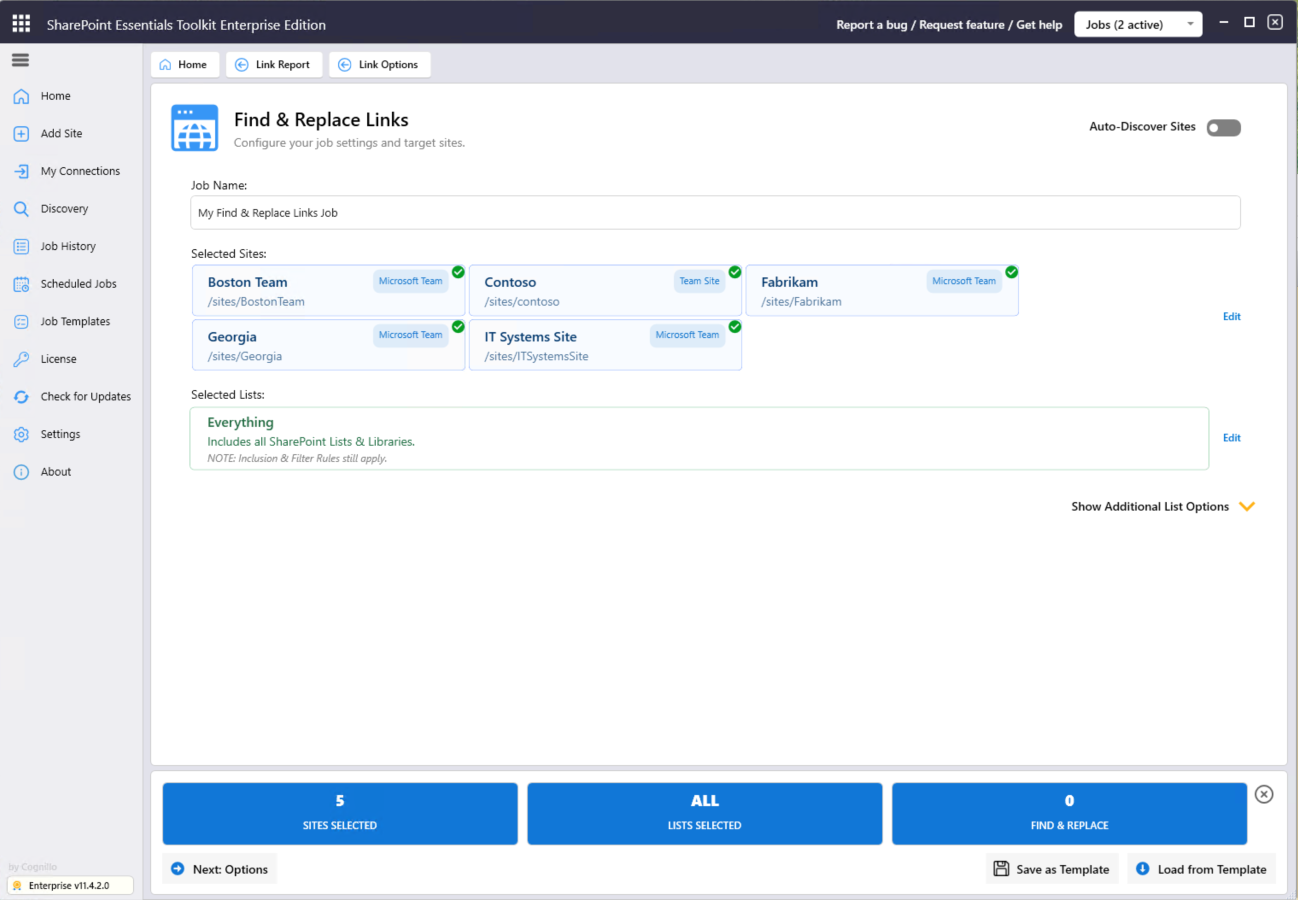
The Job Options page will appear.
Review the selected sites and lists, then click “Next: Options” to confirm the SharePoint sites and lists being processed and proceed to choose the job options.
Job Options: Tab Definitions
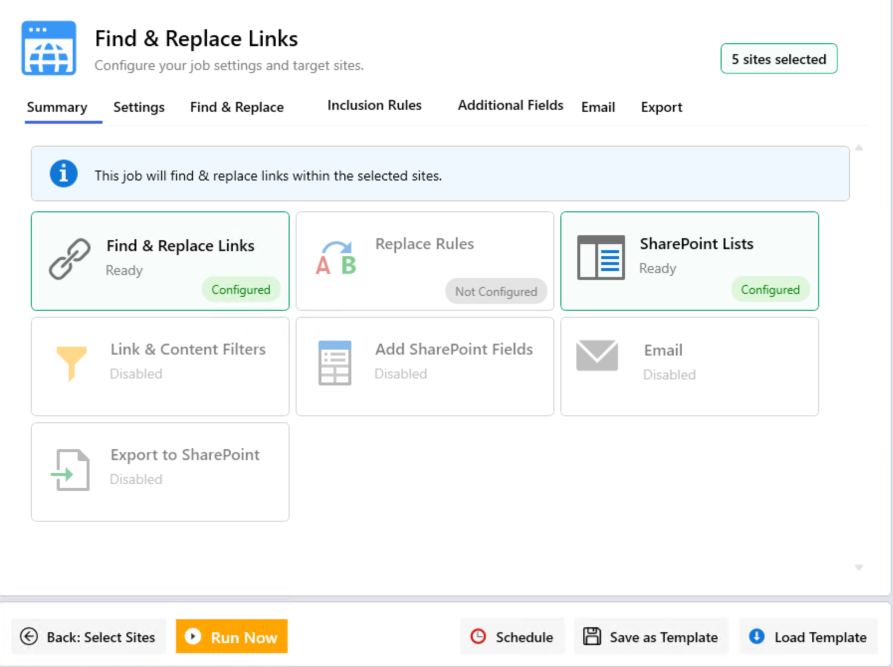
The Job Options page includes the following sections:
Summary — displays what options are configured for the job.
Settings — shows general options such as whether to validate links (check if broken or not) and link validation timeout settings.
Find & Replace — enter URLs to replace, flag items for review, and set versioning preferences.
Inclusion Rules — specify what to include, apply content filters such as folder level filtering, link filters, etc...
Additional Fields — allows user to include additional custom SharePoint metadata values in the report.
Email - allows user to send the report by email to users and teams.
Export - allows user to export the report to SharePoint as Excel or SharePoint list items
Step 3: Select What to Include
Click the "Inclusion Rules" tab
Here you can choose what SharePoint artifacts to include in the job.
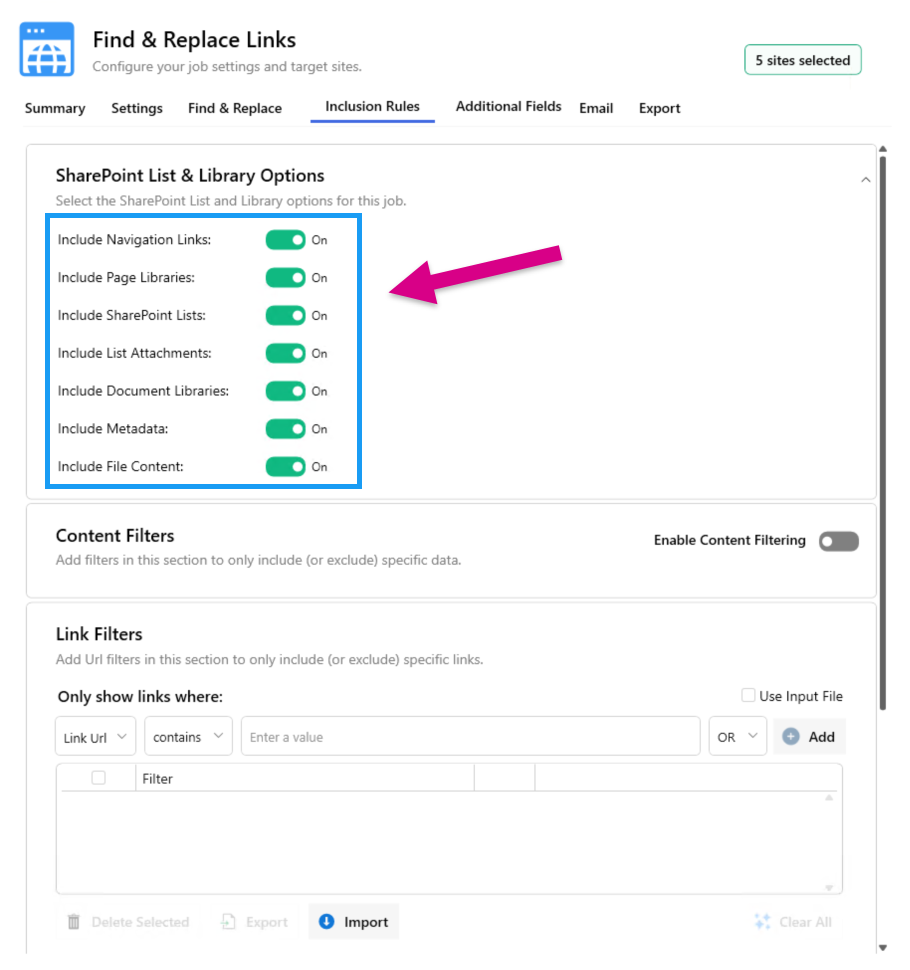
Step 4: Define Find & Replace Rules
Click the "Find & Replace" tab, and enable Find & Replace.
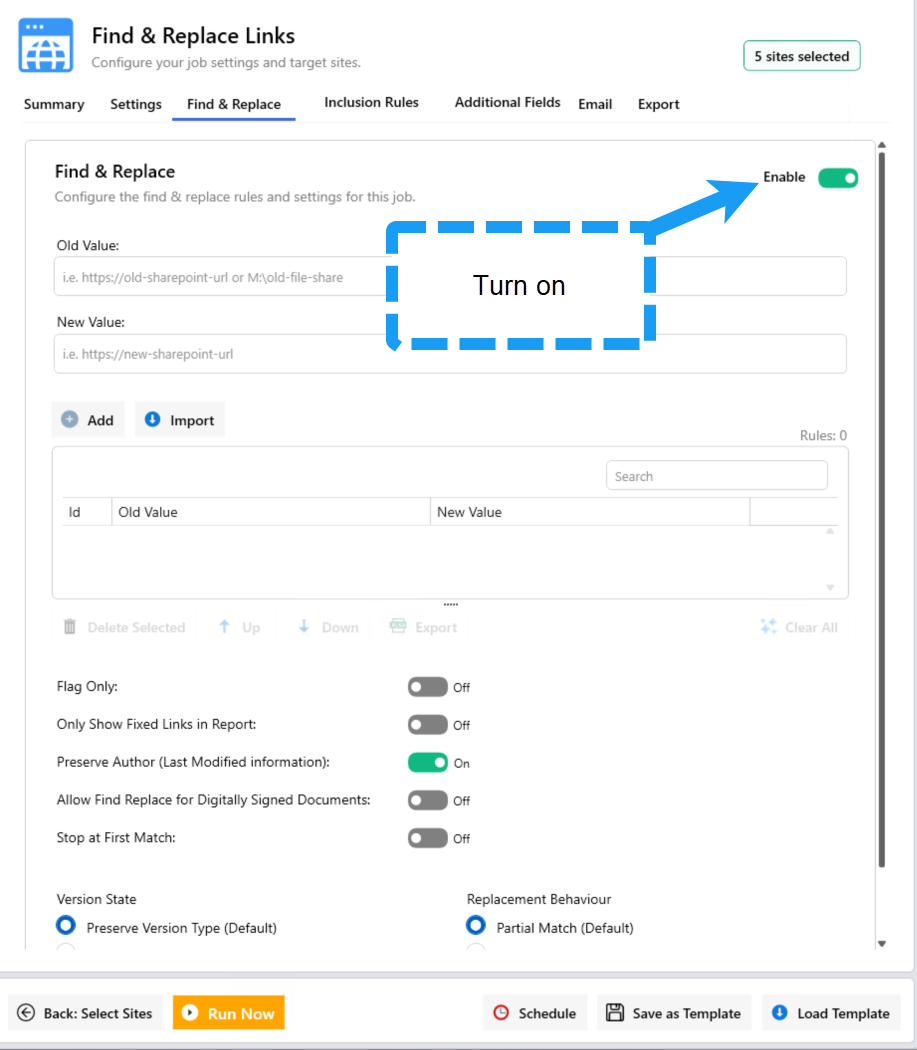
Enter the broken link, or an ‘Old Value’ to replace.
For example, if you have links that look like this:
https://oldserver/sites/hr/documents/folder1/myfile.xlsx
and you need to replace with
https://tenant.sharepoint.com/sites/hr/documents/folder1/myfile.xlsx
You would enter:
Old Value
https://oldserver
New Value
https://tenant.sharepoint.com
By default, the tool uses a ‘partial match’, meaning it will replace the portion of the URL that matches with the new value you provide.
The result of above, would be:
https://tenant.sharepoint.com/sites/hr/documents/folder1/myfile.xlsx
Don’t forget to click “Add”!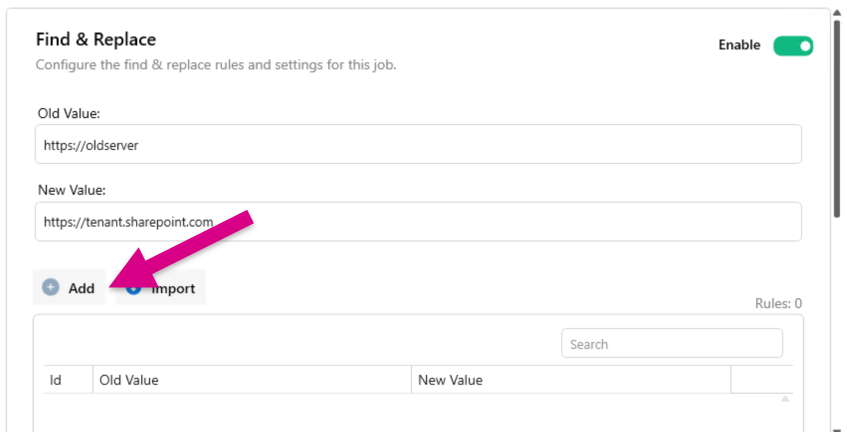
You can double-click an entry to edit it inline:
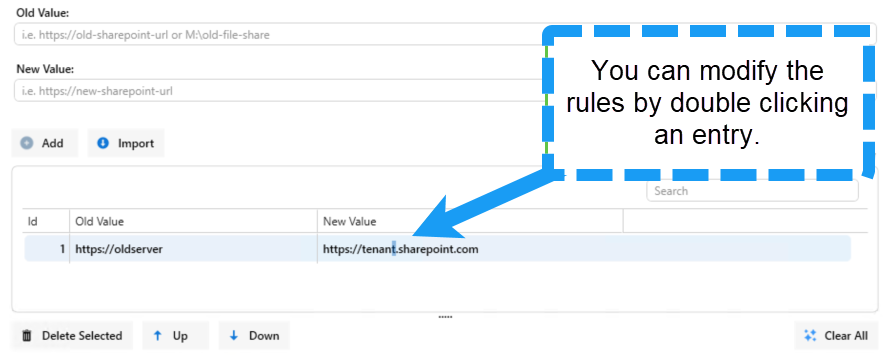
If you need to modify site URL (and not just the root site), or you need to modify the SharePoint list, folder URL paths, due to site name changes, promotion of subsites to site collections, list renaming, etc.. you can then proceed to add another rule.
For example, if this:
/sites/informationtechnology/
is being changed to
/sites/it/
You would then add that rule as follows: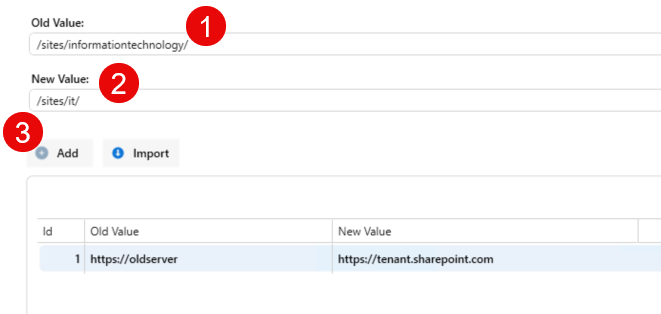
Important Notes and Best Practices
Exclude Unnecessary Content: Exclude lists that do not need to be processed. Do this in Inclusion Rules tab, Content Filters section .
NOTE: Microfeed, Style Library, and other system lists are already excluded.
Turn off options that are not needed: i.e. Unselect Metadata if it is not needed to be replaced.
Group sites by item count: Fix links in all smaller sites first to have them ‘completed first’. Group a lower number of the larger sites to have run separately.
Find & Replace: Split domain from relative site URLs and ensure the order of replacements are correct.
See this article for more info Broken Link Manager: Find Replace Not Working — Common Fixes
Find & Replace: Ensure you have Full Control (Site Collection Administrator) on all Site Collections in order to ensure Find & Replace works correctly and Preserve Author works (Preserve Author feature requires full control to work - this feature ensures last modified information is retained if a Find & Replace occurs).
Find & Replace: Perform Find & Replace on test data. Use the Flag Only option to preview changes before actually fixing links.
Find & Replace: Ensure users do not have documents checked out. Attempting to fix links in checked out documents will show errors in the report as the tool cannot modify a document that is checked out. If the tool is able to edit the checked out document (it is checked out to the current user), the tool will be able to make changes and check in as needed.
Find & Replace: To retry failed items/files/pages, see this article: How to run a job for only failed or specific items
The order of the rules can affect how the replacement results will be. See this article for more information: Broken Link Manager: Find Replace Not Working — Common Fixes
Preserving Last Modified Information
This option is ON by default.
Use the option below ‘Preserve Author’ to keep the last modified information (person and date time stamp) for documents and pages that have been updated using Find & Replace.
The Preserve Author feature requires Full Control permission level access to the SharePoint Site and its content.
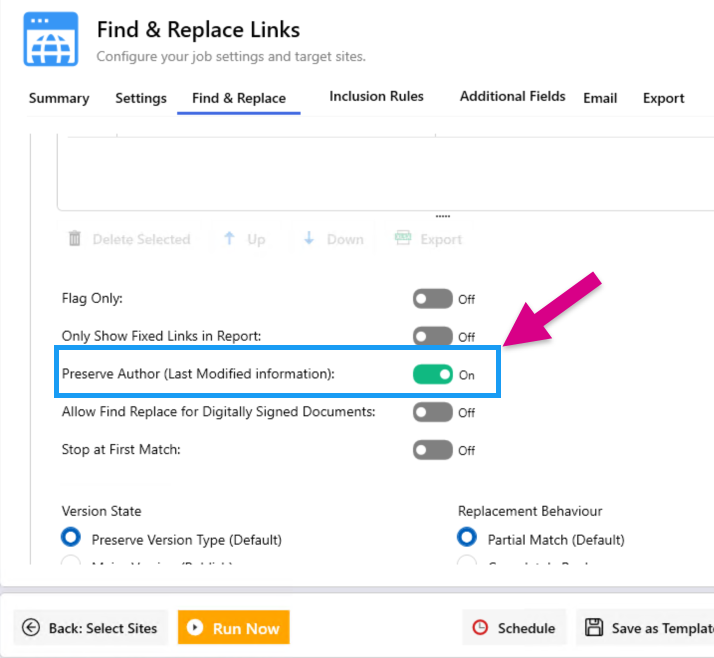
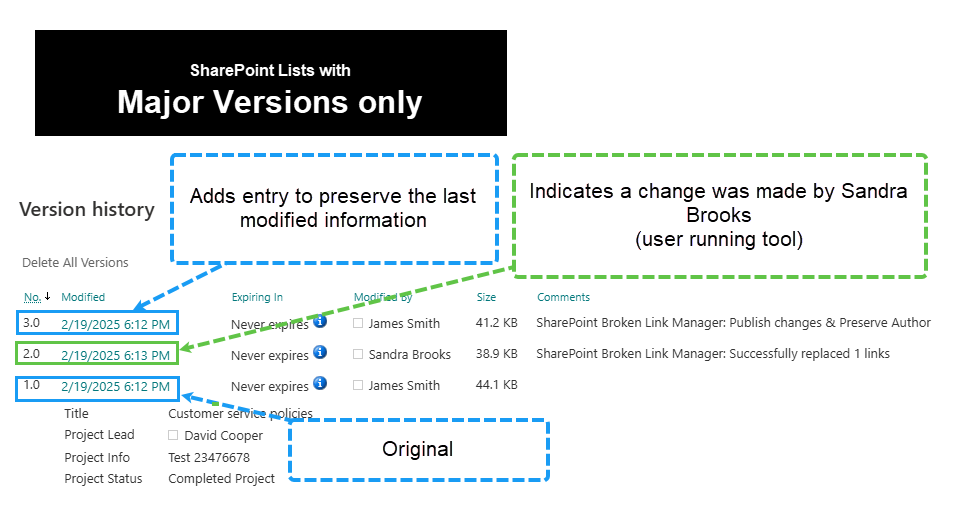
Below are examples of how the Find & Replace function works to keep the last modified information, the tool will keep an audit trail that something was modified in the document.
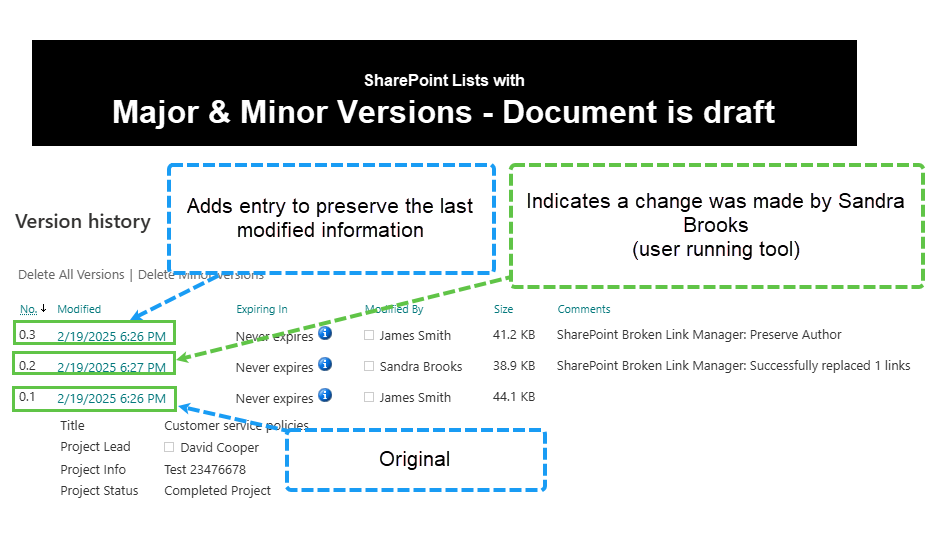
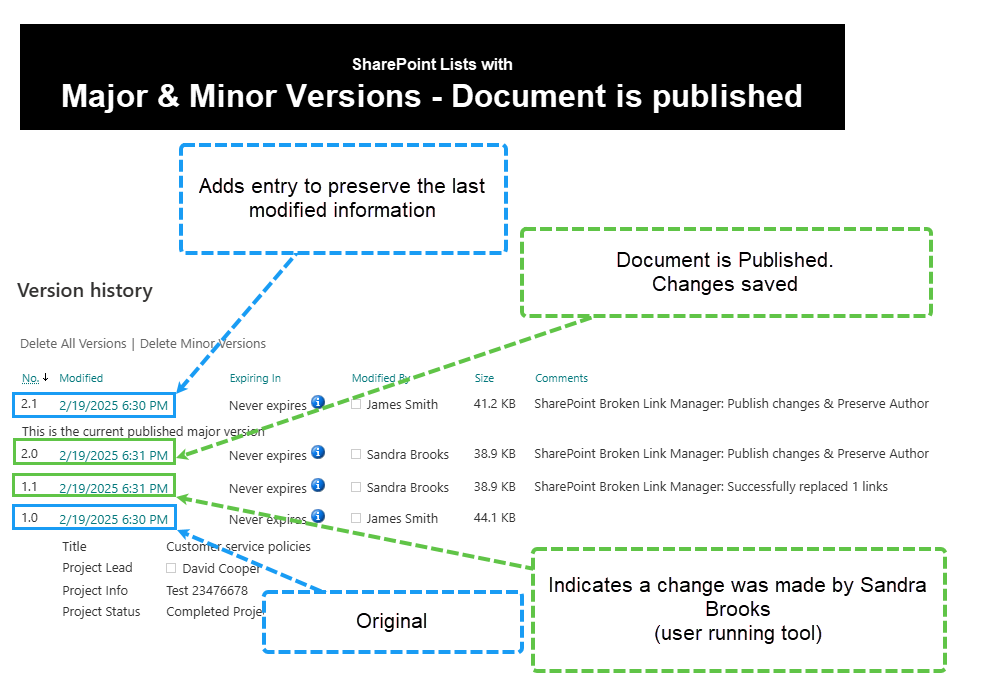
SharePoint Document Libraries with Major AND Minor versions enabled, will have a draft version to preserve the last modified information. This is because a document cannot be published as a different user. Changes will be published (with the account that made the Find & Replace/ran the tool), and a new draft version will be created after this, which is used to show the previous last modified information.
Understanding the Report
After running a job, there will be logs generated, as well as 2 primary reports.
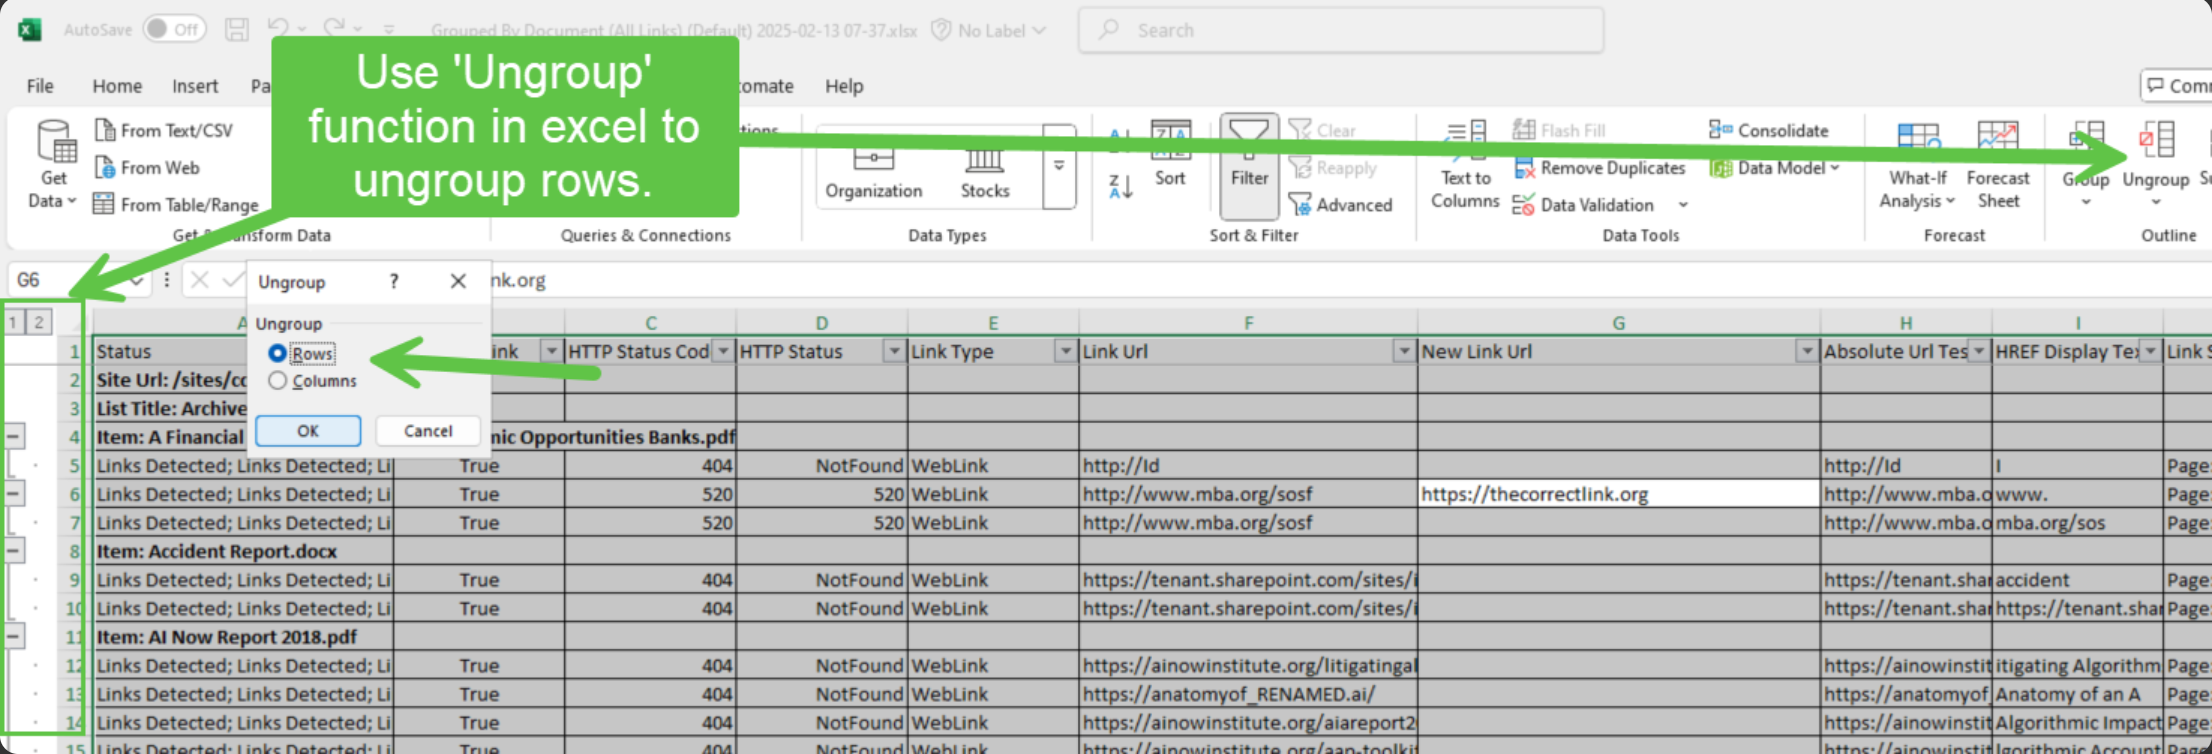
Links Report: Shows all links found inside of documents, list items, pages and navigation. This is a detailed report, by default, this will show all links found (broken and valid).
Link Summary Report: Shows all documents, list items, pages and navigation items, and a count of the total links found within them, including a count of replaced / fixed links.
Recommendations
Import Rules using Excel
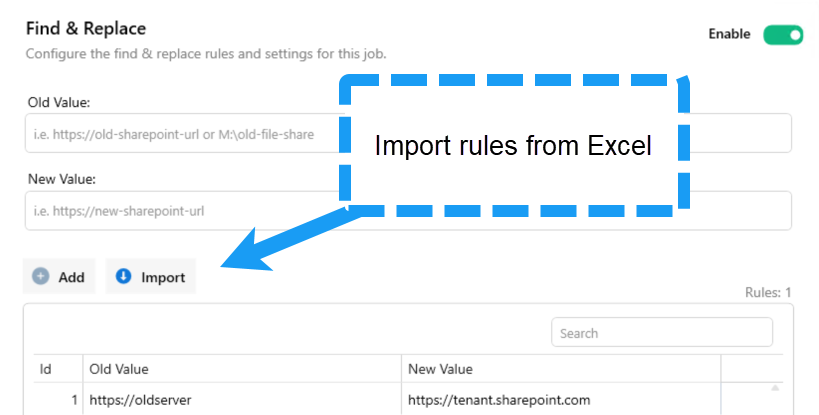
It can often be useful to have a list of old values and new values in Excel. You can create/use an existing Excel file which has the old values and the new values. The Excel file should have 2 columns, and no column headers. The first column should be the Old Value, and the second column should be the New Value.
Skip Validation of Links
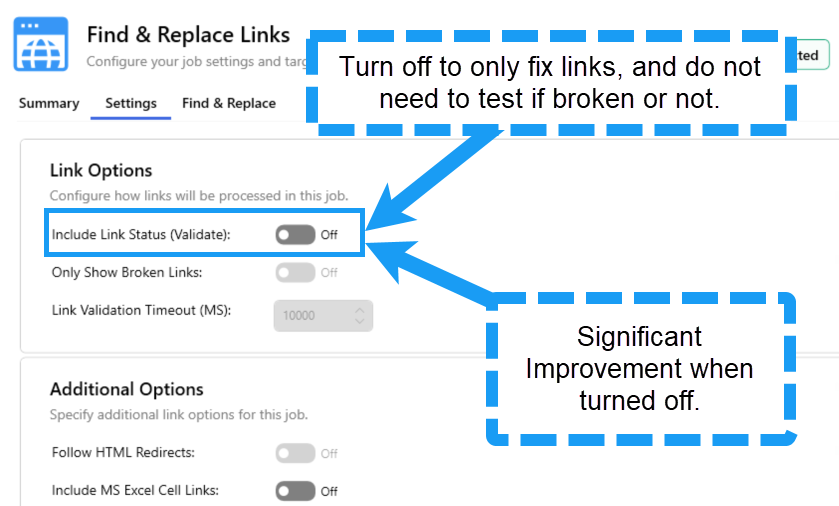
If you only need to fix links, turn off “Include Link Status (Validate)”, this will significantly improve the time to process links in the content.
This will skip validating links and will not show if links are broken in the report.
Use Flag Only for Testing
Use ‘Flag Only’ option if you want to just run a test first without modifying any content.
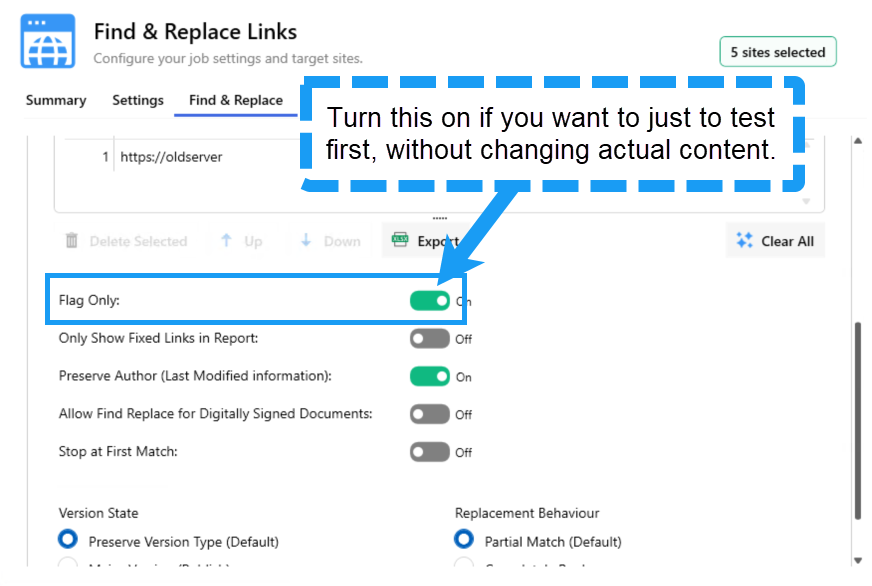
When this option is enabled, the tool will find any matches, and show a ‘preview’ of the replacement ‘New Url’ in the report - content will NOT be modified.
Performance Improvements
See this article for tips on improving performance:
How to Speed Up Broken Link Manager Jobs